• When you click on links to various merchants on this site and make a purchase, this can result in this site earning a commission. Affiliate programs and affiliations include, but are not limited to, the eBay Partner Network.

My 73 Roadrunner Project

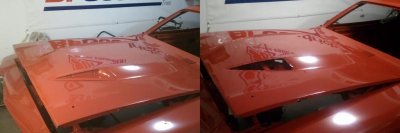
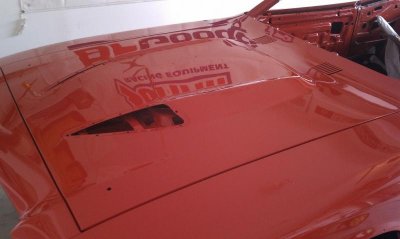
Looks good so far. I feel your pain on the paint issues you had. Picked up a few nicks in the shop on mine and had one of the rust bubbles they supposedly cut out on the passenger rear fender by the window start to lift. The shop that did it made it right but it caused several weeks delay.

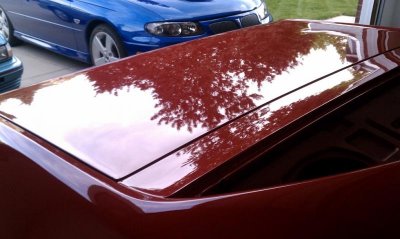
Guess you had to pull it all apart again to paint it right.

You are doing a concours level resto on yours from the detail you've shown us on the sub assemblies.... Keep up the good work and keep us posted.
 
I didnt really have to pull it all apart, but the doors, trunk and hood were removed to get all the paint done. I am glad i got this resolved before i really started putting things back on her. Its not really a concours restoration, since some of the finishes are not the same as original factory finisheds, i.e., 20% black on painted and powder coated parts, but yes, its very detailed. Looking forward to getting back on track this weekend, i have stuff backed up laying around the house waiting to be installed!!! More pictures coming soon hopefully!
 
If you're having trouble getting factory-like finishes, I might be able to help you out. My powder supplier has over 6,500 colors and textures available and I've been matching them up with original paints for a few years now. Keep up the great work! :D
 
Thanks for the information, always good to have another contact, but most of my parts are already done, and look great!
 
Hi Folks, got the car back from my new painter, and wanted to show what the before and after looked like. This is showing the original screwed up paint job that i got, and the proper paint job. Taken under the same lighting with same camera, and no modifications to the image. Now you can really see the difference, and why i was scratching my head as to what was wrong with the paint. It looked so crappy under artifical lights but looked ok under natural sun, except all the issues jumped off the car.

So basically the first guy that messed it up, only did two coats of color and no clear. The proper job is 5 coats color and 3 coats clear. Much better, and i am smiling again!!!

- - - Updated - - -

Here are a couple of shots below the before/after shot with the garage door open and natural light, oh so much better as well.
 

Attachments

  • Before and after comp small.jpg
    Before and after comp small.jpg
    24.4 KB · Views: 497
  • IMAG1372small.jpg
    IMAG1372small.jpg
    34.1 KB · Views: 506
  • IMAG1374small.jpg
    IMAG1374small.jpg
    53.7 KB · Views: 502
Starting to make some progress finally on the build. I just sent out the bumpers for chrome, and got some more stuff installed today, brake pedal, booster, and the main lines plus the heater box. Also got the front bumper mounts and head light hardware in place. Here are a couple of pictures.
.
IMAG1471small.jpg
IMAG1465small.jpg
 
I have a 73 SSP I have owned since 1974 and hope to start a rebuild this winter

and will keep it stock yellow

yours makes me want mine done sooner
 
Last edited:
Wow, your doing a fine job and the paint looks great.
 
Here is the latest round of photo updates. I got chrome, and making some progress with other stuff. Enjoy!!!

Here is the brake booster (from the Ramman) and master cylinder(from Pirate Jack) installed.
IMAG1519small.jpg

Now for the shinny stuff!!!! from Ogden Chrome.

Here are the headlight bezels, all dings, dents and scratches removed an polished to a high shine!!!!! It wasn't cheap, but worth it, these are just unbelievable
These guys did an awesome job!!!

IMAG1549small.jpg
IMAG1547small.jpg

Here is the chrome, originally the undersides were completely rusted and pitted and I had a few dents, that's all gone and only the awesome shine is now present!!!!!!!!!
IMAG1553small.jpg
IMAG1555small.jpg

Original Plymouth emblem, repainted an polished. The bumper bolts are the original aluminum capped bolts, I just buffed them up to shine with the chrome.
IMAG1559small.jpg
IMAG1562small.jpg
 
That is a very nice restoration job...congrats on your fine workmanship and perseverance. :headbang:
 
Yes sir! They did an excellent job on those bezels. You have come a long way and its looking great!
 
Here are the headlight bezels, all dings, dents and scratches removed an polished to a high shine!!!!! It wasn't cheap, but worth it, these are just unbelievable
These guys did an awesome job!!!

Those are the best looking 73/74 bezels I've ever seen. Do you know if they re-anodized them or clear coated after final polish and buff? And if you don't mind, how much did they charge for the bezels?

The work you are doing on your car is amazing.
 
These are just polished, not anodized or clear coated, that would dull the finish. They recommend Adams polish to keep them bright.

Anyway, here is what they looked like before I sent them. This photo doesn't show the detail of all the dents, scratches, pitting, and just generally dull finish, so these were in pretty good condition all things considered, and you can clearly see the difference.

IMAG1437small.jpg

Now, hold on to your hats, it took about 4 hours of labor to get each one to this condition, and they charged me 250 each, you can get them chromed for 400 each, but I didn't do that, that's just too costly. So, I am sure that folks here will think I am crazy for spending that much on headlight bezels, and I had them do 3 sets, so maybe I am crazy!!!! hahahahahahaha
 
Auto Transport Service
Back
Top