You are using an out of date browser. It may not display this or other websites correctly.
You should upgrade or use an alternative browser.
You should upgrade or use an alternative browser.
My GY8 '71 Road Runner
- Thread starter ct71rr
- Start date
71airgrabberRR
Well-Known Member
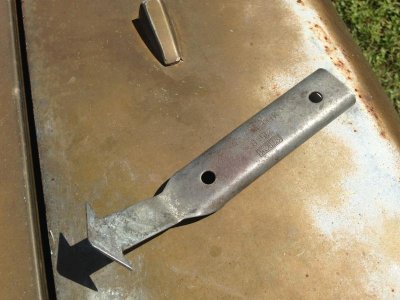
Here is a short little "How to" use the tool. Hope it helps, not trying to hijack your thread.
- - - Updated - - -
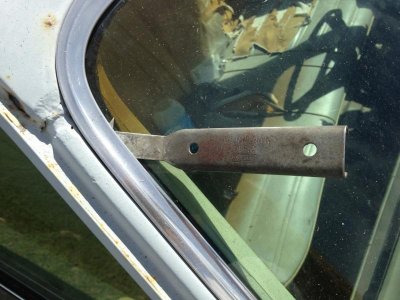
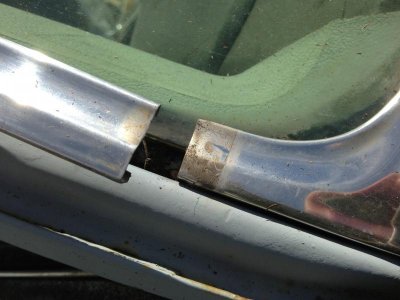
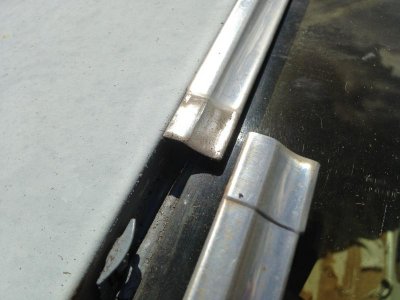
There is always a top piece of chrome. This is the last part the factory workers installed and it overlaps the next piece. Determining which piece of chrome this is, would be your first step.
- - - Updated - - -
- - - Updated - - -
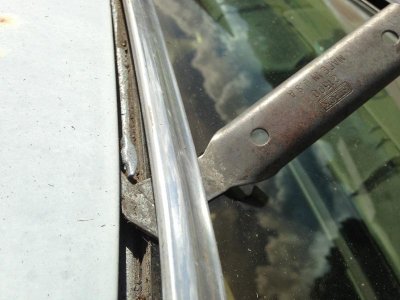
Then slide the chrome tool under the chrome. Use caution because you can crack or chip the windshield using this tool. I've done it a few times. There is a learning curve but if your very careful you should be OK.
- - - Updated - - -
- - - Updated - - -
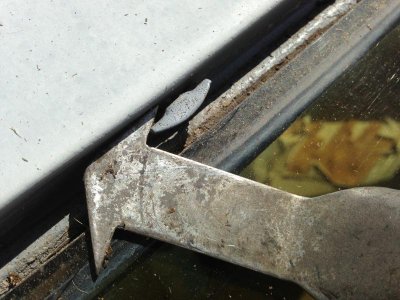
This is how you use the arrow head end of the tool to unlock the chrome from the clips. The tool can be used in either direction, right or left.
- - - Updated - - -
- - - Updated - - -
Sometimes the windshield sealer is stuck to the back side of the chrome. This makes it a lot harder to remove.
As you are disengaging the clip from the back side of the chrome you need to lift up a little on the chrome strip with your other hand. Wooden paint stirring sticks can also be used, but remember there is glass underneath and be gentle.
Once you have released several of the clips it will get easier.
- - - Updated - - -
- - - Updated - - -
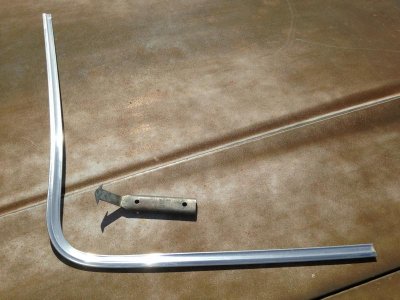
This is the end result. Try not to lift, twist or pull on the chrome too hard. It will cause it to bend or even kink it if too much force is applied.
- - - Updated - - -



- - - Updated - - -
There is always a top piece of chrome. This is the last part the factory workers installed and it overlaps the next piece. Determining which piece of chrome this is, would be your first step.
- - - Updated - - -

- - - Updated - - -
Then slide the chrome tool under the chrome. Use caution because you can crack or chip the windshield using this tool. I've done it a few times. There is a learning curve but if your very careful you should be OK.
- - - Updated - - -

- - - Updated - - -
This is how you use the arrow head end of the tool to unlock the chrome from the clips. The tool can be used in either direction, right or left.
- - - Updated - - -

- - - Updated - - -
Sometimes the windshield sealer is stuck to the back side of the chrome. This makes it a lot harder to remove.
As you are disengaging the clip from the back side of the chrome you need to lift up a little on the chrome strip with your other hand. Wooden paint stirring sticks can also be used, but remember there is glass underneath and be gentle.
Once you have released several of the clips it will get easier.
- - - Updated - - -

- - - Updated - - -
This is the end result. Try not to lift, twist or pull on the chrome too hard. It will cause it to bend or even kink it if too much force is applied.
- - - Updated - - -


Pretty cool "how to" thanks!
71airgrabberRR
Well-Known Member
Thanks guys, just trying to help out a fellow Mopar enthusiast.
roadrunnerman
Well-Known Member
The explanation with the photos was great.
Holy crap! Thanks Louis! Awesome directions once again! And, thanks to snakeyes.
Does anyone know if/how the chrome trim at the gutters above the door openings comes off??
Does anyone know if/how the chrome trim at the gutters above the door openings comes off??
Last edited:
71airgrabberRR
Well-Known Member
Old school can opener

Try this. Take an old can opener and wrap the end with electrical or duct tape. Then place the hook end under the bottom edge of the chrome at either end of the strip, and lightly work it upward. Move around a little in the general area and it will start to loosen up. Once you have an end away from the drip rail lift the chrome up very gently and keep working in this fashion until you get the whole piece off. As with the windshield chrome, be very gentle with it. These parts are very prone to bending if care is not taken during the removal process.

Holy crap! Thanks Louis! Awesome directions once again!
Does anyone know if/how the chrome trim at the gutters above the door openings comes off??
Try this. Take an old can opener and wrap the end with electrical or duct tape. Then place the hook end under the bottom edge of the chrome at either end of the strip, and lightly work it upward. Move around a little in the general area and it will start to loosen up. Once you have an end away from the drip rail lift the chrome up very gently and keep working in this fashion until you get the whole piece off. As with the windshield chrome, be very gentle with it. These parts are very prone to bending if care is not taken during the removal process.
Thanks again Louis!
71airgrabberRR
Well-Known Member
Glad I could help. Your welcome.
71airgrabberRR
Well-Known Member
Thread fix
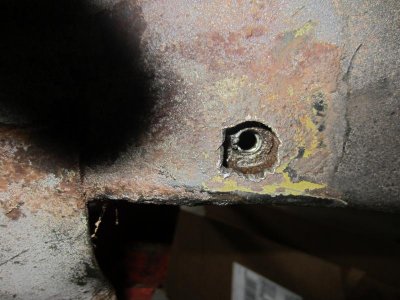
Is the broken bolt located on the driver side front frame rail??
It looks like the front bumper mounting bracket bolt, close to the lower radiator support.
If that is the case, and the inner nut is still connected to the frame rail, you may be able to run a thread tap through the hole to restore the threads.
The front bumper brackets have elongated holes in them for adjustment and should be OK if the threads will clean up.
If not, you may be able to drill it out to the next oversize and then tap it out.
It will all depend on whether or not the inner nut is still affixed to the inner sheet metal. If it's not, a whole different approach will be needed.
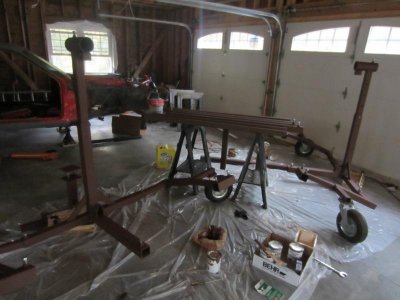
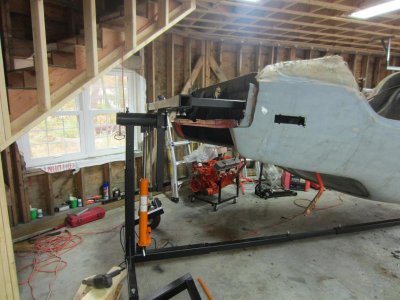
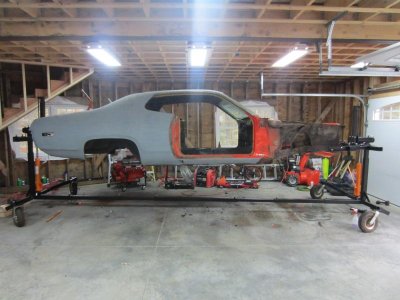
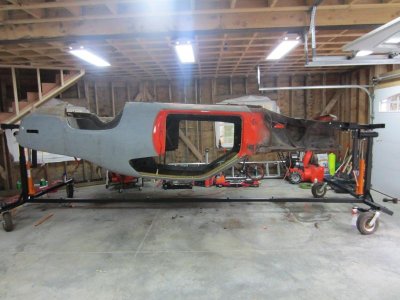
You rotisserie will make your life so much easier. It looks to be a nice one.
Keep us posted................
Is the broken bolt located on the driver side front frame rail??
It looks like the front bumper mounting bracket bolt, close to the lower radiator support.
If that is the case, and the inner nut is still connected to the frame rail, you may be able to run a thread tap through the hole to restore the threads.
The front bumper brackets have elongated holes in them for adjustment and should be OK if the threads will clean up.
If not, you may be able to drill it out to the next oversize and then tap it out.
It will all depend on whether or not the inner nut is still affixed to the inner sheet metal. If it's not, a whole different approach will be needed.

You rotisserie will make your life so much easier. It looks to be a nice one.
Keep us posted................
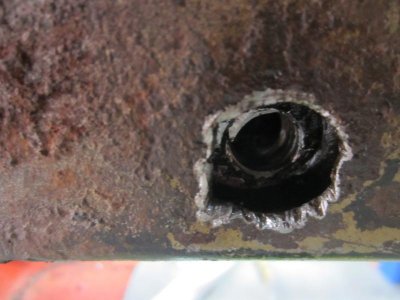
Thanks for the response Louis. Yeah, it's the front bumper bracket bolt but, the one closer to the firewall. This is why I was asking you how you mounted the front to your rotisserie. I can feel about half of the bolt in the back (inside frame rail), still attached to the inner nut. I just purchased a tap set hoping that I could make the hole a little bigger and re-tap it. I'm going to try some heat and some force (and probably The Force) to see if I can get the rest of the bolt out. So, far it looks like I can re-tap it. :eusa_pray:
The body guy should be coming Saturday to look at the damage to my car.
The body guy should be coming Saturday to look at the damage to my car.
71airgrabberRR
Well-Known Member
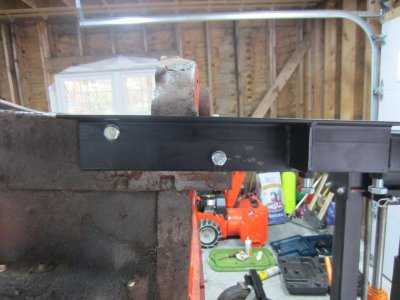
Cool deal with the body guy stopping by. Not so cool with the bolt, but it can be fixed. You may be able to use the K Frame mounting holes to mount your car on the rotisserie if your brackets are long enough. You want to try and use a location that is similar in height for mounting the car. It makes it easier to balance the car out and also makes it a little easier to spin the car too because the rotisserie isn't placed in a twist.
Hello all, the body guy came by on Saturday. He suggested that I go ahead and hang the quarters, etc but, don't weld in the rear sections until I mock up everything in the back. He will then be able to see how much the trunk area needs to be pulled out. It looks like my rear took a hit high on the left side which wrinkled the trunk pan at the left side bumper mount and puckered the frame rail slightly. He stated that the damage was not that bad at all. He also stated the car looks pretty good overall. He also didn't charge me for the visit :headbang:.
Louis, my front rotisserie mounts look just like yours. I don't think there's enough to them to attach them to the K frame mounts. The hole I drilled through the stuck bolt is almost through the center of the bolt and almost centered in the middle of the access hole. I don't think there will be a problem if I retap it to the next size up (insert fingers crossed smiley here).
Now, if I could just find some time to fix the bolt, I can get the car mounted to the rotisserie...
71airgrabberRR
Well-Known Member
Have you tried running a tap through the hole that is there now ??? It might just be the trick. Before you try tapping the hole, make sure it is the proper size for the bolt threads. If memory serves me the original hole is a 1/2 thread. That means you should be able to run a 7/16" drill but through the hole first before attempting to tap it out.
71airgrabberRR
Well-Known Member
Rock ON Brother !!!!!
OUTSTANDING !!!!! Way to go man. Life will be a lot easier for you when it comes to gaining access to all of those little areas now.:headbang:
I'm glad to hear the bumper bolt threads were OK.
OUTSTANDING !!!!! Way to go man. Life will be a lot easier for you when it comes to gaining access to all of those little areas now.:headbang:
I'm glad to hear the bumper bolt threads were OK.
roadrunnerman
Well-Known Member
That rotisserie will sure make it nice that you won't have to kneel/lay on the floor to work on your car.
That rotisserie will be a great help, id love to have one myself if i had a shop big enough to use it! Good luck, the work will be easier now...
Similar threads
- Replies
- 9
- Views
- 561
- Replies
- 47
- Views
- 3K
- Replies
- 0
- Views
- 135
- Replies
- 2
- Views
- 157

![GA243[1].jpg GA243[1].jpg](https://www.forbbodiesonly.com/moparforum/data/attachments/111/111685-8a4db4171cf9b6705ca293e0a3bf8af3.jpg?hash=ik20Fxz5tn)
