• When you click on links to various merchants on this site and make a purchase, this can result in this site earning a commission. Affiliate programs and affiliations include, but are not limited to, the eBay Partner Network.

Rebuilding an 8 3/4 489 sure grip differential

747mopar

Well-Known Member
Local time
1:00 AM
Joined
Oct 30, 2012
Messages
13,792
Reaction score
19,185
Location
ohio
Since I like doing things myself I thought I'd start a thread showing how to put an 8 3/4 pig together in hopes that others will see that it doesn't take a rocket scientist to do it. One big problem........... I don't know how to do it haha, for that reason I'm calling on the help of the more experienced guys to police this thread and correct and add to it so please by all means jump in.

First off some background, I recently installed a Viper T56 (6 speed standard) in my 69 Charger that has a 2.66 1st and .5 6th so I've put a couple hundred miles on it this Spring getting an idea of what gearing will do the trick. I've calculated my 2,000 rpm cruising, 6,000 rpm shift points and the top speed in 4th for a 12 second pass (my goal) and 4:30's are the best match. I've got 3:55's in a 742 case in it now but have been holding onto this 489 for this occasion so let's begin.

DSCN9999.jpg

First off while waiting on parts I tore down the clutch unit itself for inspection and cleaning, it's best to mark all of the parts so that everything goes back together exactly as it was. Also pay attention to the plate arrangement (some are flat and some cupped and need to be put back together as they were. Mine ended up looking really good inside so it's just getting a cleaning.

20150419_201935.jpg
20150419_201705.jpg
20150419_200329.jpg
20150419_202018.jpg

Next was getting the carrier bearings off....... What a PITA! The leave virtually no room for a bearing splitter so I carefully ground the bearing down to paper thin on one side making sure not to get into the carrier (you'll see it turning purple once your close). Of coarse you want to do this before you clean it. Once cleaned I pressed the new bearings on.

20150419_204023.jpg

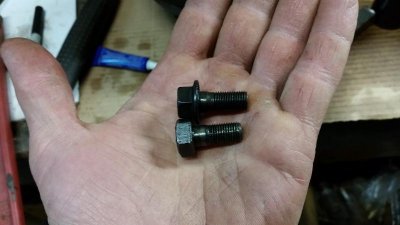
Probably one of the biggest things to make sure you do is have a coupe spare axles on hand to keep the splines lined up while bolting it back together (not doing this would mean you'd never get your axles in).

20150419_203926.jpg

On to getting the pinion setup, the rear originally had the shim behind the larger pinion bearing outer race but the kit has shims that go behind the actual bearing itself (same difference). I measured the original and put the same amount of shim behind the bearing for a starting point (will most likely take a few stabs at it to get it right). Here's the problem with not having the factory tools, once you put the large bearing on the pinion it's a real pain to get off so I chose to take Cranky's advice and buy and extra bearing (both Timkens) and hone one just for doing gear setups so it's easily removable for getting the pinion depth set right.

20150419_131503.jpg

20150420_180413.jpg

20150419_131446.jpg

Now for setting the pinion bearing preload, I bought a crush sleeve eliminator kit that came with 2 sleeves (one longer than the other). I measured the original sleeve and found one sleeve was really close and the other quite a bit shorter so I added the appropriate amount of shims to match the original for a starting point. First try was sloppy so I used a dial indicator to give me an idea of how much needed to come out and tried again. It took a few tries but I ended up with one .014 shim to achieve the 20-30 inch pound turning torque stated in the manual.

20150420_183004.jpg

20150420_182927.jpg

20150420_192315.jpg

20150420_185138.jpg

20150420_185121.jpg

20150420_184535.jpg

20150420_184530.jpg


Before installing the ring gear I took a honing stone to it and know why they suggest doing this (a few minor dings). A few minor dings will hold the ring gear out because of the raised metal, once hammered flat from abuse you have a loose fit.

20150419_205754.jpg

- - - Updated - - -

Hoping to finish it Friday.
 
I made these many years ago and use one in the pipe jaws of a fairly large vise to start assembly and then stick the other one in once the other half gets put on and a couple of bolts snugged up. They also have come in real handy at the swap meets to 'test' how strong the SG unit is....and yes, I've found several that were well worn. Sellers usually don't like it when I do that because it always attracts several on lookers but they say sure when I ask and then get nervous when others start looking on lol


Man that's allot to carry around a swap meet Cranky! Those would be handy though.
 
The power lock style carrier uses the thrust buttons and it's much easier to install them when the cross is out. Also when you put the carrier together with new bearings check the runout with an indicator by putting it in the case without the gears. Maximum runout I believe is .003". The two halves of the carrier should go back together exactly as they came apart.
 
The power lock style carrier uses the thrust buttons and it's much easier to install them when the cross is out. Also when you put the carrier together with new bearings check the runout with an indicator by putting it in the case without the gears. Maximum runout I believe is .003". The two halves of the carrier should go back together exactly as they came apart.

Your right, it would be easier to check runout without the pinion in unstead of turning the gears. I'm sure the pinion shim will need changed once I check the contact pattern so I'll do it then while it's out. As for the thrust button I just use a telescoping magnet to install them after having one fall out never to be found again but yes it's easier to do as you said (I just hate loosing things). Thanks Meep
 
Those buttons have a pin that goes through the center and is staked to hold them in place. That is why I say it's easier to install them with the unit apart. The problem is that pin breaks on high mileage cars giving the impression the buttons have no retaining device. The pin is not required because the buttons can't go anywhere once the axles are in, but as you said, they tend to drop into the housing when you pull the axle. Ask me how I know!?!
 
Now that's some useful info, I bought a new button kit and used the pin but knew nothing about staking them. Dammit, now I will take it back apart.

Another issued I think I've got a handle on now, the bolts that came in the kit will not fit the carrier! Talked to Dr Diff today and apparently nobody makes the bolts anymore, instead of the straight 3/8 bolt the new ones are 3/8 with a 7/16 shoulder requiring the carrier to be drilled out. BTW Dr Diff is a great guy to chat with, so I'll return the favor by making my next purchase with him.

- - - Updated - - -

Also found the ARP # for the carrier bolts arp-250-3006 is the Summit number. Expensive
 
Here's a pic of the button Meep was referring to, basically the purpose of this doo dad is simple. Since Mopar was intelligent enough to not run regular ball bearings "green bearings" but instead tapered axle bearings there's a need to adjust the preload or clearance, since you only adjust one side of the axle this button allows the adjusted axle to transfer threw the carrier allowing one adjuster to adjust both sides.

20150421_202027.jpg


20150421_202046.jpg


Here's the difference between the ring gear bolts, you can see the larger shoulder that requires drilling out the carrier.

- - - Updated - - -

Sorry about the Rump stripe pic, I uploaded it at the same time but clicked to remove it but the damm thing won't go away.

- - - Updated - - -

Scored a set of the carrier cap ARP bolts off Ebay at a good discount today so they'll be here in time for the weekend.:headbang:
 

Attachments

  • 20150421_193945.jpg
    20150421_193945.jpg
    52.1 KB · Views: 901
  • 20150421_202015.jpg
    20150421_202015.jpg
    32.2 KB · Views: 971
  • 20150421_202331.jpg
    20150421_202331.jpg
    36.8 KB · Views: 916
Dr. Diff has a one piece side gears for the clutch style unit. I used it to rebuild my buddy's sure grip and what a nice piece it is!! No more needing an extra set of axles or some that have been cut down to line up the splines. And speaking of splines, the side gears are way stronger than the factory!
 
Subscribed, great thread for somebody contemplating his first rear end rebuild soon (yep, Me).

I'm confused though.. I thought all 489 sure-grip rears had cone clutches and not clutch packs?!
 
Subscribed, great thread for somebody contemplating his first rear end rebuild soon (yep, Me).

I'm confused though.. I thought all 489 sure-grip rears had cone clutches and not clutch packs?!

I believe Cranky told me the same thing meaning somebody swapped this one in, I'll let one of the more experienced guys answer this question.
 
Man that's allot to carry around a swap meet Cranky! Those would be handy though.
That's what little red wagons are for lol. Or you could just leave them in your trunk/truck and if you found someone with a SG unit or complete pig for sale you could ask the seller to hold the unit until you got back from the parking lot.

Now that's some useful info, I bought a new button kit and used the pin but knew nothing about staking them. Dammit, now I will take it back apart.

Another issued I think I've got a handle on now, the bolts that came in the kit will not fit the carrier! Talked to Dr Diff today and apparently nobody makes the bolts anymore, instead of the straight 3/8 bolt the new ones are 3/8 with a 7/16 shoulder requiring the carrier to be drilled out. BTW Dr Diff is a great guy to chat with, so I'll return the favor by making my next purchase with him.

- - - Updated - - -

Also found the ARP # for the carrier bolts arp-250-3006 is the Summit number. Expensive
Rather find some new bolts to use than to try to drill a precision hole with a drill bit and electric drill. Even with a drill press or a Bridgeport, you're taking a chance of a drill bit walking around and ending up with an oversized hole. Using the proper tools to enlarge the bolt holes on the carrier is the best way to do that....and cool scoring some on Ebay! Let us know if they fit right.

Subscribed, great thread for somebody contemplating his first rear end rebuild soon (yep, Me).

I'm confused though.. I thought all 489 sure-grip rears had cone clutches and not clutch packs?!
Never saw an 89 case with a plate SG until more recent times. I suppose it's possible to get an early production 89 with one tho. I've seen plenty of cars come off the line with things that they were not supposed to have lol
 
All done! First off better make sure whoever reads this isn't lost so here's the adjusters I'll be referring to. The adjusters are used to move the whole carrier back and forth to set backlash and carrier bearing preload by moving the outer bearing races inside the caps.

20150424_232013.jpg

You might notice it's all bolted together with the locks installed here but that's because I forgot to take a pic earlier showing the run out being checked. Doing this just insures that it runs true.

20150425_004506.jpg

Now setting the backlash, I'm not going to go into great detail simply because anybody doing this should have a manual sitting in front of them but I'll at least give you an idea. Check the backlash in several places to find the area of least backlash, this is where you'll take your readings from. Torque 2 caps bolts (one on each cap leaving the other loose) then start off eliminating the side to side play in the carrier bearings by slowly turning the adjusters in until your at zero lash making sure to leave some backlash in the gears. Get your dial indicator set up on a good surface with as straight of an angle as possible to a tooth to read backlash and start reducing the backlash to .0005" -.0015" by turning the adjusters equal amounts, once your within the range torque the 2nd cap bolt on the cap opposite the gear teeth. Now turn the gear tooth side adjuster until you have .006" -.008" backlash, this sets the carrier bearing preload and the backlash.

20150425_004734.jpg

20150425_004724.jpg

Now while holing tension on the carrier (needs tension to leave a good clean mark) turn the yoke in both directions to get a good reading. My first attempt looked terrible haha.

20150424_204656.jpg

After tearing EVERYTHING back apart and re-shimming the pinion bearing.

20150424_232304.jpg

And after tearing EVERYTHING apart and re-shimming several times I've got it :hello2:

20150425_004749.jpg

The ARP bolts were nice but I had to grind the heads down because of how tight of a fit they were (probably because they also have washers).

20150425_004826.jpg

Then reassembly and adjusting the axle end play which ended up at .010 after getting the lock indexed (book calls for .008"-.018").

20150425_132727.jpg
 
Last edited:
I'm getting Invalid Attachment specified whenever I click on an attachment link.....
 
Is what better?? LOL Oh wait.....sure is! :D Btw, you might find it's easier to paint the pinion with the checking grease and then rotate it though the ring gear......
 
Now the big news, I drove it about 45 miles today and can say man did these gears smooth out the car. It has a munch smoother feel and no noise whatsoever so I'm smiling ear to ear. Now the bad news, the high speed vibe I had is still unchanged accept the gear change lowered the mph in which it does it making it a priority to get fixed. The vibration kept me from trying freeway speeds but so far I'm really liking the change and am pretty confident I know where to turn to now for the vibration, the yoke is really sloppy in tranny tail
shaft as I believe Meep had suspected so I'll get that ordered. To me this seams odd seeing how it's a 2003 Viper tranny with only 17,000 miles on it, don't Vipers have independent rear suspension? I would think there would be virtually no where at all with it connected to a stationary differential?
 
Well, how much abuse did the Viper see before it donated it's organs?
 
Well, how much abuse did the Viper see before it donated it's organs?

Good point, it was wrecked for a reason I reckon. Regardless it needs dealt with.
 
Lots of Vipers got crashed in one form or another. A good friend of mine almost lost his life in a high speed trek across Texas some years back. Might still have pics but there wasn't much left of the snake to speak of. A friend of his was driving and fell asleep. Man, how do you fall asleep doing in excess of 100 mph!!? My bud says that's the last he remembers....going pretty fast and crashing.
 
Auto Transport Service
Back
Top