Follow along with the video below to see how to install our site as a web app on your home screen.
Note: This feature may not be available in some browsers.
When you click on links to various merchants on this site and make a purchase, this can result in this site earning a commission. Affiliate programs and affiliations include, but are not limited to, the eBay Partner Network.
yes please! If you could also measure from the edge of the seat to center of screw head I can get an idea of where the hole is hiding under the new upholstery.
Also if it's not too much to ask, can you pull the screw and see what kind of threads we are dealing with? Coarse, fine, machined?
The hole location varies a bit. If I recall its a #6 Sheet metal screw. Even if it's a #8, start with a #6. Use a fabric pin to poke through the fabric/vinyl to find the hole in the frame before you start rooting around with and awl or screw. You can use a sewing needle but they are larger in diameter than a pin.
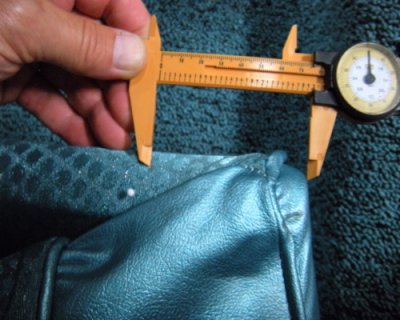
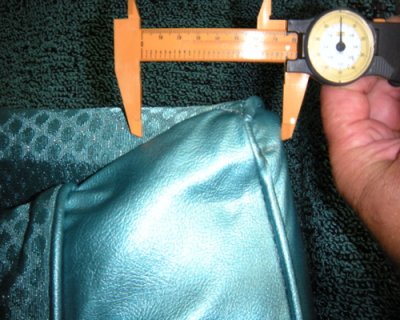
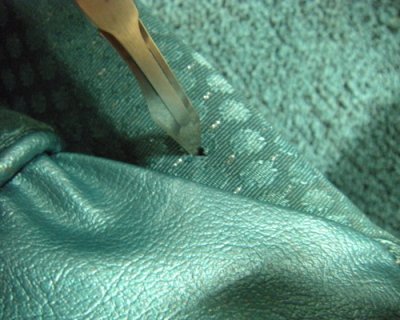
here are a couple shots from the split bench in the '64. What i'm showing on the picture with the small white pin head is that the Passenger side hole was at 3" and the one on the drivers side was about 3-1/4" in from the edge.
And I thought finding the dome light through the headliner was a PITA. I'll try a little more tomorrow but I am afraid that the vinyl is starting to look like a sponge using a needle. Thank you all for your help!
And I thought finding the dome light through the headliner was a PITA. I'll try a little more tomorrow but I am afraid that the vinyl is starting to look like a sponge using a needle. Thank you all for your help!
Your other choice is to measure 3" in, put a small cut in the vinyl and drill a new hole. Use a center punch to mark and "pilot" the bit since it is likely a round tube you'll be drilling. Lastly, put a few drops of super glue on the fabric/vinyl to "seam" the pin holes or cut you make in the material. That will keep the hole in the material from expanding over time and use. Let the glue dry over night before you install the stops. Gary Ball and an old Pro by the name of Harv taught me that trick. Good luck.
I just remembered, I have a couple stock, bare seat frames for '65 buckets in the shop. I'll see if I can get you a better picture of hole placement this weekend if you haven't already succeeded.