• When you click on links to various merchants on this site and make a purchase, this can result in this site earning a commission. Affiliate programs and affiliations include, but are not limited to, the eBay Partner Network.

Updating the Super Street Mopar

Question for you what have you decided as a seam sealer. For the floor the the frame connectors. Or will just weld the entire length of the new frame and then coat it with something. Just picking your mind as I still have to finish that part on mine. I basically have done the same as you have and I can tell you when all connected it is a very stiff car.
 
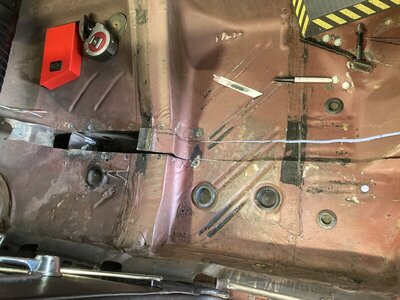
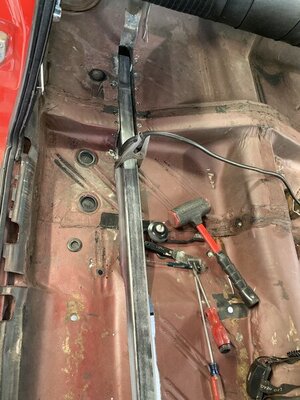
Thank you. I'm pretty happy to be back working on it. For sealer, I'll use some flexible urethane. It will be awhile before its ready for that. After the main portion of the stiffening structures are in, I need to do a sub unit for mounting my seats. In one of the photos, you can see a big crack/tear in the floor. Bucket seats, stock ones, were put in before I bought the car and did not match up with the bench seat spots that had reinforcements on the pan. Those damaged areas happen to be in the area the sub structure goes in so I'll be cutting that mess away. Also I butchered the tunnel making it fit the repositioned engine/trans combo and the GV unit. The upper hoop of the t-bar x got cut out while I was doing this. I'll make up a new hoop with a little more room for clearance plus cut the tunnel out for a complete redo. I have access to a slip roller with a freind so the new tunnel will be easier. After all that cutting/welding/repairing/updating gets finished, I'll get after rust proofing the floor and doing the seam sealer.
 
Last edited:
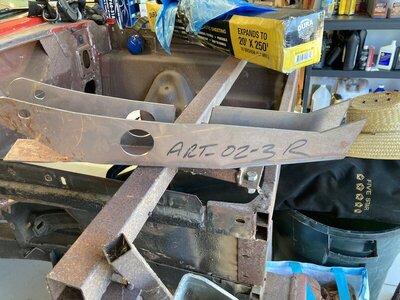
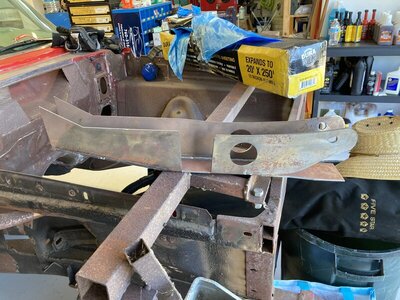
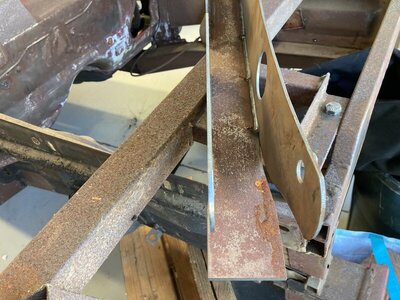
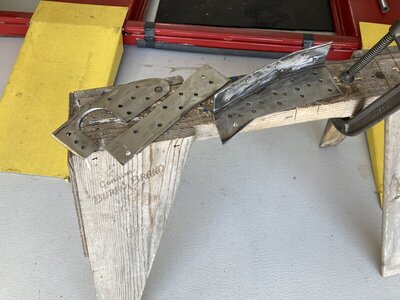
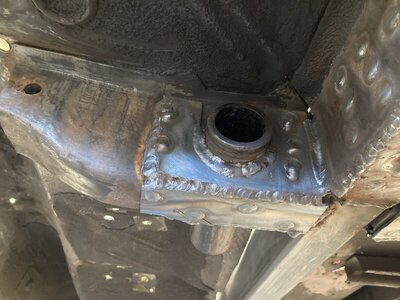
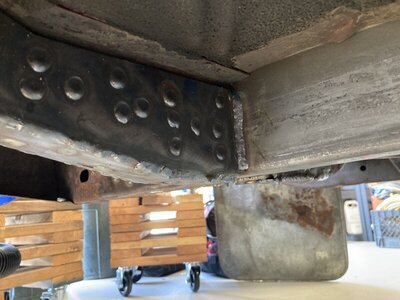
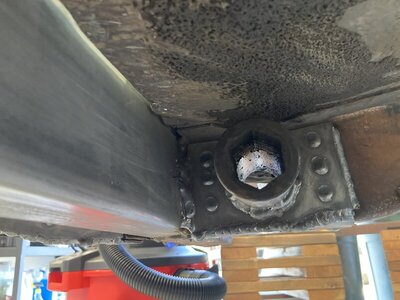
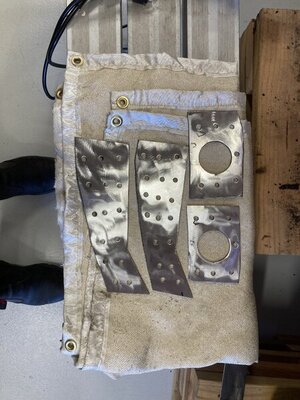
These are the reinforcements for the t-bar x-member from ART.

20C77F44-A12F-4363-A4F4-A5723062BA16.jpeg 590079BD-4055-4813-82C6-B69EB028D401.jpeg 7767B675-DF8D-4B18-8199-2301A1AEE0C9.jpeg
 
I'm watching your build.
 
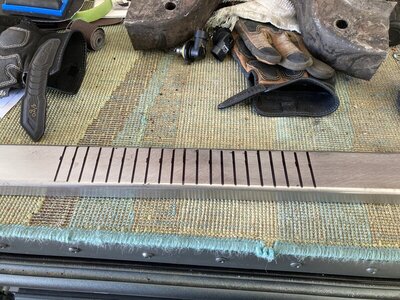
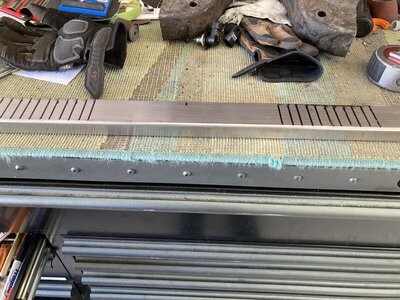
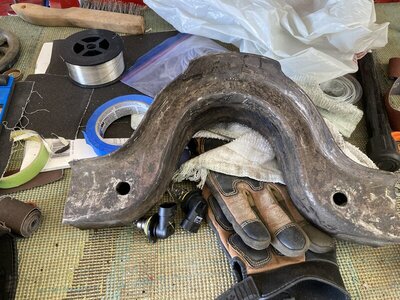
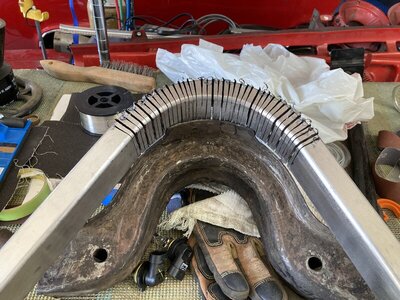
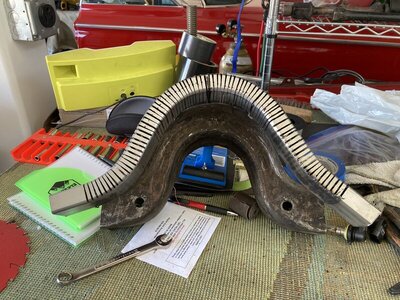
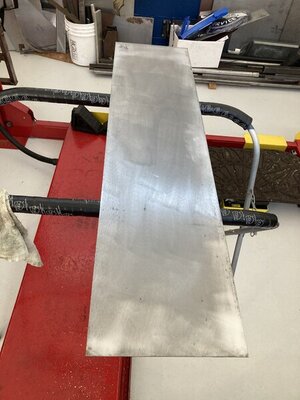
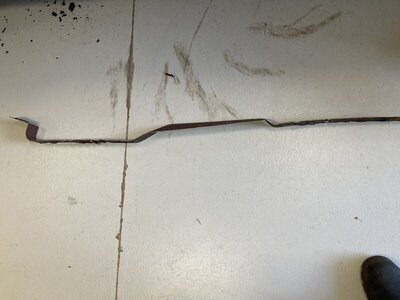
I worked on the possible new t-bar hoop before I went to work today. Since I don't have a way to bend rectangle tube, I did 95% cuts on it to make the radius. Started off with 1/2" spacing but it wasn't sharp enough so I went with 1/4".

91565931-680E-4BE7-AEB5-707FD64CF441_1_201_a.jpeg AA5A2269-2048-4CE3-8293-2390BD1E4169.jpeg A9CB6F6B-2CC3-4B2B-A33C-4C0779B04E44.jpeg CEF9DC3B-3A9B-4517-9C42-695A2CE8BB78.jpeg E34080F5-9E89-41E1-A7EC-61E541C995C5.jpeg
 
Time for some updates. Would have been sooner but had technology issues here at home.
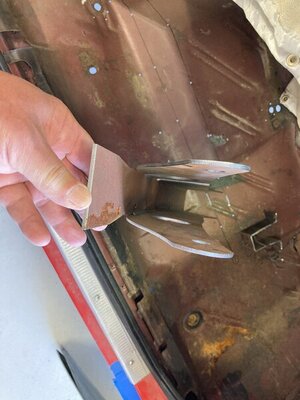
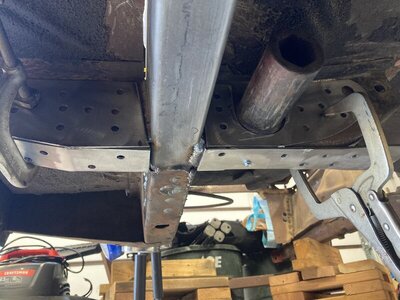
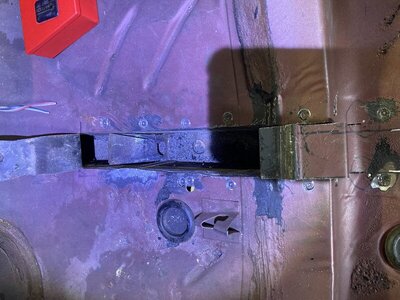
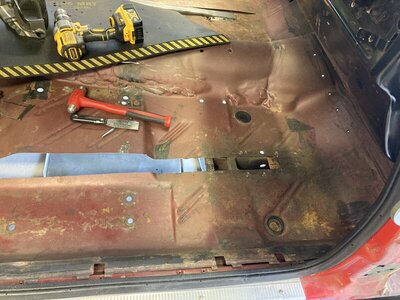
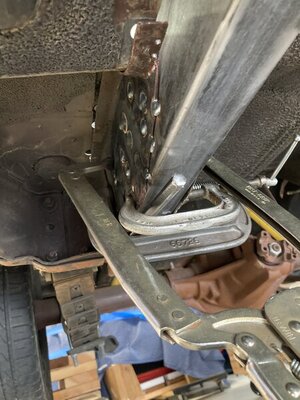
I have the left hand side frame connector squared away, in the front portion, now. I ended up having to cut the ART pieces apart at the welds as they were not square when welded together. Doing it in pieces made it easier to deal with anyway. They have an ear with one hole on both sides which I thought was supposed to mate up with the trans mount but its way short of getting to that area. I trimmed it back and squared it off so I can add material to the hoop section when I get to the inner area after I set the engine/trans in so I can set the height for my new piece that was done out of rectangle. I started cutting the floor on the rh side Sunday for its connector, will continue that on Thursday most likely. When its time to do the inner section of the t-bar x, I'll make some templates to cut some material to be fitted in there. For those wondering if I'm following any engineering data when addressing the t-bar x-member, the answer is no. Just shooting from the hip. Many won't do what I've done to get these pieces all tied in, frame connectors sleeved into the existing rails and not just butted, adding the ART pieces in and some other stuff I'm coming up with like the seat mount subframes which will be welded to the connectors too. Just me with my thoughts. I am adding larger bars in, different springs and other stuff as I want to do track events, auto crossing and some drags with a tighter feeling than the old [state of the art then] unibody technology these have.

BE3DBC42-0FE6-4FFA-B1B5-1347DECE147D.jpeg 28D03C62-403C-478E-8AE3-46E73774C193.jpeg C0B35D8E-7B2D-409A-B3A4-F8191D33E8B7.jpeg 7EFED070-21FE-4831-85FF-F028F5DDBA8E.jpeg EC3AE84B-16C5-4506-96D5-6225786F66FF.jpeg 2B57CB4B-8521-40A7-B48D-345F7BA4FD6D.jpeg
 
More. And I did make some passes around the t-bar socket with the gun so its attached to the new stuff too.

A5EA4B06-E5A7-4C25-B58F-C37E9472E552.jpeg 11FE7D90-5B92-40C2-9CF2-DAD5099E51B2.jpeg
 
I was able to get most of the right side prepped today for the next connector. Got the pathway cut and trimmed, holes drilled through the sides of the factory rails. Tomorrow I should be able to get it set and start welding it in. I took the opportunity to measure the gauge of some of the removed material just for reference. The floor metal was 20ga but I think it would actually be 21 if I removed the paint on the area. Rails were 16ga, t-bar x-member was 14ga. Having all of this exposed really brings home just how flimsy these cars are when you figure that only the stamping of the floor contours, the rocker panels and some of the roof material is the only structure between the frame rails. State of the art then but woefully lacking now, especially compared to newer uni body construction.

0BC9D054-6133-425A-8D09-EAC4651653A3_1_201_a.jpeg 2AA7BE71-8A9A-4167-B28B-D1A47380EA23_1_201_a.jpeg 2E655225-5ED0-4E78-821C-51F5E511033C_1_201_a.jpeg C6C8281F-9AD0-45AB-B98C-E21284CA1FA3_1_201_a.jpeg
 
I was able to get started on welding the rh unit in today. Had to stop due to me messing up my only .030 contact tip. Will get more tomorrow. Have .035, .045 and .023 but no 30's. I'm going back and forth on whether or not to put the torque boxes in. Since I'm sleeving the connectors into the rails and the springs get moved inboard and the mount welded to the connector, not sure if they'll be needed.

65666303-7CD3-4D44-9B10-EAA986F44D3D.jpeg 63C5D880-5CDD-40A8-AC64-566E1F198DC1.jpeg
 
I finished welding the rh unit into the frame rails. Next will be adding the t-bar reinforcement after I separate it into 3 separate pieces and trim to fit. I decided to go ahead and use the torque boxes. On the front I'll drill some holes to slip some tubing through, before the boxes go in, so that I'll have some sleeves to run lines/wiring through. The rear boxes I'm going to wait until I work that area for the spring relocation.
 
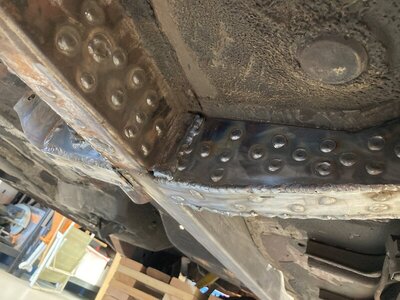
I was able to get the front portion of the rail squared away with the first weld pass done. Got the reinforcements trimmed and prepped then put most of them on. Tomorrow I'll get the last section trimmed and welded. From there, spend some time knocking welds down with the grinder until I move to the next section.

B777704B-08CF-4786-844C-791E7444F51E.jpeg
 
Yesterday I knocked down most of the welds on the rh rail. I'll do the left next and from there, swap out the hard wheel for the flap unit. I got a new work light thats way better than the little unit I had been using, amazing what happens when you can see your work area. Also got a face shield to protect face, head etc. The Scott goggles I've been using, like motorcycle/skiing units, work fine but the non covered areas get pelted since I'm sometimes right in the line of fire as the grit gets deflected off a surface and back to me. I'll continue this weekend. Thursday I have time but am getting MRI's done and don't want grit embedded in me. For those not in the know, if you've been welding/grinding, you need to let them know before hand. Especially if you've been going Commando without protection.
 
Good luck at the doctors. The project is coming along I'm glad you got protection while doing the job. Safety comes first
 
I'm a firm believer of being suited up. As I've gotten older [actually started doing it 20+ years ago], I at minimum protect eyes and respiration. I have a lot of dough invested in the eyes, having done Lasik in 2000 and its hard to do anything without them. Respiration because I can't handle any particles since I'll get at least a cold/congestion from it. From there ears, wear either bluetooth headset or straight muffs and ALWAYS gloves and jacket when welding. The MRI's, 2nd set, are to see if I have any carbon in the pipes, aka plaque. I have a facial spasm on the left side thats caused by the Vertebral Artery on the left side of the brain stem as it comes out of the noodle. The artery has enlarged over several years and is applying pressure to the lh side of the brain stem causing the spasm. Doesn't hurt but ffn annoying, especially when welding, talking to people [really embarrassing when it spaz's] or when I concentrate on what I'm doing. Like driving in traffic with only one eye open or trying to TIG and not fry the weld. If I'm carboned up, its a no go since if they move it, carbon gets dislodged and stroke time. We'll see what happens.
 
Praying that all comes out okay.
 
Got the MRI's done yesterday. Next week is the telemedicine with the doc to go over them. I filled out a form before hand asking about various hardware, pacemaker, dentures etc on it and saw one that was kind of funny but must be starting to be prevalent. Penile Implant.:lol:
 
Auto Transport Service
Back
Top