• When you click on links to various merchants on this site and make a purchase, this can result in this site earning a commission. Affiliate programs and affiliations include, but are not limited to, the eBay Partner Network.

Winter Project - ‘69 GTX Engine Compartment Rehab

The car has always looked stunningly great in all the pictures, even from years ago. Hope to check it out in real life someday as I would not be surprised it the pictures did not do it justice. Thanks for taking the time to post.
 
The car has always looked stunningly great in all the pictures, even from years ago. Hope to check it out in real life someday as I would not be surprised it the pictures did not do it justice. Thanks for taking the time to post.

It’s far from perfect, but I take a lot of pride in the GTX. Thanks…
 
Well, it’s that time of year again. Outside it’s a balmy 25° with wind and rain so I’m going to do the smart thing and stay in the garage. Instead of starting a new thread, I might as well just resurrect my project thread from last winter.

My project for this off-season is going to be new exhaust from the engine all the way out the back. After doing my homework, I chose 1 7/8 inch TTI polished ceramic headers, and the TTI 3 inch X pipe system.

Before tearing the old exhaust off, I unboxed the new parts and mocked the system up on the garage floor. Everything appears to be present and accounted for. So far, so good…

The headers were well packed with bubble wrap and a heavy cardboard box with another cardboard divider to separate the headers during shipping.

IMG_9751.jpeg

IMG_9755.jpeg


Upon inspection, I have to say that TTI does make an exceptional product. The flanges are .375 thick with very nice looking welds. The headers include all necessary, hardware, gaskets, and reducers.

IMG_9757.jpeg
IMG_9759.jpeg
IMG_9760.jpeg
IMG_9763.jpeg
IMG_9761.jpeg
 
Moving on to the exhaust system, I chose the 3” TTI kit with an x-pipe and no mufflers. All the pipes had protective plastic caps or high density foam to prevent damage.

image.jpg


As with the headers, all hardware, clamps and hangers are included in the kit. Everything fits together quite nicely.

IMG_9765.jpeg

X pipe and the slip connectors required for mufflers which are shorter than what the system is designed for.

IMG_9773.jpeg


I chose to use Flowmaster Delta 50s because that is what is currently on the GTX as well as my 58 Apache. What can I say? I just love the Flowmaster sound.

IMG_9774.jpeg


The tail pipes came with slash cut ends so I will have to cut off the tail pipe hangers and use the hangers on the aftermarket 3 inch stainless exhaust tips I got from PG Classic

IMG_9775.jpeg

The rear tail pipe hangers are also included in the kit.

IMG_9776.jpeg


That’s it for now, I’m going to box everything back up and head to Home Depot for some lumber to build wheel cribs.
 
Last edited:
The 2x4’s are cut to length so I can start building the wheel cribs tomorrow morning…

image.jpg
 
Judging by the freehand cuts I made with a SKIL saw, my woodworking skills aren’t very good. But they’re good enough.

I made a little template to mark the spots for pre-drilling. After pre-drilling the holes, the layers got screwed together using 2 1/2” deck screws.

IMG_4514.jpeg


They are 20” L x 12” W and will give me an additional 10” of room under the car. The top is big enough to accommodate a jack stand, but I don’t think I’ll need them.

IMG_4512.jpeg


Total cash outlay was about $80 with tax for 10 x 10’ SPF 2x4’s and 4lbs of deck screws.

IMG_4511.jpeg
 
I made 3 sets of the wheel/tire stands with the left over lumber from the garage build. On one set, I put casters on them. There was plenty of leftover header and beam pieces from the garage build. All are on moving dollies. Love your build btw.
61056832007__0E521D18-E874-43E1-9D7D-EBB30746E342.JPG
 
Moving on to the exhaust system, I chose the 3” TTI kit with an x-pipe and no mufflers. All the pipes had protective plastic caps or high density foam to prevent damage.

View attachment 1547367

As with the headers, all hardware, clamps and hangers are included in the kit. Everything fits together quite nicely.

View attachment 1547373

X pipe and the slip connectors required for mufflers which are shorter than what the system is designed for.

View attachment 1547369

I chose to use Flowmaster Delta 50s because that is what is currently on the GTX as well as my 58 Apache. What can I say? I just love the Flowmaster sound.

View attachment 1547370

The tail pipes came with slash cut ends so I will have to cut off the tail pipe hangers and use the hangers on the aftermarket 3 inch stainless exhaust tips I got from PG Classic

View attachment 1547371

The rear tail pipe hangers are also included in the kit.

View attachment 1547372

That’s it for now, I’m going to box everything back up and head to Home Depot for some lumber to build wheel cribs.
I have TTI exhaust on all my cars as well and think they are great. Only thing I change from their kit is to use these lap joint band clamps. Smear some anti seize on the pipes before putting them together. Makes it a breeze to take everything apart later, which seems to happen to me quite often. I use them on every joint except the one right behind the mufflers where the hanger rides.

Summit Racing SUM-681300 Summit Racing™ Lap Joint Band Clamps | Summit Racing

Once everything is where I want it, I’ll tack all of the joints and pull the pipes between the headers and mufflers and fully weld them. That will eliminate a bunch of clamps and potential leak points but allow the head pipe to come off just in case the transmission needs to come out of the car. I plan to use band clamps going into the mufflers and at the exhaust tips.
 
It took a little imagineering to safely get the GTX high enough for the wheel cribs. The next step will be to remove the under car portion of the exhaust. Hopefully my Milwaukee portable band saw will make short work of it…

image.jpg
 
That went well, I’m going to spend some time cleaning up the undercarriage before tackling the headers…

Major leaks due to rotten pipes. I patched it with JB Weld high temp to get through the summer, now it’s time…

image.jpg
image.jpg
 
Last edited:
Clean from the lower firewall to the rear. I sprayed the underside 25 years ago with self etching primer and PPG Deltron single stage. Even with minimal maintenance it still cleans up pretty nicely.

IMG_9797.jpeg


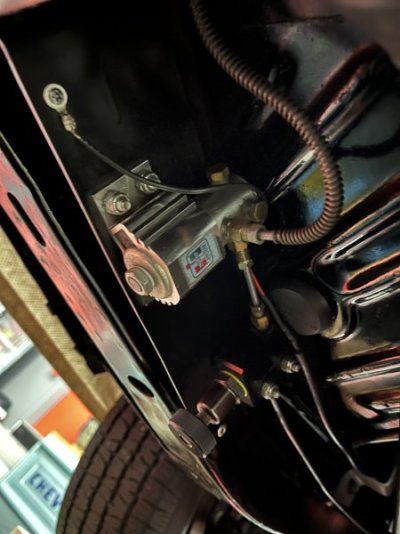
My line lock and adjustable proportioning valve plumbed to lock out the rear brakes. I’ve been told that it won’t work that way for the past 20 years, but it does…

IMG_9798.jpeg

No leaks after resealing the engine last year, maybe the undercarriage will stay clean for awhile…

IMG_9802.jpeg


The drips are actually from the factory paint process, all I did was clean and scuff the underside of the car before painting.

IMG_9807.jpeg
 
Last edited:
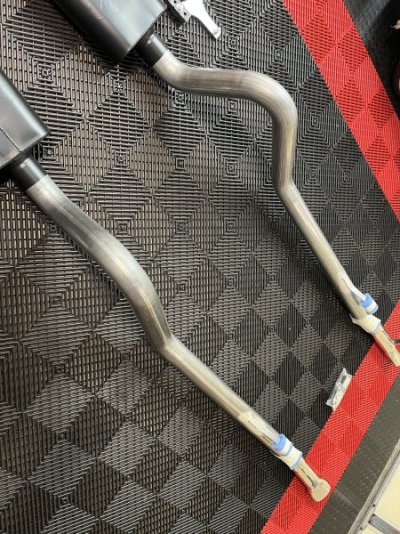
I spent last evening mocking up the mufflers and tailpipes to determine how much needs to be trimmed to accommodate the exhaust tips and check the clearance around the fuel line. The right side tail pipe barely touches the shock crossmember so I’ll have to relocate the hole in the hanger bracket to drop it down slightly.

My only complaint so far is the tailpipe hangers seem kind of flimsy and lack the upper tab which locks into the frame. I placed an order for a pair of factory reproduction hangers this morning.

Tonight I’ll remove the tail pipes to make my cuts and redrill the right side hanger bracket.
 
It took a little imagineering to safely get the GTX high enough for the wheel cribs. The next step will be to remove the under car portion of the exhaust. Hopefully my Milwaukee portable band saw will make short work of it…

View attachment 1551372
Would that "imagineering" include putting a floor jack up on 2x4 pieces?
I'm not questioning that if so - I'm seriously considering the same setup for Fred, since I have a *sigh*
clutch to replace this winter...
 
Would that "imagineering" include putting a floor jack up on 2x4 pieces?
I'm not questioning that if so - I'm seriously considering the same setup for Fred, since I have a *sigh*
clutch to replace this winter...

In short, that’s exactly what I did…
 
In short, that’s exactly what I did…
Thanks. Since I don't have a lift and I know I can't get the car high enough in the air using the usual floor jack and
stands to clear the transmission when on a trans jack to get it out from under there, looks like I need to consider
something like you've done.
 
TTI hanger on the left and a reproduction factory style hanger on the right. The factory style hanger is a little heavier material and has the additional hook that locks into the frame rail.

image.jpg


Hat tip to MEGAPARTS, I ordered the hangers yesterday morning and they were here this afternoon.

I also elongated the hole in the hanger to gain a bit more clearance at the shock crossmember.

image.jpg


Up next, remove the hanger strap from the tailpipes and cut 9.125” off to accommodate the tips…

image.jpg
 
One hanger strap removed, now for the cut…

image.jpg


Using a band clamp to mark out a reasonably straight line.

image.jpg
 
It took some tweaking to get everything together and matching from side to side. I’m happy with how it turned out…

image.jpg
 
Auto Transport Service
Back
Top