• When you click on links to various merchants on this site and make a purchase, this can result in this site earning a commission. Affiliate programs and affiliations include, but are not limited to, the eBay Partner Network.

My 1967 Belvedere Convertible Plans and Restoration (aka - Mad Scientist Build)

conv67bdere

Super Moderator
Staff member
FBBO Gold Member
Local time
12:39 PM
Joined
Aug 18, 2013
Messages
8,219
Reaction score
14,844
Location
Concord, NC
This forum is really un-believable - sure glad that I found it.

Got myself my first Mopar, a 1967 Belvedere Convertible, and I've got plans to get it fixed up and back on the road. The car is in really good shape, but as most of the cars that I've seen on here, the floors are technically "not there" . . .

My plans for the car, after reading a lot on this forum, and knowing what I like . .

- fix the floor pans in the car
- add sub-frame connectors since this is a convertible
- engine plans are a 5.7L Hemi
- transmission plans are Tremec 5 speed ( was an auto car - have parts that I may sell )
- thinking of mini tubs for the wheel wells ( hope that works with a convertible ? )
- all my trim moldings will probably be removed to make it a clean look ( might be selling my complete set )
- really love the look of a deep dish wheel in back with good size tire but not too big
- keeping the k-member for now, but hope to upgrade later to a tubular type "upgrade"
- eventually going to discs up front, not sure about in back yet - time will tell


Here's what I've got to start with ( pics from the welcome wagon if you saw them )

Best shot of the car that I've got now
sm-belvedere.jpg
Here's the bad part of the body that'll need to be replaced
sm-badparts.jpg
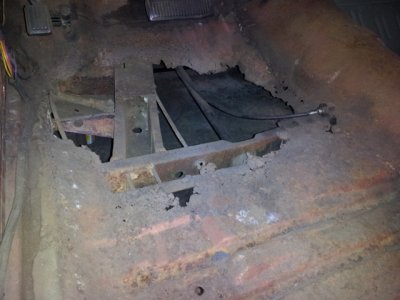
Passenger Floor pan ( or lack there of )
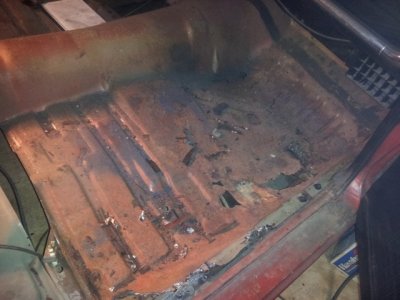
sm-PassFloorStarted.jpg

Driver's Floor pan ( or lack there of )
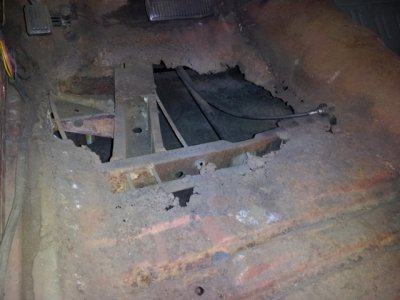
sm-Rustedoutdriverside.jpg

Rear Seat floor behind the driver

sm-DriverSideRearSeatStart.jpg

That's my starting point . . . I've made progress from here, ans will update pictures shortly.
 
Last edited:
That's a great starting point you have there. It should be a good build.
 
Rust looks pretty typical but the car looks pretty clean over all. Should be a pretty easy fix. For inexpensive floor pan patches you can go to Rockauto.com and buy the sherman panels, they work pretty good and are much cheaper then others.

Love that copper color.
 
If you go with the full length quarter patch panels, you are probably going to need trunk extensions and outer wheel housings as well. I did the long floor pans, but you may need front and back both as your floor rust goes pretty far back. The outer wheel housings are pretty much unobtainium. Most off another car are going to be rusty also, and anyone who has some that are decent is not usually willing to split inner and outer and wants to sell the whole thing in one piece. Plan to do some fabrication there.
 
Nice looking car. I agree, the copper color will look gook also.
 
Subframe connectors are a good idea for a ragtop - did it to my '66 Coronet.
 
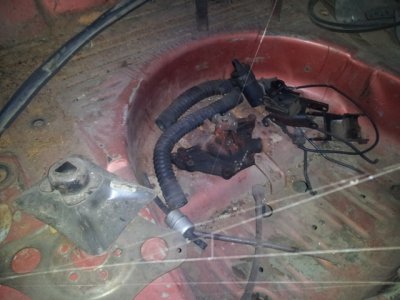
Interesting parking brake cable routing

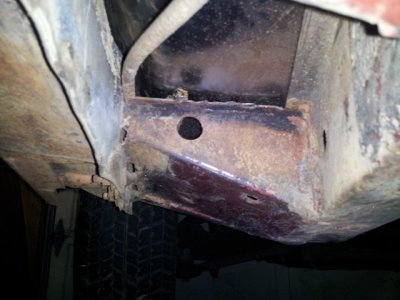
Working on the car and find out that I'm having a hard time fitting the floors into the car and getting them to lay down flat. So I crawl under the car and find the following situation with the parking brake routing for the cable.

sm-Brakelineroute.jpg

So since there was this very nice, and convenient, hole in the vicinity, I took advantage of it . . . and it helped with the cable angles too.

sm-Fixedbrakelineroute.jpg

Should post a picture of the "interesting install" that I found in my other project.

More pictures coming . . .

- - - Updated - - -

As I've said, I've got some more work done, but I've had a busy time trying to get caught up around the house, so the pictures are way behind on the actual progress of my build. Here's an update of the floor replacement . . .

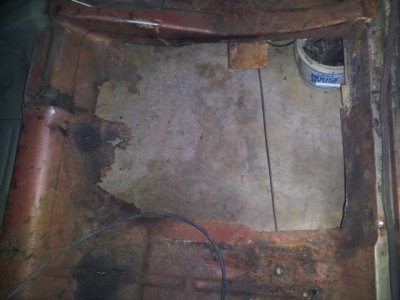
Removal of the rear seat driver side

sm-DriverRearSeatRemoved.jpg

Driver side rear seat being removed

sm-DriverSideBackRemoved.jpg

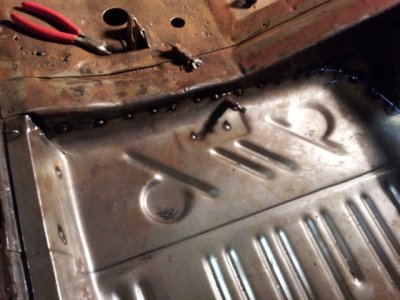
Passenger Rear seat tacked in place

sm-PassSideRearTacked.jpg

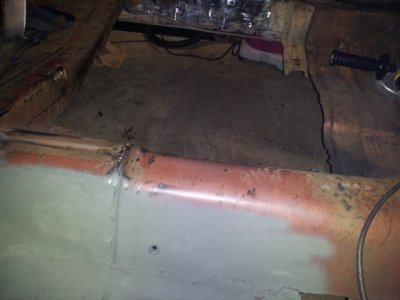
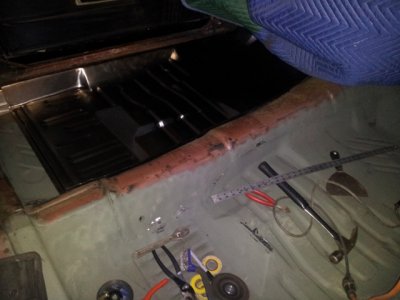
Bottom of completed rear seat welded in place

sm-PassSideBottomPrimer.jpg

Little rough on the welding, and I'll clean up the welds more later . . . but my skills are getting better with the more practice I get welding the panels in.

- - - Updated - - -

Trying to update everyone on the progress of the floor pans in my convertible.

Reminder of what I had to start with

View attachment 135911

Passenger side removed - frame rails cleaned and primed

sm-PassFloorRemoved2.jpg

Another closer look at the frame rails

sm-PassFloorremoved1.jpg

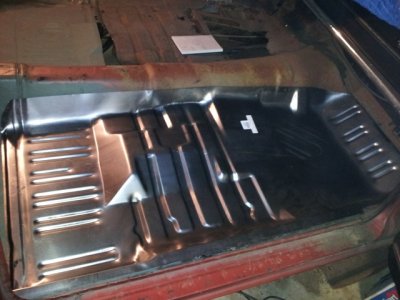
Test fitting - dropped in the original floor plan to start trimming it to size

sm-PassSideSetInUnfitted.jpg

After a bunch of times in and out of the car to fit it, it's finally tacked into place . . .

sm-PassFloorTackedin.jpg
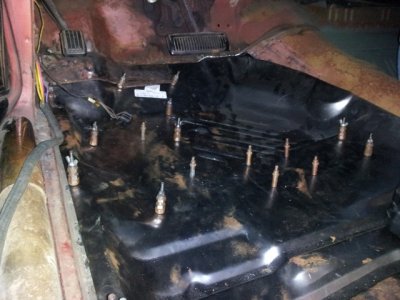
Here's the final product - the passenger side is completed - little more grinding and fine tuning yet to do

sm-PassengersideFloorPan1.jpg

I think it's coming along quite nicely . . .

- - - Updated - - -

Subframe connectors are a good idea for a ragtop - did it to my '66 Coronet.

Thanks - after reading through a whole lot of member posts, it seemed like a very good idea for cars in general, and as you said, very good idea for a convertible. Which type of sub-frame connector did you go with ? I'm thinking the fully welded in ones are the one's I'm leaning toward.

sm-Brakelineroute.jpg sm-Fixedbrakelineroute.jpg sm-PassSideRearTacked.jpg sm-PassSideBottomPrimer.jpg sm-DriverSideBackRemoved.jpg sm-DriverRearSeatRemoved.jpg sm-PassFloorRemoved2.jpg sm-PassFloorremoved1.jpg sm-PassSideSetInUnfitted.jpg sm-PassengersideFloorPan1.jpg sm-PassFloorTackedin.jpg
 
Last edited:
Man!!! You've been busy. You got those Keebler elves helping you get all that work done? Floor looks a heck of a lot better now.
 
Keebler elves, thats funny! Nice work on the pans!
 
Man!!! You've been busy. You got those Keebler elves helping you get all that work done? Floor looks a heck of a lot better now.

I've been working on the car this summer and I'm trying to get caught up on the pics from my progress . . . yes I've been busy, and it feels good to finally be making some progress.

Thanks for the support !

- - - Updated - - -

Keebler elves, thats funny! Nice work on the pans!

Thanks for the words of support - I'm new to this and learning on the way. The welds are getting better, but the first ones were ugh . . . lots of grinding !
 
More pictures to catch up on my progress

Still trying to add the pictures from the past that will get me caught up on the progress

Once again - here's what I had to start with on the driver side - uh, should I say didn't have to start with ( I'm coming Fred Flintstone )

sm-Rustedoutdriverside.jpg

Full panel set in place to start the fitting process . . .

sm-Driverfloorpansetinplace.jpg

Getting the floor pan to sit down right and fit into place - very happy with how this one went in . . .

sm-fittingdriverfloorpan1.jpg

- - - Updated - - -

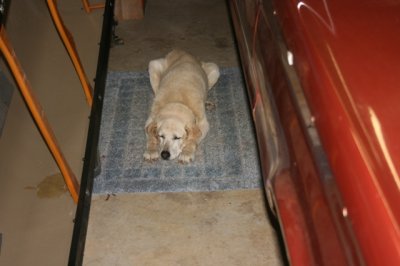
Here's a picture of my original helper on this project - on her spot and keeping a close eye on me . . .

sm-mylittlehelper.jpg

As I've said, this car has been in the garage for a couple years and Belle here, was the first helper. She would always be right there on her spot so she could be close to me. Lucky for me I had her for 16 1/2 years.

sm-Rustedoutdriverside.jpg sm-Driverfloorpansetinplace.jpg sm-fittingdriverfloorpan1.jpg sm-mylittlehelper.jpg
 
More Pictures of what I'm starting with

Have not posted a pic of the engine compartment nor trunk yet . . . so I'll get them out here now

Engine compartment ( duh )

sm-enginecompartment.jpg

The trunk in this car is in really good shape

sm-trunkgood.jpg

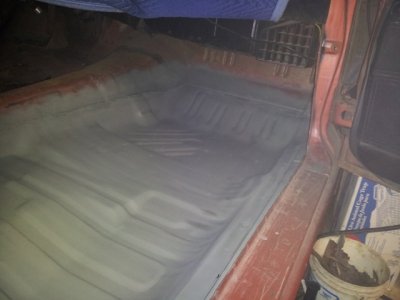
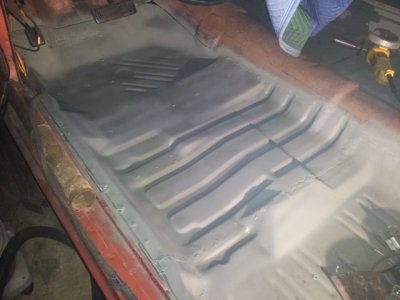
Got the driver side in primer to protect it from rust . . . turned out pretty good . . . will revisit it later.

sm-driversidedone.jpg
 
Keebler elves at it again . . .

Lo and behold the work that I found when I got out to the shop . . .

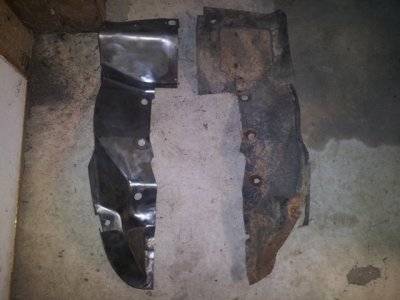
Here's the lower front quarter panels inner panel ( did I say that right ? ) - they look pretty rough

sm-InnerFrontbefore.jpg

This one had an encounter with a not so favorable opponent - and lost . . . . bit dented in

sm-InnerFrontDented.jpg

Progress on the cleaning up process - not looking so bad after all

sm-innerFrontHalfDone.jpg

Even was able to get the dent pulled out of the bad one ( still needs a bit more work ) but it's going to work just fine.
Still got a little crease in the metal that I'd like to get moved where it should be.

sm-InnerFrontDone.jpg

Work continues . . .
 
Those look like the inner splash shields. If there is supposed to be a rubber seal on the edge of them, you can take an old door jam seal from a dodge pickup and cut it to size. Make sure it has the groove that fits over the lip with the rubber seal. That what I did with mine. The rubber sits right up against the inside of the fender.
 
Those look like the inner splash shields. If there is supposed to be a rubber seal on the edge of them, you can take an old door jam seal from a dodge pickup and cut it to size. Make sure it has the groove that fits over the lip with the rubber seal. That what I did with mine. The rubber sits right up against the inside of the fender.

Thanks roadrunnerman . . . still working on the names of all these parts. Still got the rubber seals, but they're pretty much toast. Will be looking into your recommendation and any other leads I can find for locating the replacement rubber seals. The back sides have a little surface rust, so I'm going to run them in the media blasting cabinet before primer - then maybe bed-liner to have them last.
 
Nice looking project. You will be driving it in no time the way you are moving. I think the original color will look amazing on that car when done. Is that MM1 like 1968, or something else? We need to talk to Joey to see if he can't get a hyphen in your user name. Makes me think something is wrong when it always runs over into your post lol.
 
Nice looking project. You will be driving it in no time the way you are moving. I think the original color will look amazing on that car when done. Is that MM1 like 1968, or something else? We need to talk to Joey to see if he can't get a hyphen in your user name. Makes me think something is wrong when it always runs over into your post lol.

Thanks hunt2elk . . . it's a lot farther off then I'd like, but I'm going to keep busy and keep at it ( with the help of the keebler elves ) - after reading through a bunch of other forums on projects, I've decided it's best to take the time and do it right now . . . so here'we go . . .

- - - Updated - - -

Well, had to take some time out to play with the puppy and fix the leaking power steering reservoir on my daughters car ( I hope ) . . . so my time in the shop was only about 2 hours max . . . but I've dug into some more to progress on this project.

Took the fenders off this past weekend and spent a little time removing the ugh-der coating ( not too fun ) but this side, the drivers side it ready to take the wire brush to and do the final cleaning

sm-frontfenderundercoatremoval1.jpg

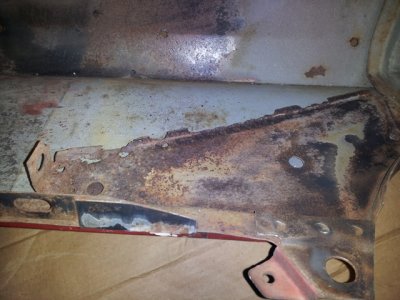
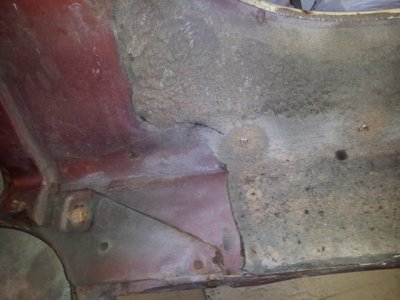
Got a little bit of cancer on this fender support - but I've got the passenger side to use an example to get it fixed up

sm-frontfenderdrivercancer.jpg

Now on to the passenger side . . . and wow, this thing weight 50 pounds, I think I've hit the mother load of ugh-der coating on this fender . . . my work is cut out for me on this one

sm-frontfenderpassundercoatremoval1.jpg

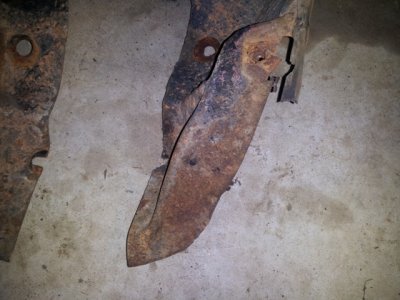
Pulled out the front splash guard and the rubber seals, but there toast too - hard as a rock

sm-frontfenderpasssplashguard.jpg

5 minutes later on, the gunk is removed and ready for the wire brush and media blasting cabinet

sm-frontfenderpasssplashguardclean.jpg

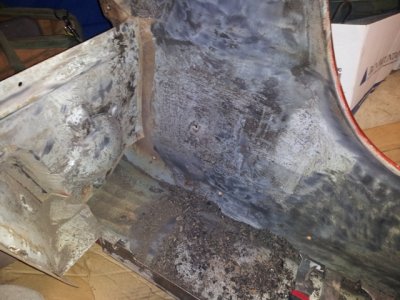
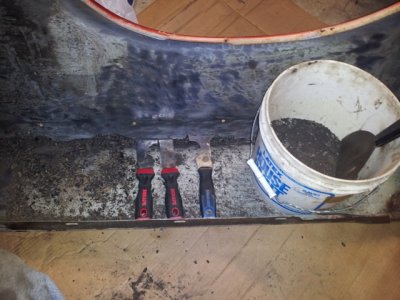
Now onto tackling the removal of all this gunk from inside the fenders . . . notice my collection bucket as I fill it up with the remnants. By the way, this is the second bucket full of stuff removed from my car and collected already . . . you can also see my tools of destruction, your typical painting scrapers seem to have the best luck for me so far ( I don't have a needler ).

sm-frontfenderundercoatremoval2.jpg

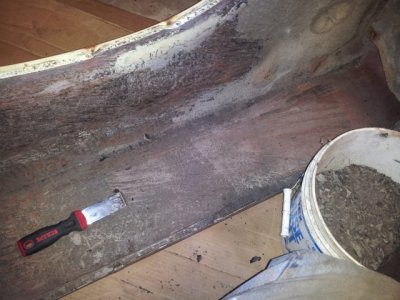
So, an hour later and I've got a good portion of the inside of this fender cleaning up nicely. This stuff was caked on there over 1/4 thick, maybe even 3/8 thick in spots . . . gonna be filling my bucket up pretty fast with this one . . . yup, it's filling up alright.

sm-frontfenderpassundercoatremoval2.jpg

It's late, time to call it a night . . .
 
Last edited:
you done alot of great work so far love to keep seeing pictures of you progress
 
you done alot of great work so far love to keep seeing pictures of you progress

Thanks a bunch 1966Christine from another Michigander who has relocated out of the snow and ice to North Carolina. I've read your posts about the fire and sorry to hear about that, but so happy to see that you're rebuilding her !

Keep in touch - got a long way to go on this project . . . . ( smile )
 
Auto Transport Service
Back
Top