• When you click on links to various merchants on this site and make a purchase, this can result in this site earning a commission. Affiliate programs and affiliations include, but are not limited to, the eBay Partner Network.

My 73 Roadrunner Project

Wow that is turning out to be a sweeeeeet ride. BTW did you purchase the wheel well chrome or did it come with the car? If purchased....I was looking for some so where did you get them?
 
BTW did you purchase the wheel well chrome or did it come with the car? If purchased....I was looking for some so where did you get them?

No, that was not the original wheel well trim, mine were either trashed or gone. I rounded up as many as I could find, but most are beyond repair or so heavily pitted its going to take a long time to fix. So I was talking with another member on here had a set of NOS wheel well trim, and I was lucky enough to be able to purchase it from him because someone else backed out of the sale! I wish someone would make it, because this set cost an arm and a leg, but I was very happy to get it. I think it was probably some of the last ones to be made because the factory stickers from Chrysler on the trim packages were dated in 1989 which really surprised me that it was still made that far after production stopped.
 
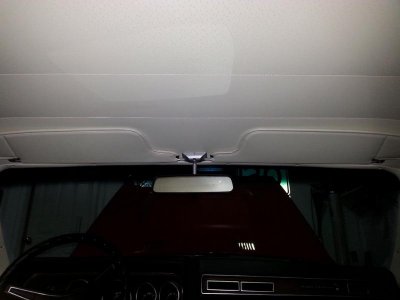
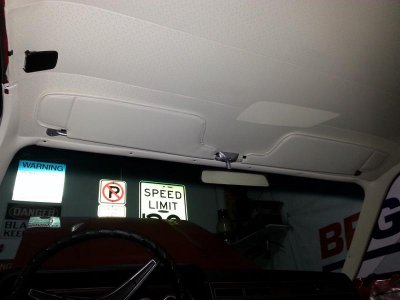
Got the headliner and carpet in today. Had a local guy that was experienced and very reasonable do the head liner, so I didn't screw it up, he did a very nice job, only took him about 1.5 hours to complete. Anyway, I hopefully can get the rest of the interior in this weekend!!!!

20140123_122025small.jpg
20140123_122034small.jpg
 
Carpet and headliner look good. I see you marked an "X" for where the seats and seatbelts bolt in. Good idea, I would have never thought of that but I am now. Thanks.
 
Yes, just use a piece of chalk that way it comes off with the vacuum! Or just rub your hand across it and its gone!
 
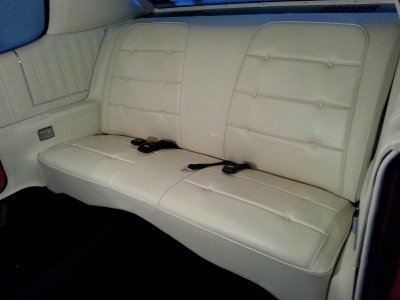
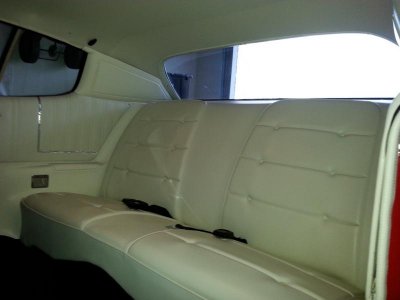
Got the rear interior in today. Tried to get the plastic panels painted to match the upholstered ones, but you can see the camera emphasizes the slight difference. Its not so noticeable in person or in sunlight. Even the two pictures below are different. I'm guessing they were not exact from the factory, but I don't have a frame of reference for that. Anyway, here is how its looking.

This is a good representation of what it looks like in person.
20140126_162442small.jpg

This one shows the difference really well between the panels.
20140126_162231small.jpg
 
Looks like you just need to get them dirty haha, "really nice".
 
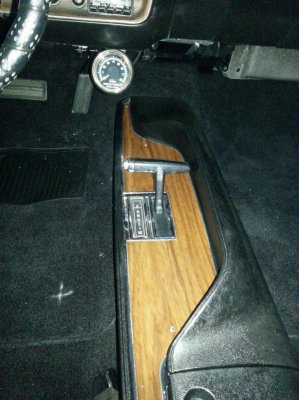
What better to do on a cold snowy day then sit in the back seat of the RR and admire the interior, well, at least what has been installed. Got the a-pillars, windshield trim, rearview mirror and sun visors installed along with the center console. The mirror and console are original to the car, and even though they show a bit of wear, no sense in replacing them so I went with the originals. Quite happy with the color of the visors and matching the headliner as well as the trim came out pretty good. Wanted to do the door panels, but the lowers don't fit worth a damn, from Accuform, and there is nothing accurate about them. The drivers side sits about 3/8" too far forward and the passenger side sits about 1/2 inch too low and there is now way to adjust them since the panel clip slots are glued in place. So I am looking for a good set of originals to use.

Anyway, here are some photos.
20140204_151424small.jpg
20140204_151501small.jpg
20140204_151614small.jpg
 
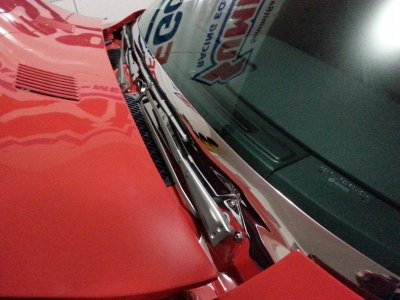
Finally done with this pesky piece of windshield trim, the wide one on the bottom. It took for ever, and if I have never have to sand a polish a piece of trim like this again, it will be too soon! Its difficult and time consuming to do all the hand sanding and then the polishing on a bench grinder and get good results, so I cheated a little bit after I got it sanded and polished as much as I could, I had a local guy use his 4 horse power buffing machine with a 10 inch wheel to get some of the sanding and polishing marks out, then I did the final polish on it, then a buff with liquid scratch x and waxed it. Its not perfect, but I think it looks real good. Oh, and I tested the windshield wipers today also and its the first time since I bought the car in '83 that the wipers actually retract all the way down like they are supposed to! LOL
20140222_171222small.jpg
 
X 2! Couldn't agree more, the birthday bird sure is looking number one!!
 
I didn't realize that almost being 50 is considered young! LOL Is 50 the new 30 or something
 
Well it is your second child hood so enjoy it well it lasts
I'm 52 and haven't left my 1rst childhood yet. idrivemopar, your car is looking better and better everytime I see it.
 
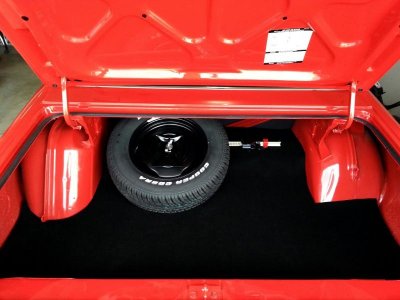
Finally a proper trunk...

Finished up the trunk today, finally looks proper again.
20140306_163535small.jpg

The next order of business is to get her running again properly as I finally got another 6319 thermoquad pieced together, rebuilt and now just need to get it dialed in, hopefully nothing else goes wrong, otherwise, may just have to do after market carb. Then I have to finish the interior front seats and door panels. Once I can get that done, I hope to address the rear end issue with the leaf spring alignment on the passenger side. And finally, if I can get that all done, maybe, just maybe, I might be able to finally take it around the block.
 
Wow, now that's looking nice.
 
Auto Transport Service
Back
Top