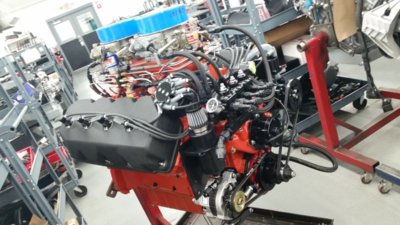
The great experiment has begun.
Started with driver's side. Straightened bolt holes, out came the RTV black and then the FelPro gasket.
Yes, I backed off of the "install it dry" bit once I checked the inside of the valve covers.
I only used the Permatex on the valve cover side; I'll try dry on the head side for now.
The studs went in beautifully as one would expect from an ARP product. Double nutted them to get them seated. Then the valve cover, which had been sitting gasket side down on the flat workbench, went on next. It had to be aligned perfectly to go over the studs, but when it was, it plunked right down squarely with a reassuring "thunk".
I then found out quickly that there wasn't enough threads on the nut side to stack both the Mopar "spreader" washer and the ARP supplied round one, so the round ones were jettisoned.
Once I did that, the nuts seated nicely against the spreader washers and the washers acted like they were meant to be there, settling into a nice alignment even in the catty corner positions of the two lower corner studs.
Stage one complete. Stage two to come.
I now know I need to do something different about a breather (mine isn't this type) as well as procure a "shorty" PCV valve, since the internal baffle isn't allowing the typical longer metal one to seat.
More to come, but so far, so good.
P.S. You can see the crud on my new MSD spark plug wires and on the head itself from the slow, weepy leaking the old valve cover was doing.
All that will be cleaned up once I'm done, along with a polishing of the valve cover itself. No sense in doing it right yet.


