You are using an out of date browser. It may not display this or other websites correctly.
You should upgrade or use an alternative browser.
You should upgrade or use an alternative browser.
69 Super Bee Rebuild (my way)
- Thread starter hunt2elk
- Start date
I feel your pain! I hope my prop valve is ok,those are a bastard with everything in! I may bleed my brakes before I install the steering column just in case. Thanks for the heads up!
daytona kid
Well-Known Member
If your prop valve still leaks elsewhere- Don't know if you saw the video I made of my leaky prop valve but it was leaking everywhere it could leak. Can't remember what type lines you have but my ss lines took a lot of way over tightening to finally seal. You probably know but sometimes loosening and retightening more will finally seal them. Some I just kept loosening and retightening a little tighter each time till they finally sealed.
Yeah, I don't know what I was thinking. I should have finished off all the brake stuff before installing the motor, suspension, and steering.I feel your pain! I hope my prop valve is ok,those are a bastard with everything in! I may bleed my brakes before I install the steering column just in case. Thanks for the heads up!
I don't understand why it is so difficult to get brake fittings to seal nowadays. I surely don't remember having problems with them back in the good ol days. Maybe a bit of oil on the threads and the backside of the flare before putting them together would helpIf your prop valve still leaks elsewhere- Don't know if you saw the video I made of my leaky prop valve but it was leaking everywhere it could leak. Can't remember what type lines you have but my ss lines took a lot of way over tightening to finally seal. You probably know but sometimes loosening and retightening more will finally seal them. Some I just kept loosening and retightening a little tighter each time till they finally sealed.
themechanic
Oklahoma is OK
- Local time
- 3:22 AM
- Joined
- Nov 11, 2012
- Messages
- 21,616
- Reaction score
- 27,746
- Location
- Moore, Oklahoma
It's tough to beat the Fel-Pro thick cork gaskets. I think they are 5/32". Use your favorite gasket maker RTV to glue them to the valve covers then put them on. Torque, heat cycle, re-torque a few times. No leaks.Next issue. Dumped in 6.5 quarts of oil in the new engine. The next day I notice oil on the bottom of my pan. Traced it up to the passenger side valve cover. Called Brian at IMM to ask about the gaskets. He says it didn't leak a drop on the dyno. Sent him the pics of the area and he us calling Mancini to see if there is some special gasket they recommend with there valve covers and Trick Flow heads. He has the good Cometic ones in there now.
View attachment 908306 View attachment 908307
themechanic
Oklahoma is OK
- Local time
- 3:22 AM
- Joined
- Nov 11, 2012
- Messages
- 21,616
- Reaction score
- 27,746
- Location
- Moore, Oklahoma
Someone told me because they are all machine made and the QA/QC is not what it should be.I don't understand why it is so difficult to get brake fittings to seal nowadays. I surely don't remember having problems with them back in the good ol days. Maybe a bit of oil on the threads and the backside of the flare before putting them together would help
I made the mistake of buying SS fuel lines for the 6 bbl, looked like a lawn sprinkler! I think they aren't as soft and are harder to get to seal. Hope you get it sealed up.
Oh, I will win.....I made the mistake of buying SS fuel lines for the 6 bbl, looked like a lawn sprinkler! I think they aren't as soft and are harder to get to seal. Hope you get it sealed up.
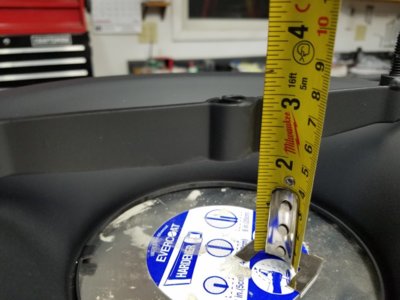
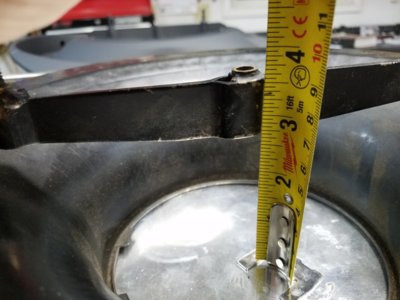
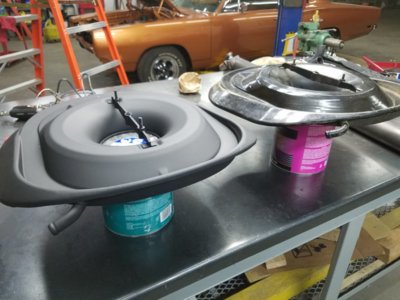
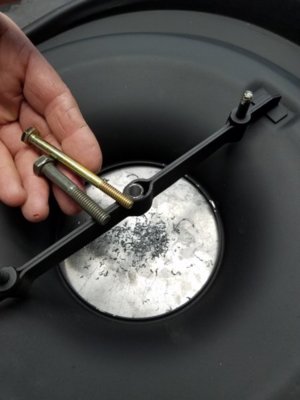
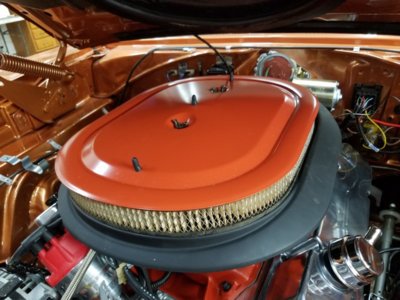
The correct 440 air cleaner base showed up from PG Classics today. So if anybody is fighting with hood clearance with an aftermarket intake on a Ramcharger or Airgrabber hood, the 440 base measures 11/16" shorter than a 383 model. To wore out from work today to find out if it will work with my Weiand intake, but hopefully will find out this weekend.


themechanic
Oklahoma is OK
- Local time
- 3:22 AM
- Joined
- Nov 11, 2012
- Messages
- 21,616
- Reaction score
- 27,746
- Location
- Moore, Oklahoma
Looks to be 1/2" more hood clearance. Is that right?
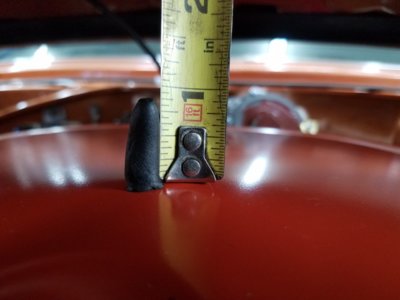
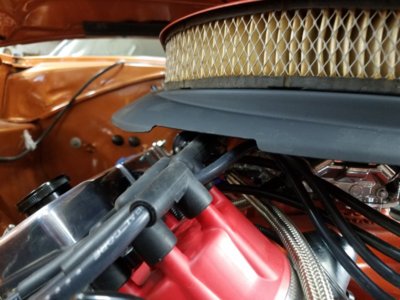
The measurement from the crossbar to the carb mounting point is 11/16" shorter on the 440 model. However when I compare the measurements from the carb mounting point to the base where the bottom of the filter sets, it is only about 7/16" in favor of the 440 model.Looks to be 1/2" more hood clearance. Is that right?
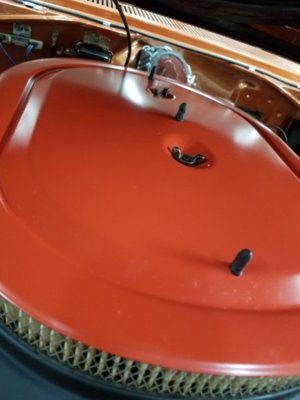
Just got done playing around with the air filter setup. I first had to bend the 2 small tabs on the base up and then drill out the bolt hole sleeve for 516" to fit my Quick Fuel carb. I used the thin style carb base gasket instead of the 1/4" model I usually use. Also used the PG top cover instead of my original because it is not formed quite the same and is a tad shorter when installed. Used some dumdum on the lid to check clearance. I have 7/8" in the center high spot, making me very happy. I could even put my thicker carb spacer in if I want seeing as though I am running solid motor mounts. These measurements are with a 400 block, solid mounts, and a Weiand Action + 8008 intake. They would be very similiar if using a standard Edelbrock Performer as that and my intake are about 1/2" taller than stock.


Last edited:
themechanic
Oklahoma is OK
- Local time
- 3:22 AM
- Joined
- Nov 11, 2012
- Messages
- 21,616
- Reaction score
- 27,746
- Location
- Moore, Oklahoma
Have you had the chance to compare the paper filter to the K&N filter height?
I have not. 2 filters came with the car, but I will need to buy something else. I thought somebody said K&N quit making the oval filters?Have you had the chance to compare the paper filter to the K&N filter height?
I have a K&N, I could measure it tonight if you like? I think they are very close to OEM.

Home > Air and Fuel >


Larger Photo
Twitter Email

K&N Replacement Air Filter MOPAR 383,440 SIX-PAC 1969-72 # E-1980


In Stock
Sale Price: $97.99
Product Code: KNE-1980
Qty:
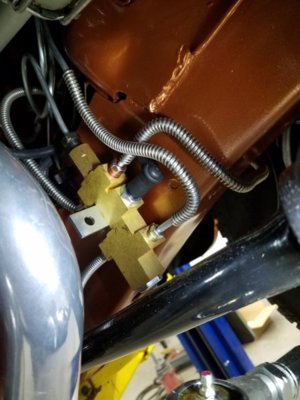
Success!! A proportional valve back in place AND dry. But get this. When the new valve came I decided to take it apart to be sure it wasn't bad also. This one had a burr on the top nut that would have prevented it from sealing. So I used the new body along with my first nut. Just crazy how poor quality control has gotten on parts nowadays.

Your making me nervous........
Oh, don't get to excited yet. I think I have a leak on one of the welds of my brand new Miloden Road/Race pan....Your making me nervous........
Similar threads
- Replies
- 41
- Views
- 5K
- Replies
- 7
- Views
- 1K
- Replies
- 10
- Views
- 1K

