• When you click on links to various merchants on this site and make a purchase, this can result in this site earning a commission. Affiliate programs and affiliations include, but are not limited to, the eBay Partner Network.

Hemi Orange 72 Rallye Charger

Nice to see you back and all the progress, good job on the heater box. I've got the DMT kit staring at me but haven't gained the courage to start working on it yet. My box does have some cracks and chunks missing. :(

Hey thank's man. It's been slow going. Work, save, buy, repeat.

The heater box is not as hard as you'd think. Mostly cleaning. I used strip caulk between the two halves and somehow broke a piece off with my hand. Luckily it won't ever be seen. If you look closely you can see it in the picture. I ended up using job weld putty for plastic ect. It worked.
FB_IMG_1553115554672.jpg
 
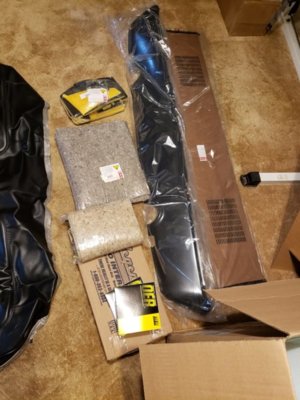
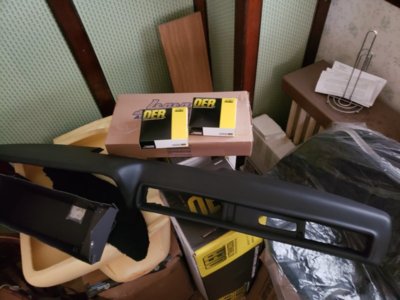
Here is some more things from my part's I've been gathering up. [ OER carpet kit, used (uncracked) steering wheel, under dash shoddy pad, kickpannel insulation, door seal kit, roof rail seal kit, new voltage limiter(rt engineering), parking light lens kit, upper steering bearing seal, new headlight motor gear, front sway bar brackets, body bumper kit, and cassette recorder/w console mount].

Still allot more needed. But it's something.
20190323_120208.jpg
 
Good looking box and I have a similar parts collection right now as well. Like building a real life model kit but with thousands more little pieces.
 
Nothing exciting going on right now. I ordered a assortment of square black tape player belts off of Ebay(haven't arrived yet. Also a head demagnetizer to demagnetize the heads and capstans in the tape recorder(also not in yet).
Screenshot_20190329-122118_eBay.jpg
Screenshot_20190329-122421_eBay.jpg

I was sourcing a factory cruise control set up and lost the bid for the turn signal / cruise lever. But I did get an original harness. I see there is an original servo bracket on Ebay, but the seller has really bad seller points.
Screenshot_20190329-122602_eBay.jpg


Got some wiring in for the new radio and to hook up 2 rear speaker's.
20190328_160431.jpg
 
I have been reluctant to spend the money on this, but now I wish I would've bought it years ago. Very helpful.
20190330_120838.jpg
 
I decided to archive the guide. Cost almost as much as the guide itself. But I think worth it in the long run.
20190412_190300.jpg
20190412_190317.jpg
 
I decided to get a proper repair manual for the radio. And ordered some bits from Partsmix for the Charger . Also some for my Coronet.
20190417_194913.jpg
20190417_194752.jpg
 
I also picked up a NOS microphone and a reconed center speaker.
20190404_164909.jpg
Screenshot_20190417-202448_eBay.jpg
 
Not much too add . Got a couple bits off Ebay. Have a large haul coming this week from Classic Industries. I feel like a kid waiting for Christmas morning. Except I know what's coming.
20190706_200119.jpg
20190706_200208.jpg
 
Hi fate good luck with the rest of your project. I had the same car new back in 72 power windows and everything
I am going to see if I still have some paperwork and I will send to you to with vin if I can find . I would love to know if you have my old car . If it matches up I will send you what ever paperwork I have on her for your records. Again Best of luck with that soon to be beautiful car!!
 
Hung the legendary covers. Much happier with them than the buckets. My error I'm sure.
20190718_172921.jpg
20190716_202741.jpg
20190718_174120.jpg
20190718_174057.jpg
20190721_192604.jpg
20190721_151050.jpg
20190721_151107.jpg
20190723_153615.jpg
20190723_173708.jpg
20190723_172638.jpg
 
Man I guess I never subscribed to your build I've been missing a bunch !
I can't wait to dig into the fun parts ! But I Know better metal work first and and at least inside of car painted ! Then I can play with the fun bits ! Your cars looking good!
 
It's all fun isn't it?! Lol. Idk if it's been mentioned before, but the rear seat upholstery kit only comes with enough foam to do one half. I'm not sure when they(Chrysler) quit using cotton and just foam, but for sure no cotton was used on this one.
So I had to buy foam from a Joann fabric's. They only carry 1/2", 1", 2" and so on, high density foam. No 1 1/2". I went with 2". It is also only 2 foot wide. So I had to glue 2 pieces together to get the needed 26" wide for the bottom. I think the cover fits better over this 2" than what came in the upholstery kit from classic.
So I'm left with a bunch of cotton batting. It will get used at some point as I have a 70 Coronet that I will be doing down the road.
I also took the time and weaved the piano wires through the burlap. It seemed to be a good idea since that's what the factory did.
I left the passenger seat for last. I tore it down and blasted/painted it. I will tackle that one this weekend.
So this car had 2 build sheets. Both destroyed unfortunately. 1 under the rear seat bottom and the other under the passenger seat bottom.
Here are some shots of the tear down:
20190724_192026-756x1008.jpg
20190724_192018-1008x756.jpg
20190724_192041-1008x756.jpg
20190724_192105-756x1008.jpg
20190724_193116.jpg
 
Last edited:
I like the Dodge pickup too! Good progress!
 
Not much to report. I had to put the project on hold till after August 12th. My step mother passed away and I'm with my 83 yr old Dad. Helping him get through this tough time.

As for the project. It wasn't going smoothly. I started with the seat top. The most difficult of the whole process imo. The listing pocket ended up ripping away from the buttons. I went to the original cover and tried to repurpose the listing pocket from that.
The original listing pocket is vinyl sewed inside out. It either shrunk over time or never was the size that legendary used on the replacement covers. After attaching them to the foam, the original pocket was tighter and didn't match the one that legendary used. So I decided to try some fresh vinyl from Joann fabric's. The store suggested duck cloth to use, but the duck cloth seemed thinner than the material legendary used. The vinyl was the same thickness. Here are some pictures of where I ended up. I will give it a few more tries when we get back, but will go to a professional if I feel like I'm not going to succeed.
I definitely don't want to ruin the foam or the cover.

The original foam had burlap glued in these corner's.
20190727_142817.jpg

Some scrap pieces cut ready to be glued in.
20190727_142822.jpg

The headrest flap and burlap glued.
20190727_142959.jpg


The cover's warming up in the sun.
20190727_143536.jpg

Bummer, it ripped!

20190727_200525.jpg

The original listing pocket installed. The pockets are held on by the buttons and spring washers.
20190727_200522.jpg


The sucky fit. The headliner laid out in the background.
20190727_210543.jpg


A close up of how tight the left side fit with the original listing pocket.
20190727_210550.jpg


Picture of the right side with legendary listing pocket. It might not be visible, but legendary side fits loosely compared to the other side. So it really looks hokie like this.
20190727_210553.jpg
 
Auto Transport Service
Back
Top