• When you click on links to various merchants on this site and make a purchase, this can result in this site earning a commission. Affiliate programs and affiliations include, but are not limited to, the eBay Partner Network.

Cam is installed advanced 2 degrees

Some helpful info.
https://www.hotrod.com/articles/cam-install-from-the-start/

"After the initial baseline cranking-compression check, advance the camshaft 2 degrees. Be sure to check piston-to-valve clearance before cranking the engine over, or damage could occur. Remeasure No. 1 cylinder’s cranking compression. Now retard the cam the same amount and check the cranking compression again.


If advancing or retarding the cam raised the cranking compression, continue to alter the cam position by 2-degree increments in the same direction cranking compression improved until the cylinder pressure drops, then back off to the highest observed number.

Maximizing cylinder pressure using this technique offers a fairly reliable method of determining optimum camshaft position for a given engine combo, compensating not only for valve timing, but also for the given engine’s rod/stroke (R/S) ratio. Circle track engine builders have had good success with this technique if they aren’t able to sort out the cam on an actual engine dyno."

That does not make a lot of sense to me. Cranking compressions is only an indirect measure of the intake closing point. There are three other cam events that might have an impact on performance. And I think if you keep advancing the cam, the cylinder pressure will keep going up.
 
That does not make a lot of sense to me. Cranking compressions is only an indirect measure of the intake closing point. There are three other cam events that might have an impact on performance. And I think if you keep advancing the cam, the cylinder pressure will keep going up.

Exactly.

If cranking compression was the true indicator of power potential, we’d all be running tiny little cams...... installed way advanced.

To me, the info in that magazine article...... which I’ve heard from various sources through the years, always seemed like one those “where do they come up with that crap” kinda things.

I’m a little surprised that Paul is puzzled by the fact he had to use something other than dot-to-dot to get the cam installed where he wanted it.
We had a pretty good conversation about it where I pretty much told him it would likely need to be advanced to have it be at 108.

Referring to cams being “advanced” or “retarded” in conversation is an easy way to end up with people not on the same page.
IMO, it’s best to specify the LSA and the intake c/l....... then there is no confusion.
Paul’s cam is a 112lsa, in at 108c/l.
The way I think of it, that’s technically 4* advanced........ which has nothing whatsoever to do with which keyway was used.

The main thing to remember is...... it doesn’t matter what you have to do to get the cam in at the right position.
It’s either in where you want it, or it’s not..... regardless of where the dots are.

I was talking with a customer about a month ago who was trying to get a cam dialed in.
Using a 9-way set.

Cam was a 110lsa, he was shooting for 106c/l.
In the +8 position the cam was at 108.
On the zero it was in at 116.

I told him to advance it one tooth(14deg), then use the -4 keyway.
Came right in at 106.
 
Last edited:
Wow, its like the light bulb just went on. So, said differently, as long as there is 12° of adjustability in the timing chain set, the manufacturer can put the keyways wherever they want relative to the dots or key-way labeling and you can get where you need to be. From a manufacturing perspective why bother with all the precision to place the "zero" keyway/dowel at to the "correct" location.

I've always considered the term straight-up silly as that term consistently has different meanings to people. I've always used the terms "advanced" and "retarded" as ICL relative to LSA and not how it was suppose to be ground. But that's just me.
 
Last edited:
Exactly.

I’m a little surprised that Paul is puzzled by the fact he had to use something other than dot-to-dot to get the cam installed where he wanted it.
We had a pretty good conversation about it where I pretty much told him it would likely need to be advanced to have it be at 108.

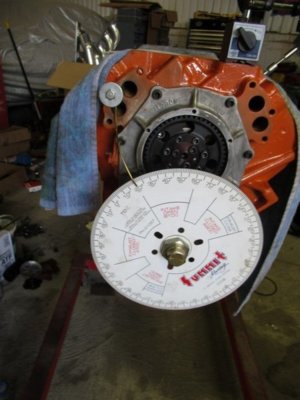
Not confused really, Just took me all day to figure out the how to use the cam degreeing kit I bought. Your instructions on the phone were very helpful. I cant tell you how many times I was ready to call you for help figuring it out yesterday, lol. Lots of You Tube videos and trying, finally got it.

What I am puzzled by, and there may be a real good reason, but why would they not cut the cam to the requested spec? We wanted a certain lobe profile with a specific IC. I am just surprised they could not make it so in the grind. Eliminate the need for more expensive timing sets.
 
Last edited:
Almost seems like they engineer in error, then sell timing sets to fix it.....
 
Last edited:
My MP 292/509 when set at dot to dot was 1.5 degrees retarded so I set it to the 4 degree notch on the crank gear which actually came in at 4 degrees. The Lunati 316/326 solid came in at exactly the number the timing set showed.
I read somewhere awhile back on how to degree using 2 deep well 3/8" drive sockets in the # 1 lifter bores. I can't recall who mentioned it but I wouldn't be surprised if it was Tony Defeo.....
 
......but why would they not cut the cam to the requested spec? We wanted a certain lobe profile with a specific IC. I am just surprised they could not make it so in the grind.

How do you know it's the cam?
 
Without precisely measuring everything, I guess we will never really know for sure. Just seems with todays CNC technology and precision machining this problem would be solved. What about the OE's. Could they tolerate something like this? Cars built today are spot on in most cases. Horse power, fuel consumption, oil burning. Generally they do exactly what the manufacturer claims they do. They put out a very consistent product. I cant imagine they degree every cam they install in every engine they build new. Or do they? .
 
I do check at several heights for verification.Adjusting a gear drive is a different trip!:D

7.5.17 057.jpg 7.8.17 001.jpg 7.17.17 019.jpg 7.17.17 020.jpg 7.17.17 021.jpg 7.18.17 019.jpg
 
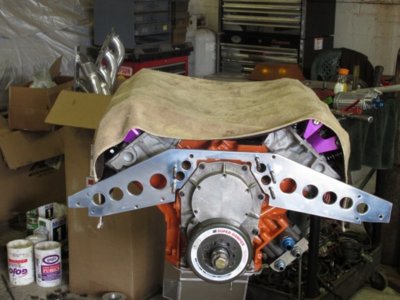
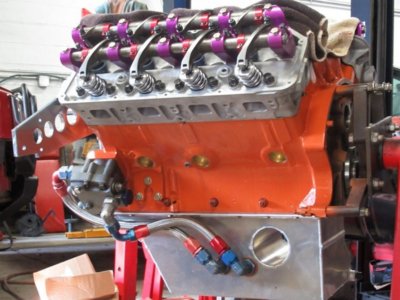
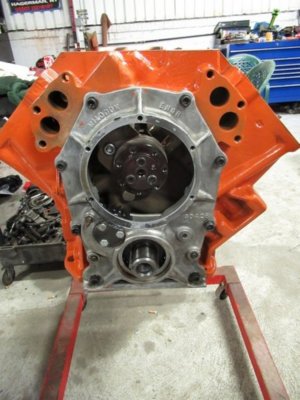
Its a 76 motor home 440 block. 440 Source stroker kit, Comp Cam, Summit Racing timing set. View attachment 873606

Why the custom cam?
My Convertible with the 505" stroked 440 is using the XR286HR-10 Hydraulic roller cam that is just a hair more duration and overlap, and it is fairly mild, but I do have a bit over 10:1 compression?

On those cams, if installed at about +2, the numbers come really close to split overlap (both intake and exhaust open the same at TDC. At +4 the numbers show the intake open a bit more than the exhaust. Once the chain gets some slack, it will retard the timing slightly anyhow.
 
Timing chain and gears can vary quite a bit, as can the cams themselves. I can't remember which mag tested a bunch of them, and found one that I recall being like 16 degrees off.. They said it wasn't a cheap one either. I spoke to a well regarded engine builder, and he told me its very hard to spot 2 degrees even on a dyno.

Been there, I had one timing set that appeared to have the marks lined up correctly but was a tooth off. Slight rotation & recheck showed the cam mark just slightly. Very careful check with the straight edge. Now always degree the cam opening, closing & IC to be sure timing is correct.
I should have mentioned, I caught the tooth off issue when checking piston to valve clearance. I did toss that timing set at next rebuild. Also I couldn't be sure to see 2* change at the track, but could see 4*.
 
Last edited:
Some helpful info.
https://www.hotrod.com/articles/cam-install-from-the-start/

"After the initial baseline cranking-compression check, advance the camshaft 2 degrees. Be sure to check piston-to-valve clearance before cranking the engine over, or damage could occur. Remeasure No. 1 cylinder’s cranking compression. Now retard the cam the same amount and check the cranking compression again.


If advancing or retarding the cam raised the cranking compression, continue to alter the cam position by 2-degree increments in the same direction cranking compression improved until the cylinder pressure drops, then back off to the highest observed number.

Maximizing cylinder pressure using this technique offers a fairly reliable method of determining optimum camshaft position for a given engine combo, compensating not only for valve timing, but also for the given engine’s rod/stroke (R/S) ratio. Circle track engine builders have had good success with this technique if they aren’t able to sort out the cam on an actual engine dyno."

Not sure I agree, cranking cylinder pressure is one indicator. IMHO depends on your desired RPM for the peak performance you are looking for, low vs higher.
 
Years ago I got my racecar short block used. Decided to throw my cam and heads in and check P/V before disassembling it to check the rest out. Lined the dots up on the Jessel belt and started to roll it over. Imagine what thoughts went through my head when it didn't roll one revolution with no heads or valve train. cam lobe was contacting the rod. Thoughts of the BME aluminum rods being to large for the base circle. Then I realized looking at the #1 and #6 lobes that the cam wasn't even close at TDC. Turns out the Jessel dots are off close to 3 teeth. Then the 10 degree advance retard feature is closer to 8/12 degrees.
Doug
 
Why the custom cam?

Well, this is my first full engine build. I am relying on the experts to help me get it right for the application the engine is going to be in, and meet my performance goals. The custom grind really didn't cost any more than a cam on the shelf at Summit Racing. So why not?

My 72 has a 3.91 rear gear, and overdrive, air conditioning, big stereo & amp, etc., its a cruiser. In overdrive and converter lock up the car will cruise at relatively low RPM. 2300 to 2500 RPM on the highway. Also I am using a 2400 stahl lock up torque converter. The cam has to operate in that range. So this is the cam we have chosen.

OK, the rest of the build. 440 Source stroker kit designed for 10.5:1 compression, PP240 heads, 1 7/8" long tube headers, Eddy dual plane intake, 850 carb, MSD ignition. My goals for this engine are mid 550 HP and over 600 TQ. Idle like a mild engine, go like stink, and be an old school street car that can run stop lights with the modern muscle cars.
 
I read somewhere awhile back on how to degree using 2 deep well 3/8" drive sockets in the # 1 lifter bores. I can't recall who mentioned it but I wouldn't be surprised if it was Tony Defeo.....

The hydraulic roller lifters have a raised area the tie bar connects to. I had the dial indicator on that raised area. Worked well.
 
I think Paul forgot some of our long conversation.

Any cam that doesn’t start out as a blank piece of billet bar stock, or an “UGL”(unground lobe) core, starts its life on the cam grinder as a “semi-finished” core.
The semi-finished core has lobes that are roughed in, bearing journals done, gear is cut, bolt holes done, dowel pin hole done.
For a roller cam you want the semi-finished core to be as close as possible in lift and lsa to what the finished cam will be, since the heat treat only goes so deep.
The more you have to remove from the semi-finished core, the less hard material remains.
The two things that require the most amount of material removal are......changing the lsa...... and advancing or retarding relative to the pin.
My preference is to have them leave as much hard material on the core as possible, and not make large changes to the indexing of the finished grind relative to the pin(and therefore removing more of the hard material)...... since it needs to be degreed in anyway, and any out of phase situation cam be rectified at that time.

The only potential plus of moving the grind relative to the pin is it “might” come out closer to being installed correctly with the timing set dot to dot.

The potential problems are you end up with a cam that has soft spots and fails, filling your motor with hard steel shavings.

I’ll take the minor inconvenience of possibly having to use one of the other than “0” slots on my timing set.
 
In the grand scheme of things, I have assembled very few engines and/or installed cams.
In what is a tiny sampling in terms of the numbers of units used vs the number produced....... I have personally come across 4 defective timing sets, where one of the dots was on the wrong tooth.
I’d have never believed it unless I experienced it myself.
That alone is all the reason I need to make sure I always, at the very least, measure the cam timing to know it’s at least “close” to where it’s supposed to be.

Many years ago I stopped worrying about what was required to get a cam installed where I wanted it, or which of the 4 pieces of that puzzle was the reason it wasn’t where it should be when the dots are lined up.

The motor doesn’t care how you get the cam timed properly.

Doug...... one of the 4 I found to be off was actually a Jesel Belt drive.
Off a tooth.
 
Last edited:
I think Paul forgot some of our long conversation.

Me forget??? Every night I go to sleep thinking tomorrow I have to do this, that, and that. Every morning I wake up thinking... what am I going to do today? Hmmm.. I ll find something. :realcrazy:
 
Well, this is my first full engine build. I am relying on the experts to help me get it right for the application the engine is going to be in, and meet my performance goals. The custom grind really didn't cost any more than a cam on the shelf at Summit Racing. So why not?

My 72 has a 3.91 rear gear, and overdrive, air conditioning, big stereo & amp, etc., its a cruiser. In overdrive and converter lock up the car will cruise at relatively low RPM. 2300 to 2500 RPM on the highway. Also I am using a 2400 stahl lock up torque converter. The cam has to operate in that range. So this is the cam we have chosen.

OK, the rest of the build. 440 Source stroker kit designed for 10.5:1 compression, PP240 heads, 1 7/8" long tube headers, Eddy dual plane intake, 850 carb, MSD ignition. My goals for this engine are mid 550 HP and over 600 TQ. Idle like a mild engine, go like stink, and be an old school street car that can run stop lights with the modern muscle cars.

Sounds nice. Alot like my convertible that has a 5-speed manual, 3.54:1 dana. 1,500 RPM @ 50 MPH in OD.
I have the 1-7/8" TTI headers, 2-1/2" exhaust with somewhat quiet mufflers that were a pain to install because of their length (Walker Quiet Flow SS #22154), and EFI. Edelbrock XT TPI style manifold and throttle body, but FAST 2.0 Electronics.
Vintage air A/C, 4-speaker stereo in the cabin and a sub box with amplifier in the trunk.
 
Auto Transport Service
Back
Top