• When you click on links to various merchants on this site and make a purchase, this can result in this site earning a commission. Affiliate programs and affiliations include, but are not limited to, the eBay Partner Network.

1968 Charger, Ray Barton 528 Hemi, Pro-touring.

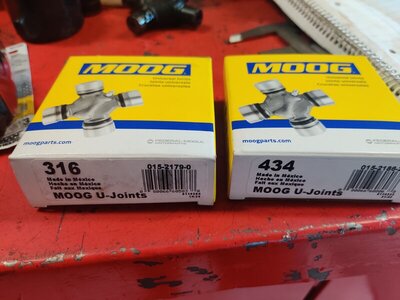
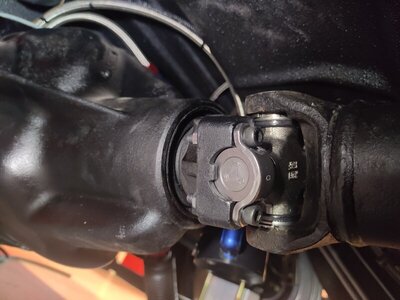
You may only need to take the cups off the u-joint in the drive shaft now and take the cups off the one your parts dealer supplies you. Your dana yoke looks like it's for a 1330, I've found that the cross shaft for 1330, 7290 and 1350 u-joints to be the same. Only difference is cup diameter. Just measure cross shaft where needle bearing ride.
Yes, i suspected this. If the new u-joint is a moog but just with different cups it might work, saves me some time. Thank's
 
When I swapped out a B-Body 8¾ chunk for the A-Body chunk I had in an 8¾ rear axle, in my 79 F-Body Aspen R/T that I pulled from a junkyard 73 340, 4 speed A-Body Dart? that we just left the rest of the car on the street to be towed back to the junkyard (yeah, I know, it was 1980)...
Anyway, a local Dana/Spicer shop "U-Joint Specialties" sold me a U-Joint that had caps for my driveshaft and larger caps for my chunk, and while I was grateful, they made it seem easy.
That 8¾ A-Body rear axle was a DIRECT bolt in to my F-Body Aspen, the leaf spring locator pins lined up perfectly.
 
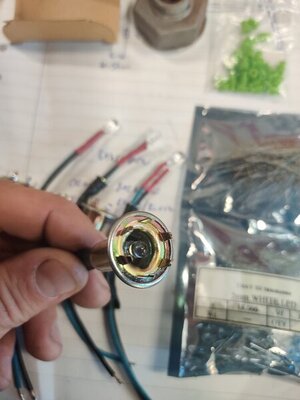
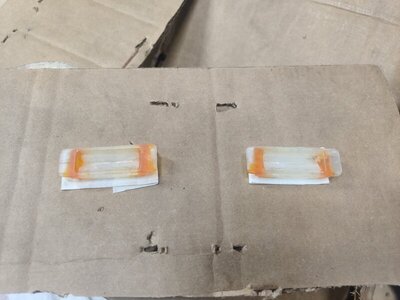
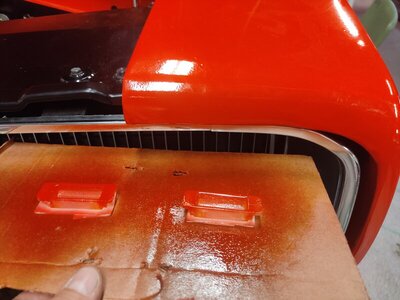
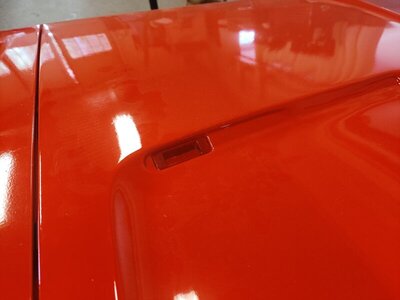
I got light, Converted the side markers to LED and started on the hood turn signals. The old plastic was really faded. More clear than orange so I tried to tint them with some red paint. Soldered in the LED socket and sorted out the wiring with some poly-sleeves.
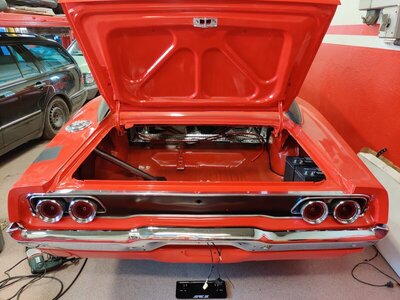
Everything electrical completed on the front end so I continued with the rear. Almost done with all wiring.

IMG_20210617_175745.jpg IMG_20210617_175750.jpg IMG_20210617_180041.jpg IMG_20210617_170020.jpg IMG_20210617_170350.jpg IMG_20210617_203136.jpg IMG_20210616_195816.jpg
 
Finally had some good flow in the garage today, only got like three hours but got the driveshaft bolted on for good. @Fran Blacker @biomedtechguy it worked great with just swapping the cups!
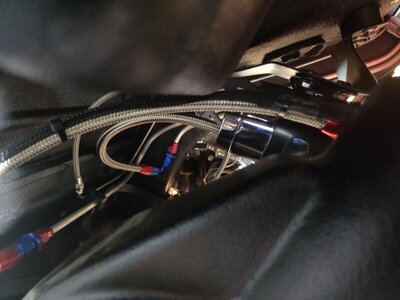
Continued with the rear wiring and connected the fuel pump and tank sender while I was already underneath the car.
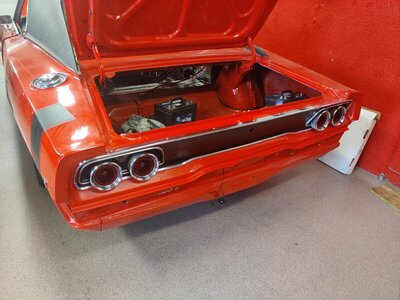
After that I fitted the tail lights and all the rear trim.

IMG_20210618_122326.jpg IMG_20210618_122627.jpg IMG_20210620_120635.jpg IMG_20210620_120658.jpg IMG_20210620_120722.jpg IMG_20210620_135539.jpg IMG_20210620_135812.jpg
 
Rear wiring completed. What's left now is the engine and center console control buttons for various stuff. The anxiety is building up for first start now..
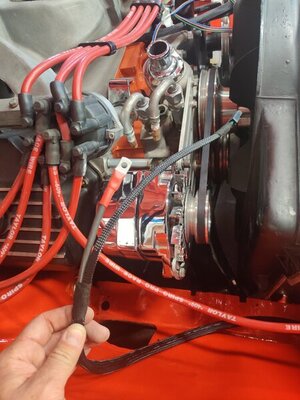
Found a kevlar loom for heat protecting the starter wiring.
I think the hood turn signals turned out fine in red. Doesn't stand out from the red hood.

IMG_20210625_124445.jpg IMG_20210625_124417.jpg IMG_20210625_124521.jpg IMG_20210625_124832.jpg IMG_20210625_124932.jpg IMG_20210625_124757.jpg
 
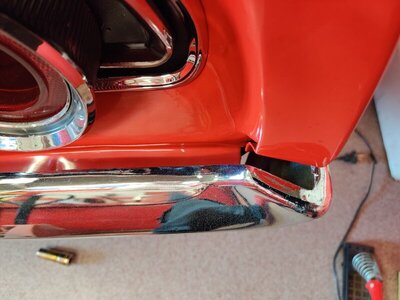
Had a decent bumper that I put some elbow grease on. It's not perfect but fits the shape of rest of the car. I'm missing the bumperettes but I had some bumper bolts att least. Kind of rusty but I sand blasted and zinc plated them.
I'll try and blend in the rear view camera in the number plate holder to make it stealth.

As usual, fitment sucks. I measure a 11mm difference in the gaps between right and left side! What to do? Modify the left side bracket to get the bumper closer to the tail panel?

IMG_20210626_121509.jpg IMG_20210626_122049.jpg IMG_20210626_124313.jpg IMG_20210626_124337.jpg IMG_20210626_124401.jpg
 
My wife convinced med that we needed to paint the house and the belonging buildings so I've been busy cleaning and prepping..
Sneaked off into the shop for a couple of hours today and finished the engine harness and power distribution. I could actually turn the engine now IF everything is wired correctly..

IMG_20210708_200346.jpg IMG_20210708_173308.jpg IMG_20210708_175447.jpg IMG_20210708_200353.jpg IMG_20210708_200400.jpg IMG_20210708_200417.jpg IMG_20210708_200440.jpg IMG_20210708_203804.jpg IMG_20210708_203813.jpg IMG_20210708_203835.jpg
 
House maintenance and honey do's take priority. Can't wait till I get all the work done here so I can get cracking on my car.
 
Almost done with the house and garage now so the wife is happy and I got some much needed work done on the Charger!
Happy wife=Happy life!

I don't want to start this thing up without exhaust so I got started on that today.
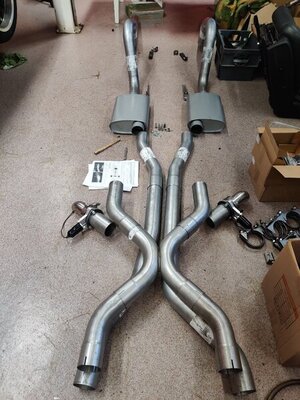
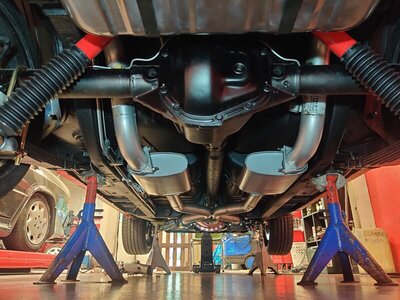
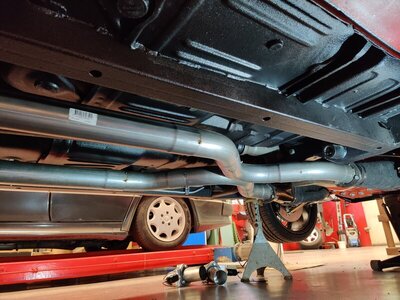
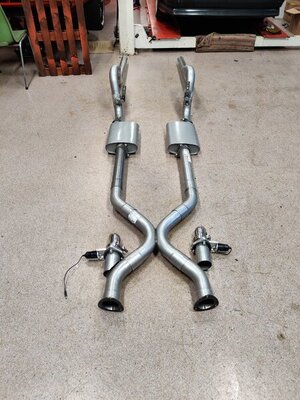
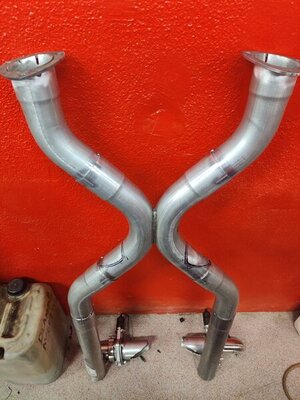
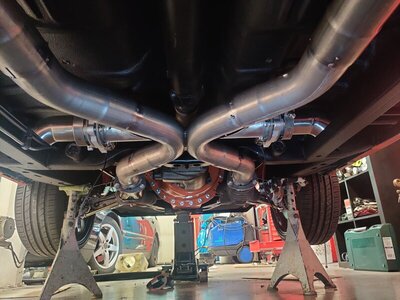
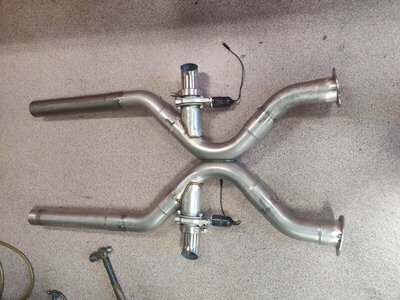
I ordered a 3" system from Summit, did a mock up and it didn't fit very well but no big deal there, I'm going to modify it anyways and want it tucked up really well. So cutting and welding is in the plans. Will also add an x-pipe and cut-outs.
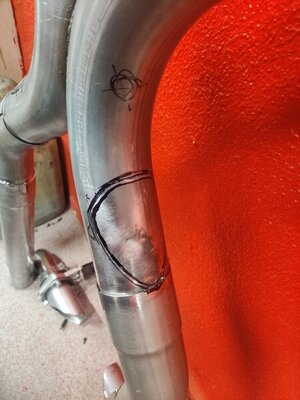
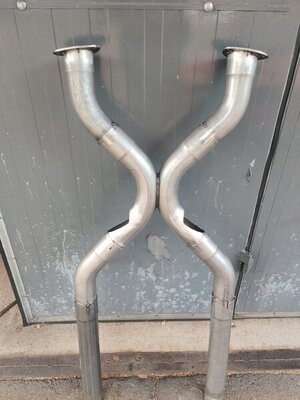
But what I didn't plan for was that the header collectors was 3,5", not 3"! Couldn't source any locally so I just did a template and cut some myself. Quicker than waiting for an overseas order. Got that sorted, mocked up the x-pipe and tacked it in place. Then I started from the rear passenger side to establish where the mufflers would end up.
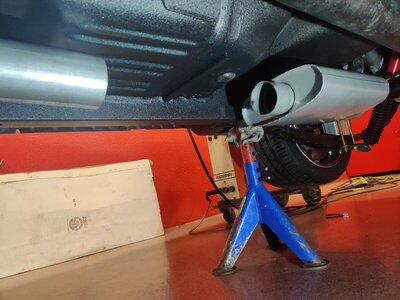
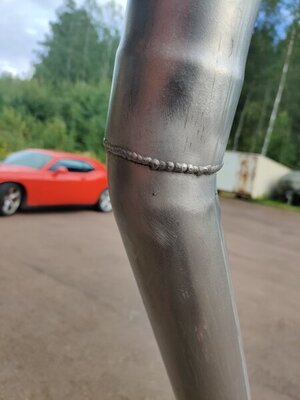
The bent pipe going up above the axle was way to tall so I cut off a little bit more than an inch to get the muffler closer to the floor and tacked it together again.
Made some custom hangers in the rear, also with the intention of getting the exhaust outlets as close as I could to the rear valance.
So passenger side is almost done. Just need a short straight piece from the x to the muffler.
Does anyone know where to find some good looking square outlets similar the old SS outlets but for 3"?

IMG_20210727_174554.jpg IMG_20210727_180257.jpg IMG_20210731_164010.jpg IMG_20210731_170518.jpg IMG_20210731_201200.jpg IMG_20210731_201238.jpg IMG_20210731_212529.jpg IMG_20210731_212604.jpg IMG_20210731_212625.jpg IMG_20210731_212811.jpg
 
All pieces measured in, cut and tacked together and hangers adjusted. It's quite close to the floor in some places, about 10mm, I wanted it as close as I possibly could to get ground clearance. Lowest point is still the headers.

I'll keep the clamps in/out on the mufflers only, rest of the joints gets welded. I don't like clamps..
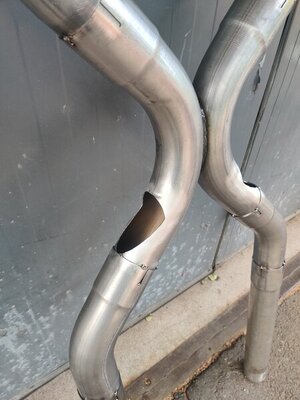
Started to cut in the cut outs but it was a bit tricky so not done with them yet.
Now I just need to convince my brother to help me weld, just looks so much better when he does it!

IMG_20210810_192424.jpg IMG_20210810_192531.jpg IMG_20210810_192650.jpg IMG_20210810_192714.jpg IMG_20210810_202711.jpg IMG_20210810_202720.jpg
 
The US car tools subframe connectors and torque boxes look great.
I'm happy with mine, but I haven't had time or money really to drive my car much since last October.
Pretty depressing, but this too shall pass. (Then WATCH OUT!) LOL
 
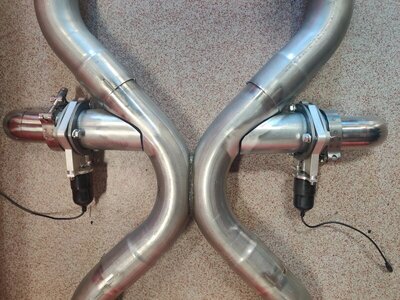
Did some more work on the exhaust. Cut out holes for the cut-outs and tacked them in place. Cleaned up all areas that needs welding with a wire-wheel so now I just need to get my brother on it!

IMG_20210817_210000.jpg IMG_20210817_205956.jpg IMG_20210818_184535.jpg IMG_20210818_184523.jpg IMG_20210818_185759.jpg IMG_20210818_191259.jpg IMG_20210818_193220.jpg IMG_20210818_201818.jpg
 
Again, your work and car are fantastic.
I'm prefacing with that so as to not have this misconstrued. I like the lower profile of that design (and almost all manufacturers use that basic design) electronic cutouts, but I really believe the Doug's design is better. The advantages for the Doug's design I perceive and have experienced are: The opening is completely unobstructed which means better flow, and better longevity than the "butterfly" assembly. The ones like yours are always exposed to very high temperature exhaust gasses. The "guillotine" design completely moves the blocking plate out of the way.
It's also "self cleaning" in that as the plate slides, if there is any carbon buildup, it is scraped away and blown out of the system.
I've had my Doug's for at least 5 years. The only problem was replacing a motor, that had a serial number in a recall, and they sent 2 replacement electric motors of which I only used the one I needed and kept the spare, all paid for by the manufacturer.
I'd appreciate your input and that of others, but I don't want to sidetrack your build thread.
Doug's 3" cutouts, just like mine:
dou-dec300ak_xl.jpg
 
Nice work on the exhaust, looks great and should sound pretty nasty with the cutouts cracked open:thumbsup:
 
Again, your work and car are fantastic.
I'm prefacing with that so as to not have this misconstrued. I like the lower profile of that design (and almost all manufacturers use that basic design) electronic cutouts, but I really believe the Doug's design is better. The advantages for the Doug's design I perceive and have experienced are: The opening is completely unobstructed which means better flow, and better longevity than the "butterfly" assembly. The ones like yours are always exposed to very high temperature exhaust gasses. The "guillotine" design completely moves the blocking plate out of the way.
It's also "self cleaning" in that as the plate slides, if there is any carbon buildup, it is scraped away and blown out of the system.
I've had my Doug's for at least 5 years. The only problem was replacing a motor, that had a serial number in a recall, and they sent 2 replacement electric motors of which I only used the one I needed and kept the spare, all paid for by the manufacturer.
I'd appreciate your input and that of others, but I don't want to sidetrack your build thread.
Doug's 3" cutouts, just like mine:
View attachment 1154387
I think you are correct, that design looks a lot better! I'll do with this for now but if/when the butterflies break down I know what to replace them with, thanks!
 
I think you are correct, that design looks a lot better! I'll do with this for now but if/when the butterflies break down I know what to replace them with, thanks!
Thanks for the kind reply.:thumbsup:
Just look at clearance first, as my cutouts, where the exhaust block off plates retract into, is one of the lowest points of my car.
 
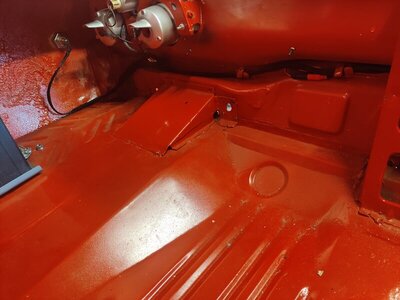
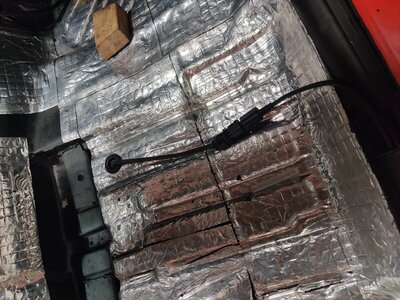
My brother helped me weld the exhaust today, looks a lot better than my work! I almost forgot to weld in the wideband O2 sensor bung but now it's there. Placed it in the "X" angled slightly upwards. Also made a new hole for the cables in the floor so it's all done now.
I suspect that the O2 reading won't be correct when the cut-outs are open but who cares, I'll adjust the mixture when they're closed anyways.
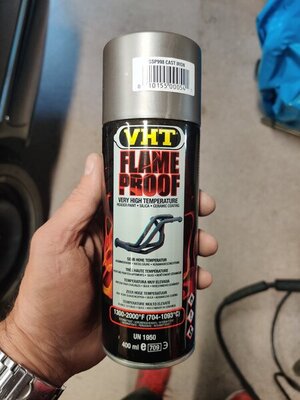
Painted the exhaust with VHT cast iron flameproof paint. Looks Good imo.

IMG_20210819_182949.jpg IMG_20210819_191727.jpg IMG_20210819_201104.jpg IMG_20210819_182919.jpg IMG_20210819_200408.jpg
 
Auto Transport Service
Back
Top