Follow along with the video below to see how to install our site as a web app on your home screen.
Note: This feature may not be available in some browsers.
When you click on links to various merchants on this site and make a purchase, this can result in this site earning a commission. Affiliate programs and affiliations include, but are not limited to, the eBay Partner Network.
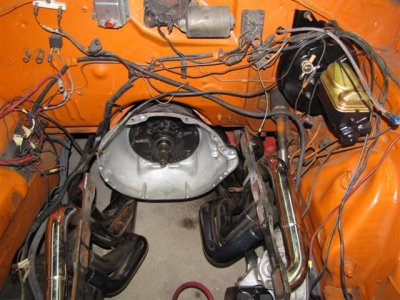
I have a 70 Road Runner and I am using the CNC front engine plate from Mancini. How do I ensure that the engine is properly place in the engine bay? Is it off centered to one side or the other and if so by how much?
Do you still have the stock engine mounts etc in the car? If so, that is one way to get it where it should be but most plates I've dealt with will at least get you pretty close. And yes, the engine sets more towards the passenger side. I don't remember the exact number off the top of my head but iirc, it's around 1 5/8" over to the right.
If headers etc allow it...push it back as far as you can. You might have to 'adjust' the trans mount but 1" of engine set back does help and if traction is a problem, any little bit you can do helps. And it's not too hard to move the rear end forward either....
What are you guys bolting the plate to in the engine bay?
I have debated doing this on mine as well, but not to sure on what can hold up to the engine torque?
A piece of angle iron or aluminum, 1.5x1.5 mounted to the top of the frame rail. Some thru bolt it to the frame and some weld it. I've even seem some with a rubber pad sandwiched in between the angle and the frame....
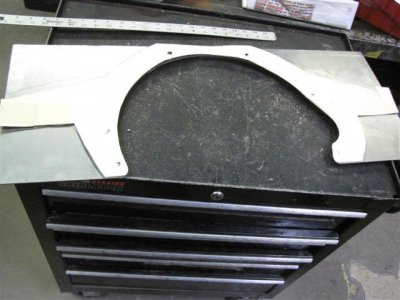
I am going to try and add some pics for you guys. As you will see the original solution was the brown cardboard cutout, but that solution hit the headers so I went with the white cardboard template!
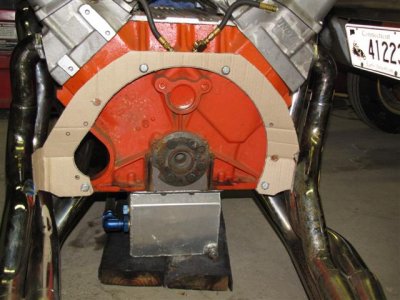
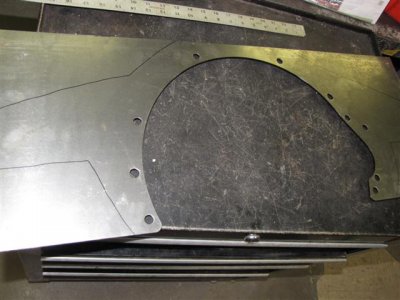
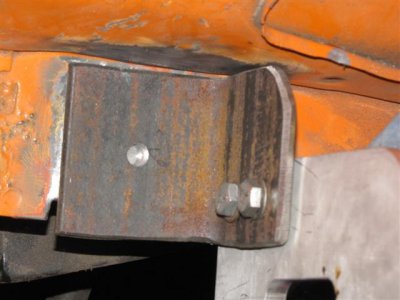
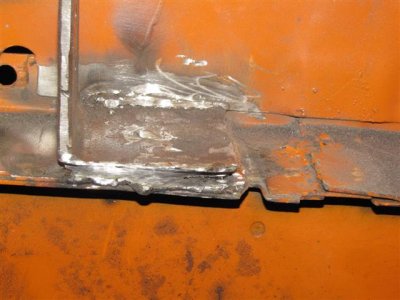
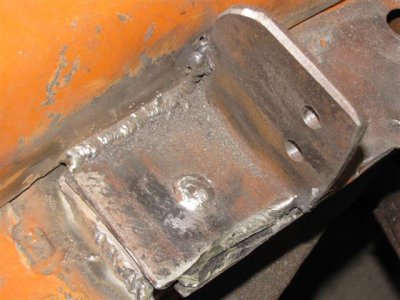
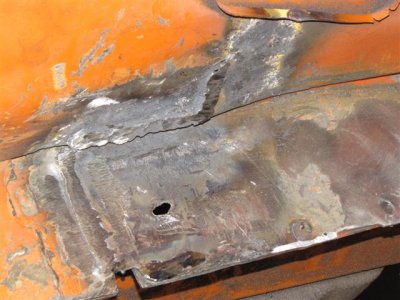
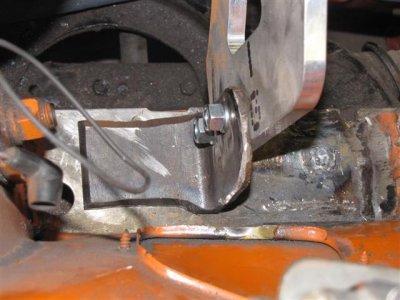
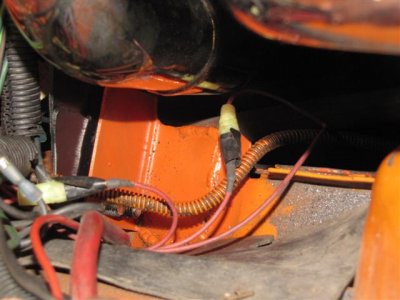
A few more! I had to extend the ears on both sides since the new pattern was going to sit on top of the frame rail. As you can see I welded the brackets to the frame and bolted them to the plates. The plasma cutter worked like a dream.
A friend from another site suggested that I weld the brackets on the back side of the plates. Just trying to confirm or negate this thought from anyone who is knowledgable about engine plates?
Another quick question, I have the Indy 8qt aluminum oil pan with the square hole cut out for the tie rod. I can't seem to get mine to hook up on both ends. Does anyone have a similar set-up that can tell me or show with pics, how you made it work?
Wedge five thank you for your reply. Can I ask you how much HP you are weilding and is you car a driver or drag application? Have you had any issues with your bracket being in front of the plate? And finally do you also use a mid-plate? Thanks for your help!!!
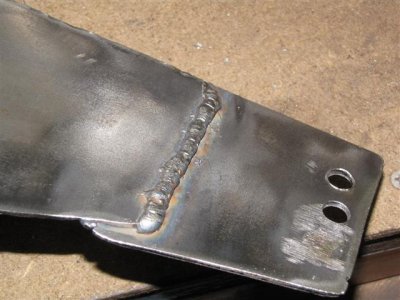
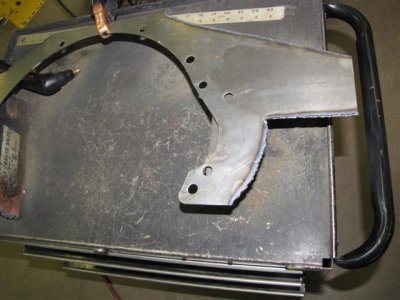
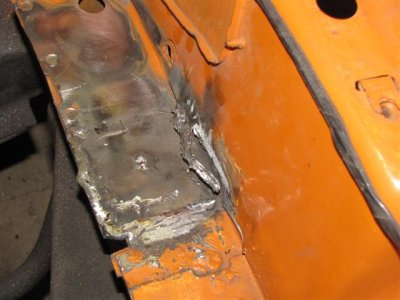
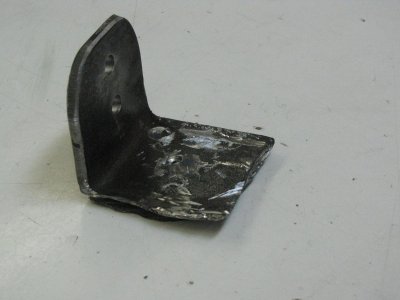
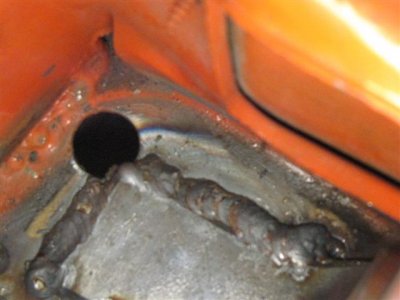
I had to cut out the brackets that I welded on as my setup would have made it impossible to get the engine out without first removing the tranny. It took a lot of time and effort to correct this error. Here are a few pics of the fix. Hopefully I will have the engine and tranny back in today so I can position and weld in the new brackets.
I always put my bracket on the back side of the motor plate so you don't have to raise the motor up first to move forward to get it out of trans.it seems to be easier that way to me..Artie
And you don't have to gorilla weld the brackets either....especially on the passenger side. The torque of the engine compresses to that side and you really only need about half the amount you are laying down on the driver's side.
I don't know if I will have time this week to work on it, but when I get this part completed I will share the pics here. Thanks for your comments and suggestions. I will definately omit the rosebud weld in the middle and just hit it on the back and two sides of the bracket.
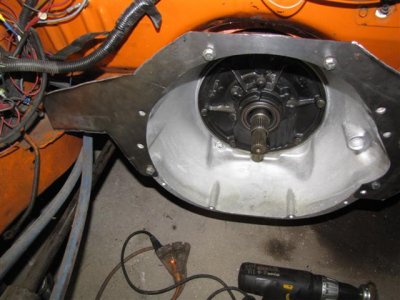
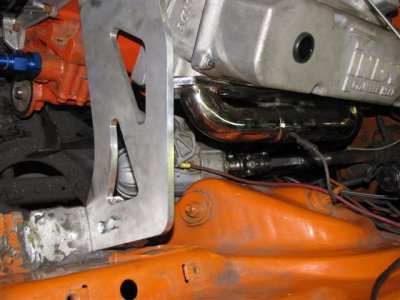
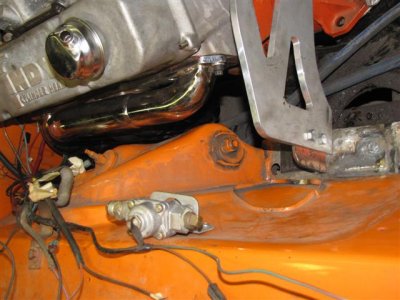
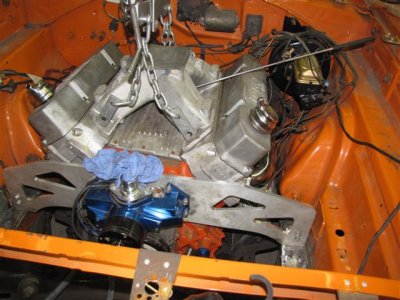
The brackets are welded in and the engine is properly positioned with the mid-plate and the headers fit. These TTI headers are huge, but they fit like a glove. I have some pics below for you, but I have to take the engine out one more time to out the torque converter in and the flex plate on the crank.
I think you'll need to replace your water pump. The color scheme is all wrong.
Ok,, OK,,,, I'll let you give it to me!
LOL!!
I realy like that water pump!