You are using an out of date browser. It may not display this or other websites correctly.
You should upgrade or use an alternative browser.
You should upgrade or use an alternative browser.
'64 330 Street Hemi build
- Thread starter 2059
- Start date
2059
Well-Known Member
- Local time
- 11:30 AM
- Joined
- May 4, 2012
- Messages
- 1,332
- Reaction score
- 659
- Location
- North Central Indiana
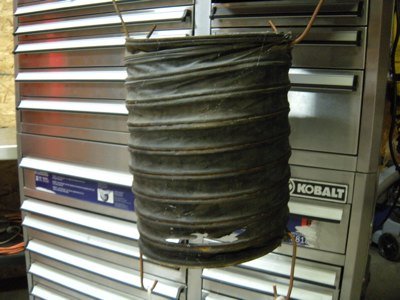
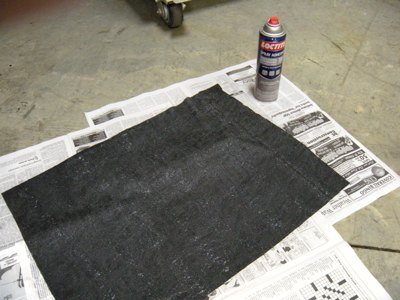
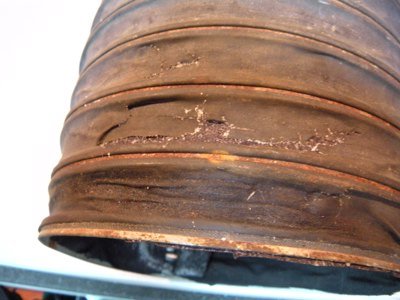
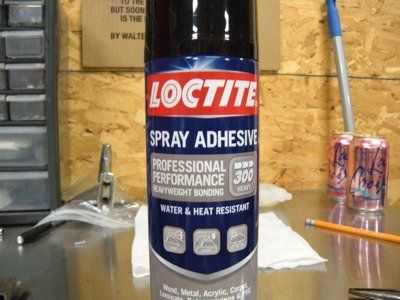
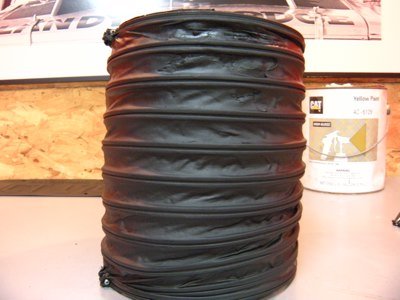
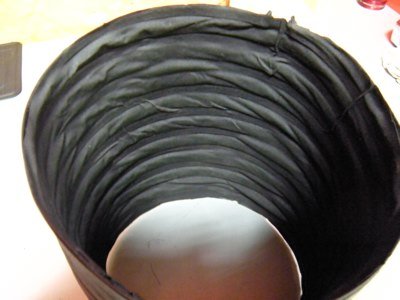
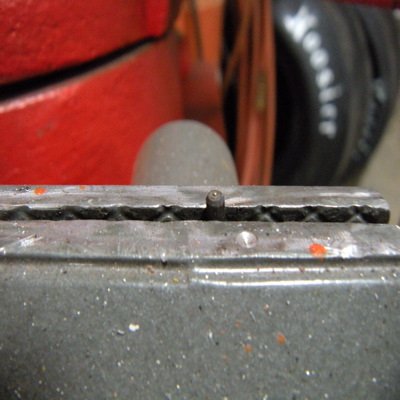
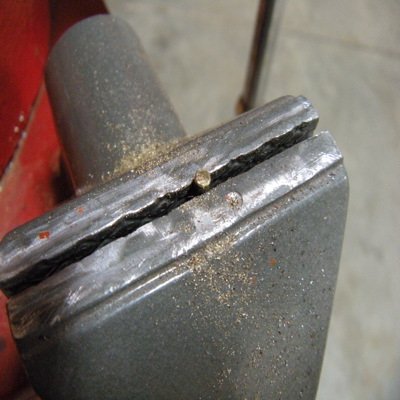
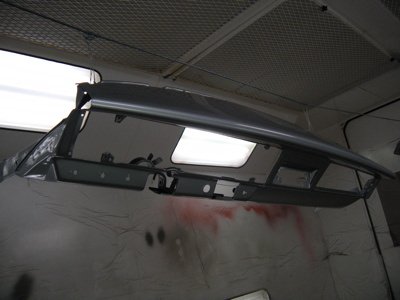
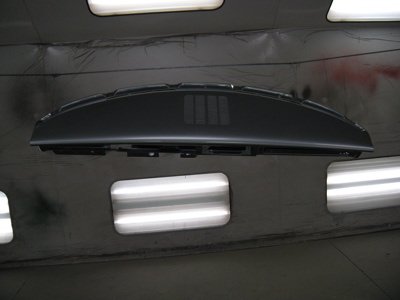
We're gonna file this one under.... " I can't believe this actually worked out pretty well." category. i'm not sure what order these pictures will load so here's the problem/project. The main fabric hose inlet for the heater was ripped and very fragile. after about two months of looking for reproduction hose, with no luck, I decided I'd have to fix this one. Went to Walmart and bought a half yard of black cotton fabric. From work, I brought home a can of heavy duty spray adhesive. Followed the instructions on the can for maximum bond and lined the INSIDE of the vent tube with the fabric. it's a little tricky, but can be done. had to make sure there was glue on all parts. as you can see there a few rips and rotted spots. The reason for the interior "lining" is to reinforce the old fabric and cover any holes. After trimming the extra fabric and re-gluing where necessary, removed and polished the screws, and spray painted the exterior flat back. If you try doing this make sure you lightly stretch the vent before installing the interior fabric.
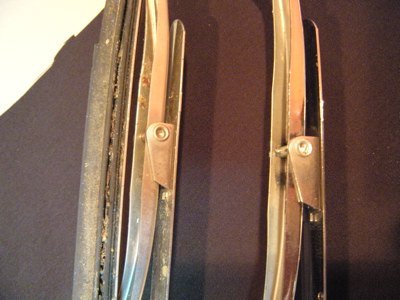
The reason for showing the before and after on the wipers is because they had to be almost completely disassembled to polish them with the bench grinder outfitted w/ a buffing wheel, which means drilling out the rivets. replacement rivets can be bought at MSC Ind. or at true Value that carries Hillman fasteners. they are 1/8" x 1/2" tube rivets. if anyone out there is thinking about doing this and was hesitant to drill the rivets, you can get replacements off the shelf.
A little more "wordy" then normal, but these were a couple of projects that stumped me for a bit until a solution came. Hope it helps...
Attachments

2059
Well-Known Member
- Local time
- 11:30 AM
- Joined
- May 4, 2012
- Messages
- 1,332
- Reaction score
- 659
- Location
- North Central Indiana
2059
Well-Known Member
- Local time
- 11:30 AM
- Joined
- May 4, 2012
- Messages
- 1,332
- Reaction score
- 659
- Location
- North Central Indiana
Lol. It's for sale, but you'll need to buy the Challenger that goes with it... 90K should do...:toothy5:
2059
Well-Known Member
- Local time
- 11:30 AM
- Joined
- May 4, 2012
- Messages
- 1,332
- Reaction score
- 659
- Location
- North Central Indiana
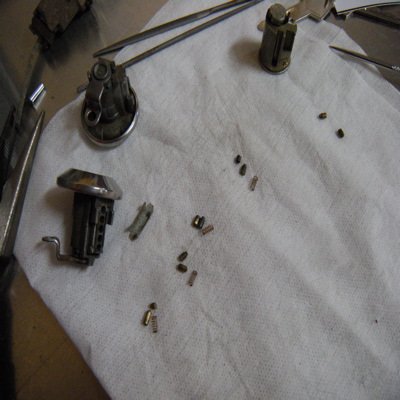
Door locks rekeyed to the replacement Ignition key. luckily I could use 4 of the 5 pins by re-arranging them in the door lock cylinder and only had to file down one pin. Was a locksmith in a past life.
Attachments
MoparMitch
Well-Known Member
- Local time
- 11:30 AM
- Joined
- Apr 12, 2011
- Messages
- 3,810
- Reaction score
- 2,838
- Location
- Friendship, Maryland
Wow!! Talk about takin care of the smallest detail. Awesome car and Awesome build. This will be an Unreal car when its done.
2059
Well-Known Member
- Local time
- 11:30 AM
- Joined
- May 4, 2012
- Messages
- 1,332
- Reaction score
- 659
- Location
- North Central Indiana
Wow!! Talk about takin care of the smallest detail. Awesome car and Awesome build. This will be an Unreal car when its done.
Thanks Chicken. Appreciate it, considering your project.
- - - Updated - - -
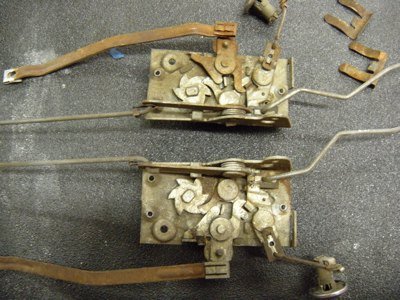
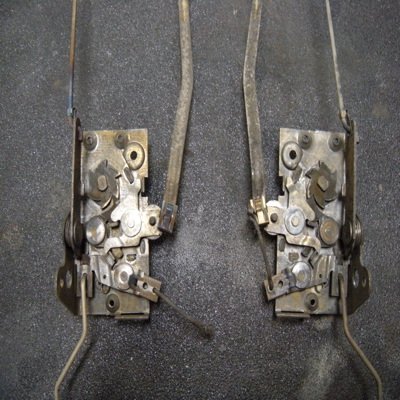
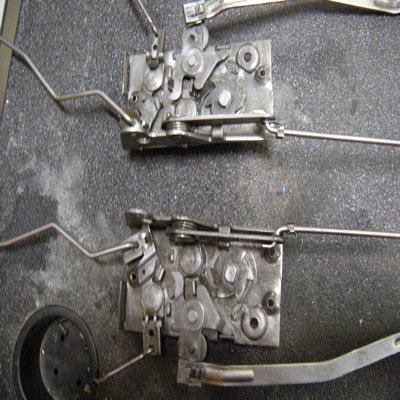
I never know how these shots will load. before and after on the door latches. Rusty raw, second is out of the molasses. then disassembled, wire wheel/brush and oiled/greased reassembled and ready to go.
Attachments
2059
Well-Known Member
- Local time
- 11:30 AM
- Joined
- May 4, 2012
- Messages
- 1,332
- Reaction score
- 659
- Location
- North Central Indiana
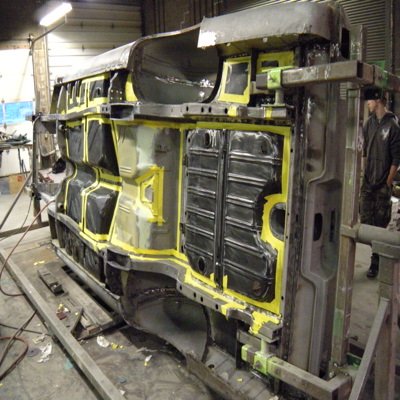
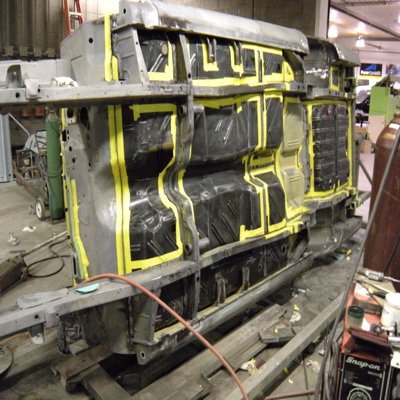
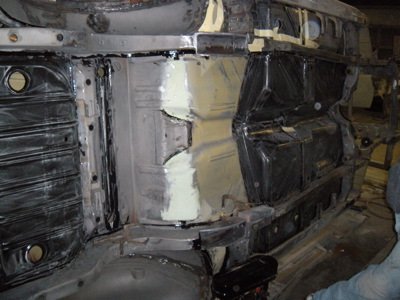
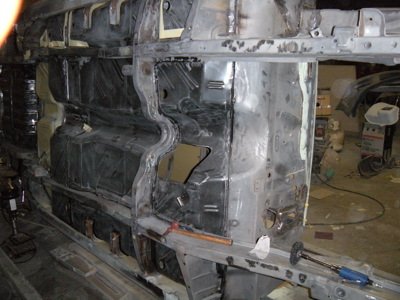
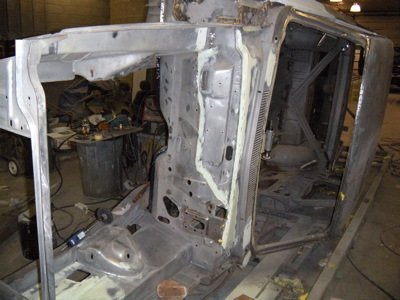
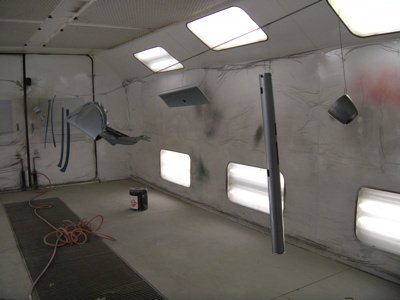
nothing super exciting this week, just grunt work. 2 part sealer applied and the start of D/A-ing the underside. The sealer cures to a slightly rubbery sand-able (80 grit) state. The shot from the rear shows the trunk pan sanded and along the frame connectors. a little repair work around the battery tray area and "knee dents" in the cowl.
Attachments

2059
Well-Known Member
- Local time
- 11:30 AM
- Joined
- May 4, 2012
- Messages
- 1,332
- Reaction score
- 659
- Location
- North Central Indiana
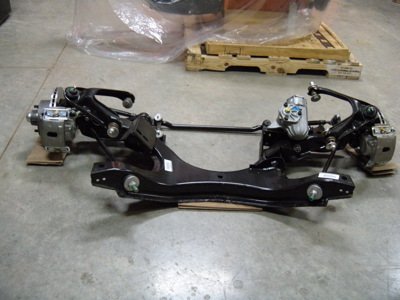
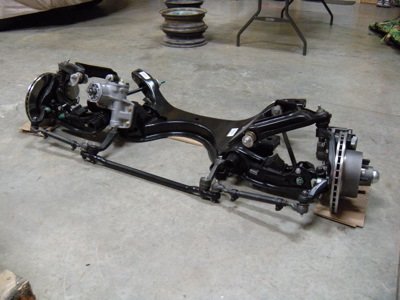
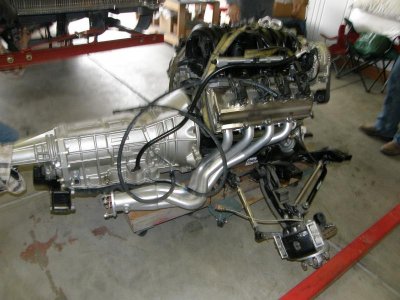
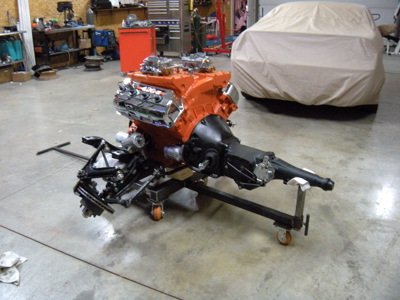
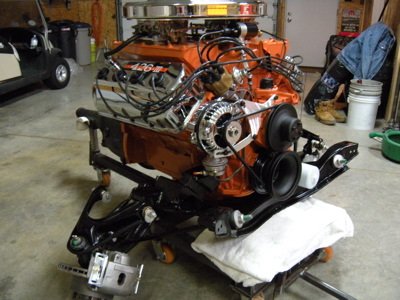
Again, not a whole lot shakin'. just cleaning and buying fasteners and misc. parts. (no one wants to see a pile of bolts). This is where the nickel and dime stuff comes in. Body work is moving along. picked up the narrowed dana from Moser on monday and dropped it off at the body shop so we can hang it and fab the upper link perches. also, picked up the front end from the freight dock yesterday and will be fabing a rolling cradle for it and the engine so I can get the headers installed and move the assy around ready for install sometime in February.
Attachments
2059
Well-Known Member
- Local time
- 11:30 AM
- Joined
- May 4, 2012
- Messages
- 1,332
- Reaction score
- 659
- Location
- North Central Indiana
Exactly 5.7!! IMO, that's the only way to do it. That's how we did the Challenger. What do you figure the 5.7 and the NAG1 weighs? 600-ish? I'm guessing the GenII and 833 is pushing 900# Might have to beef up the furniture dolly a bit. I'll weld up a piece next week.
That seems like a fair weight for my set up and I used a 1000lb--er for the engine and a 500lb--er for the trans. I'm sure the gen11 is a heavy s.o.b. so something like a 1500lb--er might be in order.
2059
Well-Known Member
- Local time
- 11:30 AM
- Joined
- May 4, 2012
- Messages
- 1,332
- Reaction score
- 659
- Location
- North Central Indiana
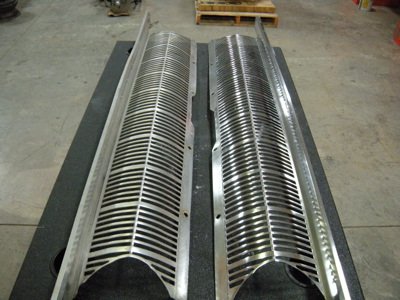
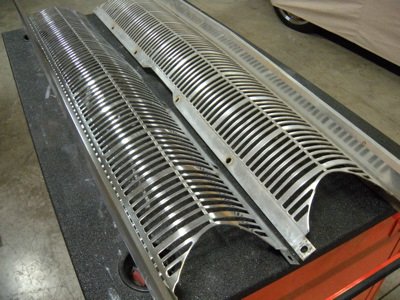
here's the before and after on the grill. i chose the best one of the two and had the anodizing stripped. The plater told me he wouldn't chrome the part because there was no way to get into the lower front to buff it. So i hand polished it and will have it clear powder coated. BTW; the casting quality of the grill is terrible. very porous.
Attachments
2059
Well-Known Member
- Local time
- 11:30 AM
- Joined
- May 4, 2012
- Messages
- 1,332
- Reaction score
- 659
- Location
- North Central Indiana
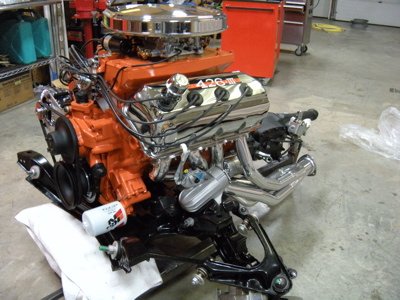
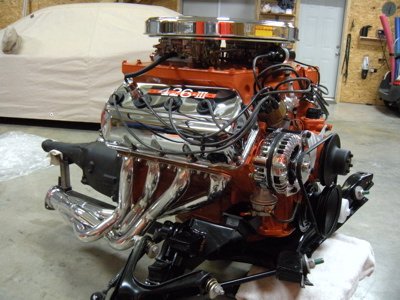
This weeks work. small stuff was the grill brkts, defroster vent reconstruct, (still need another plastic vent duct), gathering fasteners. saturday spent mounting the engine to the K-Member. the front of the oil pan was very close (almost touching) to the lower flange of the K mem. so I trimmed it off and re-welded/dressed/painted the K mem before mounting. Headers should be here in a couple of weeks.
Attachments


- Local time
- 11:30 AM
- Joined
- Jan 23, 2009
- Messages
- 6,761
- Reaction score
- 5,632
- Location
- New Jersey The State of Tax Theives
That car really wants the 426 Hemi instead of that 5.7 Motor.
2059
Well-Known Member
- Local time
- 11:30 AM
- Joined
- May 4, 2012
- Messages
- 1,332
- Reaction score
- 659
- Location
- North Central Indiana
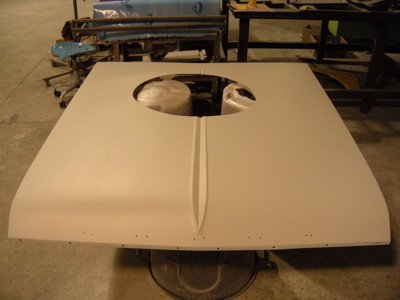
past weeks progress. slow detail stuff. hood prepped/primed ready for final blocking (deck lid in same cond.) color shot dash, garnishes, steering parts. We should be able to get the first layers of primer on the body this weekend. I'll have shots of it sometime next week.
Attachments
2059
Well-Known Member
- Local time
- 11:30 AM
- Joined
- May 4, 2012
- Messages
- 1,332
- Reaction score
- 659
- Location
- North Central Indiana
2059
Well-Known Member
- Local time
- 11:30 AM
- Joined
- May 4, 2012
- Messages
- 1,332
- Reaction score
- 659
- Location
- North Central Indiana
Beautiful. That is my absolute dream car.
Is the re-keying the locks something a novice can do? I'm running into the problem of getting a matches set for the 65'. Keep up the great work.
Thanks! Ya, you can rekey your own door lock cylinder. The first thing you need is the correct Keyway, which means the cross section of the Key must match the lock cylinder. There is a letter stamped on the key right above the blade. Most (all) keys sold on ebay don't tell you what keyway it is, you would need to ask, and they are worthless to you if it's the wrong one. Even the replacement aftermarket keys don't have the keyway "letter" stamped on them, they are simply matched to the replacement cylinder. (starter switch, trunk lock, etc...). If you have the correct keyway and it already has been cut for another lock, let me know and I'll explain. BTW. I haven't figured out how to rekey the trunk lock without destroying it. I just bought a replacement.
Similar threads
- Replies
- 0
- Views
- 136
- Replies
- 31
- Views
- 3K
- Replies
- 1
- Views
- 113


