• When you click on links to various merchants on this site and make a purchase, this can result in this site earning a commission. Affiliate programs and affiliations include, but are not limited to, the eBay Partner Network.

67 Coronet build thread

Thanks Ken!
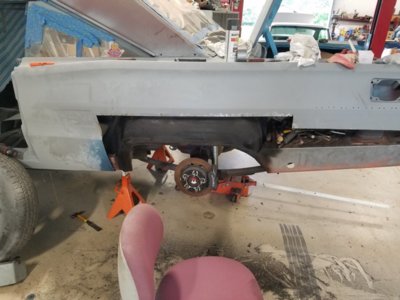
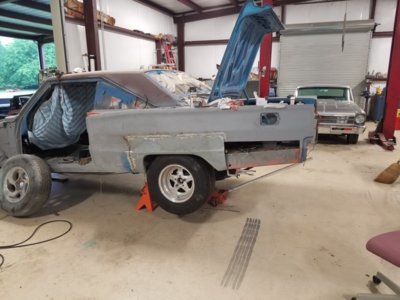
There's some dent repairs on the right door that looks like they beat it with a ball peen hammer, the drivers door has a crease in it but I think I can dolly it out.
There was a lot of filler in some places, not because of rust but to cover dents..
My initial plan was to fix the floor pan, get it on the road and do a little at a time...but I figured I went this far, might as well do it all right while it's down..
Good idea. Looking great, keep at her...
 
Thanks Ken!
There's some dent repairs on the right door that looks like they beat it with a ball peen hammer, the drivers door has a crease in it but I think I can dolly it out.
There was a lot of filler in some places, not because of rust but to cover dents..
My initial plan was to fix the floor pan, get it on the road and do a little at a time...but I figured I went this far, might as well do it all right while it's down..
It’s better to get it done at the same time Mike. Especially if you have the room to work on it properly, it’s better in the long run. I did a lot more than I originally planed to also but that usually can’t be helped.
 
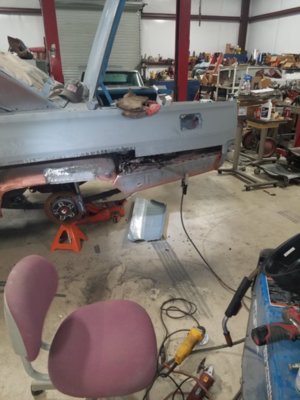
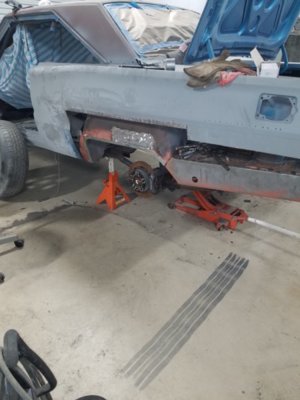
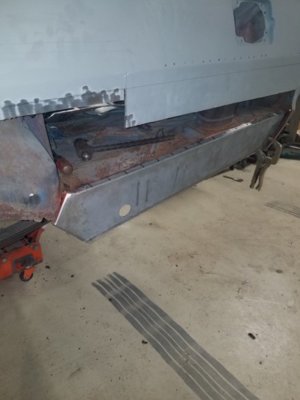
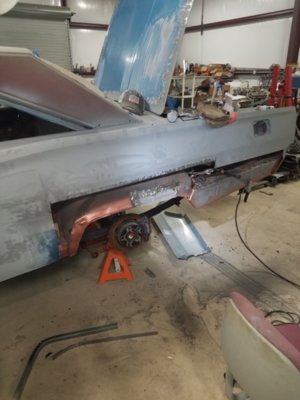
Man made so really go progress yesterday. They sent me these righttrunk extension so I was able to tackle that. My trunk it really solid and the lowers were the problem area. So unstated of replacing the whole section I spliced it in to the existing.
The Sherman panel seemed to be a little smaller that the origunal, but luckily they have a lot of extra metal on the edges so I was ablento flatten the lower out and re-brake it. It Fit perfect!
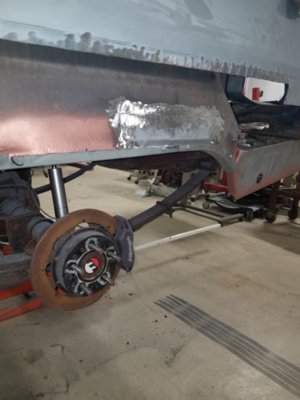
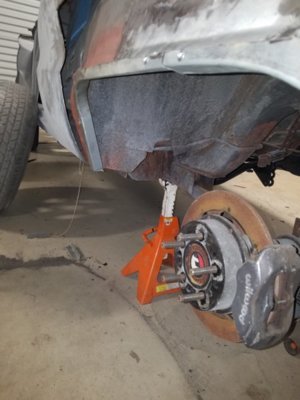
The wheel wells were a little more difficult. There wasn't much left of the original lip probably about 3 inches worth.
Never doing this before caused me to have two major concerns, one if repaired incorrectly would change the position of quarter, 2. I didn't want to work from the inside the well out!.
Overall it may not be perfect or the way others would have done it but the fitt was perfect, there is no more rust, I have a wheel well lip and the panel is perfect!.

20180407_134442.jpg 20180407_173104.jpg 20180407_173110.jpg 20180407_183821.jpg 20180407_183837.jpg 20180407_183848.jpg
 
Nice work, bring it back to the beauty it once was my hat is off to all you guys that got the guts to handle such a job will be watching you.
 
That looks eerily familiar! I actually did the same thing with mine. Feels good to wrap these jobs up though. Each step is huge.

Looking good! :thumbsup:

Ya I'm pretty happy with it, I still need to tack the lips in place and weld one seem...if you have any pics of what you did I would really like to see them!
 
Got my project just collecting dust. I'm just collecting parts and info as what i want to get done. I also need to learn how to post pics. Not to good with this high tech stuff. I can rebuild cars but can't take a picture and post it lol
 
This ones been sitting about 3 years, I have accumilated a stockpile of parts during that time... which, makes the financial burden seem diminished in a weird sort of way.
As far a uploading pic its pretty easy, they just need to be in the right format.
 
I agree with parts pile. How do i get to the format
 
When ever you save a pic it typically will format itself, such as jpeg, tiff or image. Just dave/download it somewhere that you will remember. So when your here and you want to posting the upload photos button, choose the location you've stored your photo select it and wait until it uploads!
 
Ok thanks will go play with it to see if i can get it
 
Ya I'm pretty happy with it, I still need to tack the lips in place and weld one seem...if you have any pics of what you did I would really like to see them!

My build thread, linked below, shows all the pics I took of doing this part. It was a slow process.....4,174,293 spot welds later.........:). But well worth it, my car is solid and should be on the road within a couple months now! Here is an example of my task.

IMG_1432.JPG
IMG_1435.JPG
 
Last edited:
My build thread, linked below, shows all the pics I took of doing this part. It was a slow process.....4,174,293 spot welds later.........:). But well worth it, my car is solid and should be on the road within a couple months now! Here is an example of my task.

View attachment 592931 View attachment 592932
Wow those wheel well lips great! Mine were so rusted out I had to build them back with angle. My stretcher wouldn't make a tight enough radius for the forward lip so I just split it, the plan is to weld everything back to make it seamless.
It was a pain getting the height and forward position right with very little references but it spot on now.
 
Your car is looking great brother im debating on doing mine the original owner cut most the wheel well lip off so its replace the entire thing like you or spend hours fabing the lip back lol
 
I just bought the 18ga. 1x1" angle and stretched it cut back the bad metal and am going to stich it in. There's more than enough lip on the replacement panels that will allow me to spot weld those. As a matter of fact I am going to have to trim it down in the middle to fit that 12" wide tire in there, it will still leave me with 1/2-5/8" lip.
 
I just bought the 18ga. 1x1" angle and stretched it cut back the bad metal and am going to stich it in. There's more than enough lip on the replacement panels that will allow me to spot weld those. As a matter of fact I am going to have to trim it down in the middle to fit that 12" wide tire in there, it will still leave me with 1/2-5/8" lip.
Think ill have to try doing that with mine ive got 17 1/2 wide tires lol
 
Got a little bit done this weekend, first section is tacked, wheel well is finished...

20180421_144700.jpg 20180421_183940.jpg
 
Auto Transport Service
Back
Top