• When you click on links to various merchants on this site and make a purchase, this can result in this site earning a commission. Affiliate programs and affiliations include, but are not limited to, the eBay Partner Network.

68 GTX Project

Cleaning garage today!


This is waiting patiently to get inserted into the car!

20160619_214047[1].jpg


Too bad they both won't be hemis!


20160619_142204[1].jpg


Now which third member to restore; 2 or 9, 3.23 or 4.11 ratio?


20160619_131650[1].jpg
 
Curious, the "2" housing has the 4.11 gears and a small yoke. Can I interchange the "guts" (pinion) in either housing?
 
No, the pinion is a different diameter between the 741 742 and 489 cases. Nothing wrong with the 4.11 in the 742 case. I have 3.55s in a 741 that are in my 69 gtx project.
 
No, the pinion is a different diameter between the 741 742 and 489 cases. Nothing wrong with the 4.11 in the 742 case. I have 3.55s in a 741 that are in my 69 gtx project.

Ahh, thanks, I thought as much. I have to do some research. I know that and other questions are easily answered as the interweb.
 
Interesting, thanks for the info. By any chance are there pictures available showing the difference?
I "might" have the mouldings 5wndwcpe is talking about. When I was cleaning all the parts out of my car there was a pair of mouldings about 1.5" tall and long enough to run the length of the rocker. I thought they might be for an A body as the guy I bought the car from was mainly into A bodies. I'm pretty sure they don't go on my 69.

I can get a measurment and some pics of what I have. If anyone knows the specific dimensions let us know.
 
Here are some pics of what I have. 77 3/4" long x 2" wide. Origin unknown, were inside my 69 GTX.
20160625_174701.jpg
20160625_174730.jpg
20160625_174749.jpg
20160625_174800.jpg
 
So it begins...


No Frame!
20160702_113146.jpg


Old Frame
20160702_113201.jpg

New Frame

20160702_113153.jpg


Yes Frame
20160702_134650.jpg
 
The trunk floor looks nice! one piece. Take your time lining up everything and don't finish weld anything until

the lineup is perfect. Nice!
 
Take your time lining up everything and don't finish weld anything until the lineup is perfect. Nice!

Yeah I hear ya, I'm kind of OCD that way.....spend way too much time making things perfect.....if I'd learn to let some **** slide now and again maybe this wouldn't take so long!
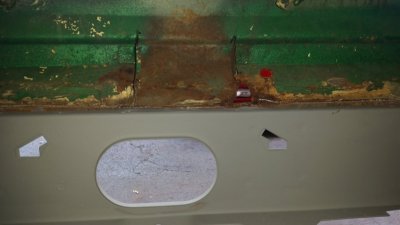
 
Yeah I hear ya, I'm kind of OCD that way.....spend way too much time making things perfect.....if I'd learn to let some **** slide now and again maybe this wouldn't take so long!

Come on down to my garage, I'll teach you! Lol

Frame is looking good. One more hurdle out of the way.
 
OK, final fit up today. Things are dang near perfect....well with in an 1/8" or so. My problem is I don't know what to believe is accurate for reference points. Generally I used the forward spring hanger and the holes in the frame. It's kind of hard to see in the pictures but even the waves and markings from the stamping process pretty well line as well....I thought that was a bonus.

I left the sides of the new frame long and they lap into the old frame. The bottom of the frame rails and the top flanges butt together.

You can also see the rear cross member extensions line up almost perfect with the tabs from the old ones that I left in place for reference.

Now time to remove the frame and clean everything for welding...

Any thoughts on how to flange the sides of the frame for the lap joints?


20160703_143852.jpg
20160703_143926.jpg
20160703_143949.jpg
20160703_144025.jpg
20160703_144032.jpg
20160703_144111.jpg
20160703_144012.jpg
 
The other interesting thing that I found out is that both the upper support for the gas tank and cross member for the shocks were welded in out of square at the factory by about a 1/2"...I left them that way.
 
Normally when butt splicing a frame like that you would make a plug the goes on the inside. It would be the same shape of the frame rail, just small enough to fit inside the existing rail(s).
 
IMG_0050.JPG
IMG_0052.JPG
Tach.JPG


OK, I got my good old pops working on my instrument clusters. I have two 150 (15) MPH units and one 120 MPH unit.

The pixs above are from the crashed '69 'X. It happens to have the only tach out of the lot. Ironically for having the lens cracked and now expoxied back together, the lens looks great. It is very clear and free of scratches. I wonder if the repaired area on the lower edge of lens will be visible or hidden?

The tach needle is free, moves and comes back to zero so the instrument is probably good. Any thoughts on what can be done to restore the face? I thought I saw some stencils out there for repainting our gauge faces....I think I will start a separate thread on that topic.

Anyhow if anyone needs cluster parts hit my up, I have three and need one.
 
Last edited:
If you find stensils I would be interested in where you got em. I have a spare tach that is crusty and needs some tlc. My car also came with a spare gauge cluster and random dash pieces.
 
Some action and some progress! Sandblasting and patching up the recovered rear wheel houses, and test fitting. The OEM wheel houses fit great. Going to get all the marginally accessible stuff patched and cleaned up before I put the a$$ of the car back together.


20160723_150131.jpg
20160723_150157.jpg
IMG_2362.JPG
IMG_2366.JPG
IMG_2368.JPG
20160901_135949.jpg
20160906_221525.jpg
20160906_221615.jpg
20160906_221629.jpg
 
Auto Transport Service
Back
Top