You are using an out of date browser. It may not display this or other websites correctly.
You should upgrade or use an alternative browser.
You should upgrade or use an alternative browser.
Hawk-Rod: The Restoration
- Thread starter HawkRod
- Start date
So no pictures yet, but I am pretty happy.
I just energized my electrical system for the first time. To be safe, I hooked up the positive side with a fuse so if I had any major problems it wouldn't cause any big damage (fuse between the battery cable and battery).
It's ALIVE! The first thing that came on was my key in buzzer. I think this is the first time I have heard that buzzer and NOT been annoyed! :grin:
Many lights work (although a couple bulbs or grounds might need some work), my clock works, radio comes on (no antenna yet), dome light works, map light works, running lights, etc. So far, so good!
Of course, I have a lot more checking and work before I can declare victory, but this is a good first step.
Damn, I have to go to work tomorrow.............................:angryfire:
Electrical work can be very rewarding for sure especially when you've had your fingers all through it and it still works haha. Congrats on the milestone.
I had a good day today!
So I systematically worked to check electrical circuits today. At this point, I have checked out just about everything except the Fuel Injection and related ignition stuff to make the engine run. I also need to do a final check of the heater and A/C controls. Besides those, I have checked and have all other electrical systems working! :hello2:
First I started checking all circuits that are powered without the key, like headlights, running lights, dome lights, key in buzzers, cigarette lighters, clock, horn, flashers, etc. I did need to clean up and improve grounds for the rear lights, since NONE of the were working. In all cases, it was due to paint that kept grounds from flowing electricity. Once the grounds were cleaned up, everything worked.
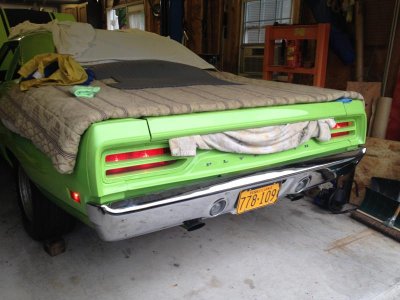
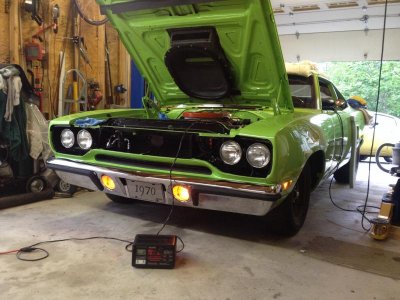
I then moved on to circuits powered with the key, so this included things like turn signals, rear defogger, brake warning light, wipers, washers and the radio. Also, to test the reverse warning light, I needed to install the shifter. Cool!
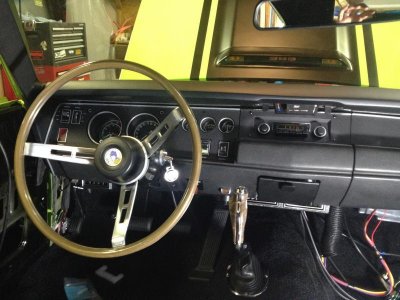
I also played with the radio a bit. I am REALLY HAPPY with it. As a reminder, I have a 4x10 speaker with integrated single speaker and dual tweeters, two rear 6" three way speakers, and a 8" subwoofer behind the rear seat pointing into the trunk. With just a little bit of tuning of the subwoofer, the system sounds fantastic! I also hooked up the Bluetooth to the radio, and that worked great too. With the exception of the two 6" speakers on the package tray, everything else is completely hidden and looks like an old AM radio system.
Now to get back out to the garage and start talking to the Fuel Injection computer. Things are getting exciting boys............
Hawk
So I systematically worked to check electrical circuits today. At this point, I have checked out just about everything except the Fuel Injection and related ignition stuff to make the engine run. I also need to do a final check of the heater and A/C controls. Besides those, I have checked and have all other electrical systems working! :hello2:
First I started checking all circuits that are powered without the key, like headlights, running lights, dome lights, key in buzzers, cigarette lighters, clock, horn, flashers, etc. I did need to clean up and improve grounds for the rear lights, since NONE of the were working. In all cases, it was due to paint that kept grounds from flowing electricity. Once the grounds were cleaned up, everything worked.


I then moved on to circuits powered with the key, so this included things like turn signals, rear defogger, brake warning light, wipers, washers and the radio. Also, to test the reverse warning light, I needed to install the shifter. Cool!

I also played with the radio a bit. I am REALLY HAPPY with it. As a reminder, I have a 4x10 speaker with integrated single speaker and dual tweeters, two rear 6" three way speakers, and a 8" subwoofer behind the rear seat pointing into the trunk. With just a little bit of tuning of the subwoofer, the system sounds fantastic! I also hooked up the Bluetooth to the radio, and that worked great too. With the exception of the two 6" speakers on the package tray, everything else is completely hidden and looks like an old AM radio system.
Now to get back out to the garage and start talking to the Fuel Injection computer. Things are getting exciting boys............
Hawk
a68postcar
Well-Known Member
good deal Hawk, I'm as excited as you are I think, this car is bad ***.
So just a quick update: I connected the EZ EFI handheld unit and it powered up. I went through most of the setup except the fuel test, and everything seems to check out OK.
I now need to build the circuit for the fuel pump (it's just a relay triggered by the FAST wiring), get the clutch fan and fan for the radiator installed, some oil in the engine, antifreeze, some gas and minor odds and ends and I should be ready to try and fire this thing! My goal would be to do that next weekend. I'll spend the rest of tomorrow on the fuel pump circuit and some other small stuff...
- - - Updated - - -
Thanks! I am pretty damn excited - this project has been ongoing since January of last year, and if I can get this 'ol girl fired and running, I'll feel like I am in the home stretch.
One step at a time!
I now need to build the circuit for the fuel pump (it's just a relay triggered by the FAST wiring), get the clutch fan and fan for the radiator installed, some oil in the engine, antifreeze, some gas and minor odds and ends and I should be ready to try and fire this thing! My goal would be to do that next weekend. I'll spend the rest of tomorrow on the fuel pump circuit and some other small stuff...
- - - Updated - - -
good deal Hawk, I'm as excited as you are I think, this car is bad ***.
Thanks! I am pretty damn excited - this project has been ongoing since January of last year, and if I can get this 'ol girl fired and running, I'll feel like I am in the home stretch.
One step at a time!
- Local time
- 12:17 PM
- Joined
- Jul 17, 2008
- Messages
- 4,992
- Reaction score
- 3,295
- Location
- Southeastern, PA
Ooooh, I can feel the vibes all the way over here on the other side of the Turnpike !
Lookin' good Hawk.
Lookin' good Hawk.
Ooooh, I can feel the vibes all the way over here on the other side of the Turnpike !
Lookin' good Hawk.
Thanks! Stop by for a cold one any time! Hopefully this thing will be making some noise very soon.
I got the relay circuit built and installed, and the fuel pump will now run. I have filled my engine with fresh oil, so now I need to get a fan clutch, paint the fan and get some gasoline. Then a few other odds and ends and I might be ready to try and fire this thing off.
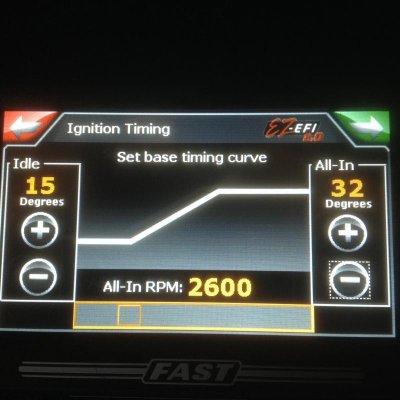
I wasn't sure what to program my timing to be, so I set it at 15* initial and 32* by 2600 RPM - that's max. Again, I have a stock HP 383 that is original to the car with no mods other than headers. There is a small chance the car could have a cam in it because the timing cover was messed with, but overall that's it. I would appreciate any comments on those settings if you think they are off...
CoronetDarter
Well-Known Member
Very exciting Hawk. It's going to be awesome when the beast fires up. I just got my car back from paint so now comes the fun part of putting it back together. Step 1: Go back to the beginning of Hawk-Rod: The Restoration and re-read again. :read2:
Very exciting Hawk. It's going to be awesome when the beast fires up. I just got my car back from paint so now comes the fun part of putting it back together. Step 1: Go back to the beginning of Hawk-Rod: The Restoration and re-read again. :read2:
Very cool. That means you have now turned the corner and can start bolting stuff on. I enjoy when I can take a part off the shelves and permanently install it. It's a great feeling to leave the space on the shelves and watch them slowly go from packed to nearly empty!
NZ 70 RR
Well-Known Member
Awesome Hawk, heres hoping the clutch fan arrives and you get to start her this weekend.
Awesome Hawk, heres hoping the clutch fan arrives and you get to start her this weekend.
It arrived!
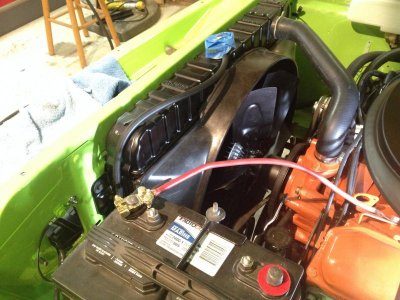
So I got a few things done, but first, the fan clutch. I cleaned up and painted the fan, installed the clutch and then got it on the car. Don't forget the bushing in the center if you need one - in my case, I needed it.
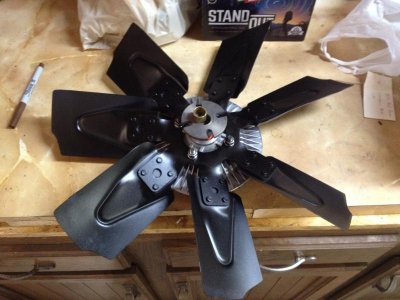
Installed!
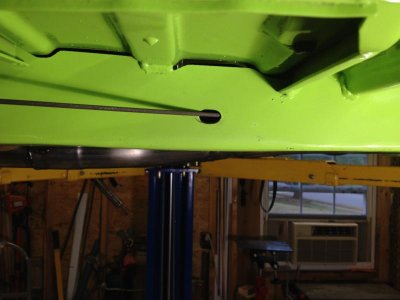
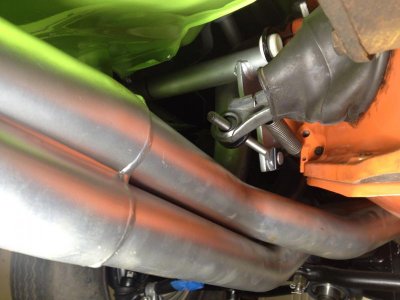
Then it was time to install the emergency brake cable. This should be easy, BUT my car now has subframe connectors. They are in the way to where the cable needs to go. So the only solution was to drill holes in line with where the cable needs to go. Then a little touch up paint to clean it up. Here is where the cable enters the connector.
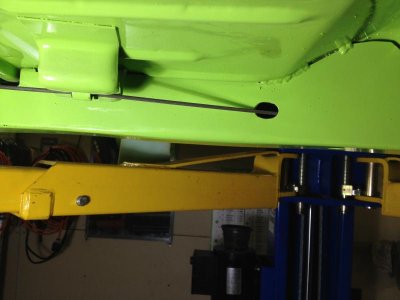
and here is where it exits. Note that the exit hole had to be a little bigger to allow the threaded rod at the end of the cable to fit through. It was hard to get the holes in the right place, but it turned out OK.
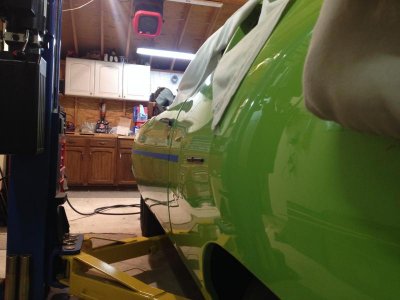
I also drilled the holes and installed the "road runner" emblems. I was a bit worried drilling the holes in the body - I could almost hear Mark chewing me out if I screwed anything up! Luckily, they turned out OK. I also began to mock up where the dust trail decal should be. Note that it is NOT centered in the rear scoop. It starts higher up, centered on the road runner emblem. This makes it flow well to the front of the car.
Then I installed the Z bar for the clutch. Standard stuff here, just cleaned it up, painted and used a rebuild kit from Passon Performance so it would work smoothly.
ALL my electrical systems now check out - at least the ones I can test without starting the car. I went through the FAST setup menus and programmed parameters into it - here is an example screen. I think I am pretty much set to try and start the car this weekend... :hello2:
- Local time
- 12:17 PM
- Joined
- Jul 17, 2008
- Messages
- 26,628
- Reaction score
- 83,323
- Location
- South Jersey USA
its gonna fire right up!
a68postcar
Well-Known Member
I have my fingers crossed for you Hawk. I am probably going to try to run Jeff's car tomorrow afternoon or Saturday morning.
Thanks guys. Mark, I hope you are right and it does start right up. You guys will hear my celebrations from there!
Tonight I need to run out and buy distilled water and power steering fluid. Added oil to the engine already but I still need to get oil pressure up before I try to light it up...
Good luck with Jeff's car too! Maybe the green machines will both fire up on Saturday together!
Hawk
Tonight I need to run out and buy distilled water and power steering fluid. Added oil to the engine already but I still need to get oil pressure up before I try to light it up...
Good luck with Jeff's car too! Maybe the green machines will both fire up on Saturday together!
Hawk
Good luck! I was just getting ready to suggest filling the float bowls before trying to fire it and........................ well you don't have float bowls. So I guess just turn on the key haha. Enjoy the monumental moment!
Good luck! I was just getting ready to suggest filling the float bowls before trying to fire it and........................ well you don't have float bowls. So I guess just turn on the key haha. Enjoy the monumental moment!
LOL, well, I kind of need to do that. I have to run the fuel pump and set the system pressure to 43 PSI, so THAT will be "filling the float bowls"!
Hawk
Bladecutter
"Pursuit of Shape"
Right on Hawk....Very Nice looking....Congutulations...You knocked a biggie right out of the park...i'm getting closer to a B to put up on a cart and label project in process. Always appreciate seeing the extra edges the zen masters pull up....like Dev here....'Lo 747.....there's done & there's Dunne!! and mucho mileage in between....You Guys are Dunne...the attention to detail is off the richter.
Right on Hawk....Very Nice looking....Congutulations...You knocked a biggie right out of the park...i'm getting closer to a B to put up on a cart and label project in process. Always appreciate seeing the extra edges the zen masters pull up....like Dev here....'Lo 747.....there's done & there's Dunne!! and mucho mileage in between....You Guys are Dunne...the attention to detail is off the richter.
Thank you! I don't know that I even come close to either of your skills, but I do what I can. The most important thing is I have a good time with it and the end result should at least be presentable... :headbang:
MoparMitch
Well-Known Member
- Local time
- 12:17 PM
- Joined
- Apr 12, 2011
- Messages
- 3,810
- Reaction score
- 2,838
- Location
- Friendship, Maryland
In Suspense Hawk. Can't wait to hear it run. I'm sure you'll post a video.
Bladecutter
"Pursuit of Shape"
Hawk...."Effort Equals Results" *Roger Penske*
i don't have any thing close to Yours.....i'm still working on other Peoples. Looking at the exhaustive efforts and kil'r results of You Guys Helps Keep my Hope alive.....A Most Excellent Piece Hawk. A 66-69 Coronet is the one most important thing i have to do before i die......Only car i ever did for me was bodywerk & paint my Mangusta back in 80....i gotta get some vindication for the years in the trenches.
i don't have any thing close to Yours.....i'm still working on other Peoples. Looking at the exhaustive efforts and kil'r results of You Guys Helps Keep my Hope alive.....A Most Excellent Piece Hawk. A 66-69 Coronet is the one most important thing i have to do before i die......Only car i ever did for me was bodywerk & paint my Mangusta back in 80....i gotta get some vindication for the years in the trenches.
Similar threads
- Replies
- 41
- Views
- 5K
- Replies
- 98
- Views
- 3K
- Replies
- 29
- Views
- 933
- Replies
- 5
- Views
- 353


