• When you click on links to various merchants on this site and make a purchase, this can result in this site earning a commission. Affiliate programs and affiliations include, but are not limited to, the eBay Partner Network.

Here is what's on my table

There is more on my table, or on my shop floor now

451Dyno.jpg

451 stroker

Last springs craigslist shopping yield was (2) 400 blocks, and (1) 440 block/crank. I sold the 69 440 block for $400 and established the one and only profit in my Mopar journey. :blob1: I kept the forged 440 crank and the best 400 block to build the above 451. The decision of 400 vs 440 stroker really came down to I already owned (low deck)TTi headers, and just a tad bit more room in the engine bay.

400 block to 451 stroker
w/440 crank and rods
440 Source Heads w/valve job, beehive springs and 10 deg locs
Comp Custom Solid cam (243/248@50; 552/553 lift; LSA 112 .016 lash)
Comp Cams Pro Magnum 1.5/1 Roller Rockers
Edelbrock Torker 383 single plane intake-Port matched to intake runners
Quick fuel HR780VS
Melling HI-Vol Oil pump
440 Source HI-Vol water pump
440 Source Aluminum Water pump housing
Comp Cams Magnum roller timing chain
FireCore Ready to Run distributor
FireCore Coil
7 Quart Milodon Road Racing Oil pan
Milodon pick up tube and Dipstick
TTI Ceramic coated headers
Mopar Performance Valve Covers and rubber grommets

Torque Converter - tbd

The opportunity to witness all 14 runs on the dyno, and be involved in the tuning was priceless. The attached dyno sheet is near the last of the pulls, this one with 1/2 inch phenolic spacer. The torque curve was broad and over 500ft lbs from 2800 to 5200. While on the dyno the engine seemed to prefer these timing settings: 15 degrees initial, with total mechanical of 34 degrees @ 2400+, and total mechanical + vac 53 degrees @ 3200 w/ 19" of vacuum. The Quickfuel HR780vs came with jets of 72, 83 for primary/secondary. The secondarys were switched to 81's for a leaner A/F.

451Dyno11.jpg

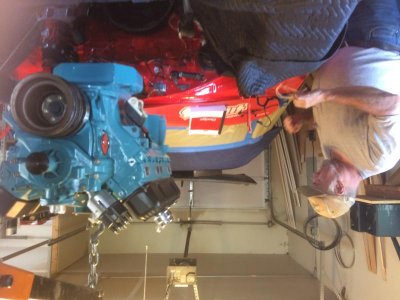
See how big the numbers get when you scroll down. :headbang::headbang:Onward for existing engine removal.
 
Not being a engine builder, It does look and sound like its going to be quite the power plant, Please now, don't be to shy to show the machine its going in, done or in the process, we need the fun and car, MOPAR **** ill bet everyone would agree! :)
 
Ron, this 451 is going in my 68 Coronet, replacing the stock 383. I just needed a little more Go pedal.
 
Nice project, sweet car. Keep up the good work.

Thanks John, (have to say that I drooled over your engine build while mine was hatching.)

My engine replacement project has a few things I need to address, but like my suspension/brakes overhaul I need to keep things moving since driving is the main goal. So here's my list, I am sure the devil is in the details.

1.) Remove 383 w/AC
2.) Clean Engine Bay & paint to match body
3.) Fit new pulleys w/new Sanden AC compressor
4.) Install new converter
5.) Install 451
6.) Paint to match, install new Power Bulge hood
7.) Burn some cheap gas.

Longer term

6.) Replace OE driveshaft
7.) US Car tools subframe connector (learn to weld?)
 
Nice car and mods you have going on. The car should perform well with the changes you are making. Might want to freshen up your trans with a shift kit while you have the motor out unless you are ready have.
 
Nice numbers on your 451 and pretty sure this thread will serve as a great reference point to a bunch of us planning suspension work in the future! Thanks!
 
Nice car and mods you have going on. The car should perform well with the changes you are making. Might want to freshen up your trans with a shift kit while you have the motor out unless you are ready have.

Thanks Black64, I am thinking about a Transgo shift kit maybe just the basic put it in 'D' and go. Or Transgo 2?

Nice numbers on your 451 and pretty sure this thread will serve as a great reference point to a bunch of us planning suspension work in the future! Thanks!

Thanks Goon, the suspension changes really begged for more pedal. :eek:

Nice!! Congrats on the newfound power man!

Thanks Speedy
 
Thanks John, (have to say that I drooled over your engine build while mine was hatching.)

My engine replacement project has a few things I need to address, but like my suspension/brakes overhaul I need to keep things moving since driving is the main goal. So here's my list, I am sure the devil is in the details.

1.) Remove 383 w/AC
2.) Clean Engine Bay & paint to match body
3.) Fit new pulleys w/new Sanden AC compressor
4.) Install new converter
5.) Install 451
6.) Paint to match, install new Power Bulge hood
7.) Burn some cheap gas.

Longer term

6.) Replace OE driveshaft
7.) US Car tools subframe connector (learn to weld?)

If your looking for a GOOD custom torque converter: Eric at JW Performance can help you.

They can build you a custom one based on your engine build, dyno sheet, etc.

Their prices are about the same as an off the shelf, but custom to your car.

I just put one in my car, great people to deal with and well known in the Mopar world.

Have fun!
 
Stay away from Heim joints for a street car, they are not designed for this purpose. i am sure some will differ but they are not meant for street use.
 
Thanks for the converter link, I'll check it out.

- - - Updated - - -

Stay away from Heim joints for a street car, they are not designed for this purpose. i am sure some will differ but they are not meant for street use.

Not sure what your referencing Snake, the Firm Feel control arms don't utilize heim's?
 
Have you ever heard of a TC called a "Thunderbolt"? I hope i got the name right, im only asking because this reminded me of it, my 69 is a 4-speed but i have that thunderbolt and wanted to put it in my 73, hopefully at the same time the 410 gears go in it, i don't know anything about them and thought maybe you did, or anyone else... Now im more curious then ever! :)
 
Couple things off the table: 451 is installed and I have been a slug about posting.

Disclaimer: The engine install came about 7 months after I brought it home from the builders. Just kept putting it off until 10 days before the local annual hot rod show. Long story short, the engine install was complete 1 day after the annual show. Lesson learned, make a plan and just do it.

A few notes,

1.) I like the newly painted engine compartment more than I imagined. I can smile when the hood comes up!

2.) Installing engine w/Milodon RoadRacing oil pan from the top is easier with the transmission crossmember loosened up for clearance.

3.) In car talk today 500 horsepower just doesn't grab any attention(thank you Street Legal TV). Regardless, driving the Coronet 451 exceeds all expectations!

I started with this 383 and chevy black engine compartment.
5941c6fdb6f699c7b0d9081899f78e816299c847_large.jpg
FullSizeRender.jpg
Note: If replacement converter is smaller than a smaller flexplate is required. :eek:


EngineCompartment.jpg
Foil masking trick thanks to Grabinov.


IMG_1677.jpg
Finally, body color engine compartment.


IMG_1684.jpg
Local Mopar boys come to rescue


451.jpg
The Milodon Anti-install oil pan. Because I chose to install the engine from the top with tranny intact the clearance to stab the engine in place was minimal. Key bit of help would be to loosen the tranny crossmember for wiggle room.


IMG_1710.jpg
With one day to said local car show the install is complete. Except one minor problem, a huge oil leak from the back of the intake. I am in unfamiliar territory. Some have questioned the need for a high pressure oil pump. I decide to sleep on it.


IMG_1712.jpg
With iphone video camera I captured a pinhole oil fountain near the back of the intake. The real culprit, the plug on the right. When removing the engine from the dyno the builder unknowingly grabbed this engine plug. Doh! It was replaced with a plug that wouldn't leak. :)


FullSizeRender (10).jpg
With that dang show I didn't make now behind me I settled down and completed the car assembly.

An upgrade of lamps followed, using Crackedback's relay harness. Aside from the new 451, the headlight harness is the most bang for the buck that I've spent on my 68. The harness fit right behind the original across the radiator support. For the low/high beams I got some Hella H4 Single High/Low Beam Headlamp w/halogen 60/55, and for the high beams just some basic sylvania sealed beam Halogens. The combination is perfect, low beam driving is sweet and the high beams are spot on.
FullSizeRender (7).jpg
Since I live 20 miles out of town having adequate lighting is a must. I have a 500 hp 451, and now I have a 500 hp lighting system to match. This upgrade is a must. And here is the deal--the harness is plug and play so if you want to roll back the upgrade to sell your 'original numbers matching' beauty just unplug it and throw in the old headlights. Done.


IMG_1792.jpg
Looking out across the power bulge hood. Another fella cruising in his red car .
IMG_1866.jpg
I will color match the hood this coming soon, the black 2k primer isn't permanent.


After logging 1,500 miles on the new setup, which includes a PTC converter, there are two instances that really define the engine combo performance.

First, I am at a traffic light and this dude in a Lexus creeps forward towards the upcoming green light. It's about 105 degrees out so the road is sticky. I am determined he will not get the jump. He doesn't and I only mash the pedal enough to accelerate without wheel spin. Starting in Drive the coronet rockets forward 0-50mph so fast I am embarassed. Lets call that my torque converter test.

(For the most part I do drive my car conservatively.)

Second, after the first 1000 miles I am thinking I might need to adjust the kick-down linkage. It wasn't working. I had done a few mild burnouts and some accelerations. As it turns out I just wasn't deep enough into the pedal in 1st or 2nd to engage the kickdown. This engine combo rocks. Thanks to all threads where I have borrowed information and to those who gave me some suggestions along the way. Michael

Up next some US Car Tool subframe connectors are on order.
 

Attachments

  • IMG_1681.jpg
    IMG_1681.jpg
    58 KB · Views: 414
Awesome numbers on the 451, stout motor! Love the car and what your doing with it.
 
Awesome numbers on the 451, stout motor! Love the car and what your doing with it.

Thanks, I have been watching your serpentine belt thread with interest. My build uses Bouchillon Performance brackets for a v-belt Sanden AC. First attempt with the AC alignment produced no belt squeal but an aggressive full throttle acceleration would result in loosing an AC belt. With supplied shims from Bouchillon, washers, the belt alignment is perfect but now I have belt squeal. I had never heard of ordering matching belts? Yours is a sweet ride!
 
Auto Transport Service
Back
Top