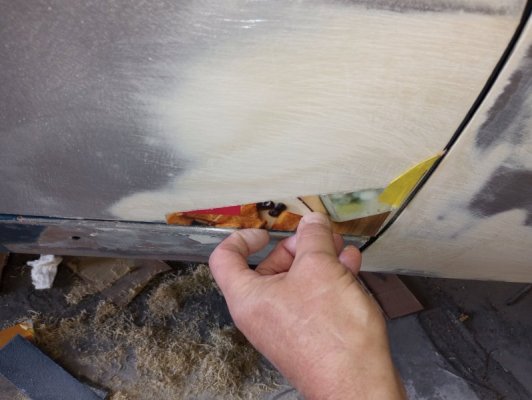
just a little off the back and sides please

eldubb440

more miracles than Jesus
FBBO Gold Member
Local time
9:57 PM
Joined
Jul 17, 2008
Messages
14,140
Reaction score
35,773
Location
South Jersey USA
"they didn't fit very well from the factory"....... is never an excuse to be lazy.

Panel fit is where the game is won and lost. That little bit of filler work around the edges goes a long way. The true artistry always gets buried under primer and paint.......I say "clearcoat that ****!"
 

eldubb440

more miracles than Jesus
FBBO Gold Member
Local time
9:57 PM
Joined
Jul 17, 2008
Messages
14,140
Reaction score
35,773
Location
South Jersey USA
finished blasting up front, primed up, cowl back on.......looking like a car again

IMG_20230216_223922820_HDR.jpg
IMG_20230217_211936127_HDR.jpg
IMG_20230217_212015251_HDR.jpg
IMG_20230218_010203169_HDR.jpg
IMG_20230218_010116832_HDR.jpg
 

moparwacko

MASSIVE GOLD MEMBER
FBBO Gold Member
Local time
9:57 PM
Joined
Mar 14, 2015
Messages
2,437
Reaction score
6,560
Location
NE Pa
You Sir are an artist!

You've inspired me to do the body and paint on my 64 D100.
So far I've purchased a mig welder and a board sander. (Already have a compressor).
Is there anything else I'm really going to need?

:lowdown:


:lol:
 

eldubb440

more miracles than Jesus
FBBO Gold Member
Local time
9:57 PM
Joined
Jul 17, 2008
Messages
14,140
Reaction score
35,773
Location
South Jersey USA
Last edited:

Robking

FBBO Gold Member
FBBO Gold Member
Local time
9:57 PM
Joined
Sep 22, 2013
Messages
143
Reaction score
83
Location
Raleigh, nc
Sorry to jump back on your thread eldubb, but looking to see if you (or anyone else) has any advice before I start tacking the tail back on (had to put it aside for a few months, finally back on it).

I test fit the extensions, they seem to line up well with the body line across the tail panel.

PXL_20230326_172622800.jpg


I have it all clamped up and ready to clean the weld thru primer out of the holes and start pluggin' holes. You can't really see it but there is a spreader in there keeping the sides the right spacing to keep my trunk edge gaps parallel.

PXL_20230326_181727956.jpg


Fits pretty well all in all (this is not the original tail panel, came off a southwest car that had some dings in it but very little rust).

If there are any gotchas I should check before I start welding I sure would appreciate a heads up as it ain't coming back apart...

Thanks!
 

Cranky

Banned Henchman #27
Staff member
FBBO Gold Member
Local time
8:57 PM
Joined
Dec 4, 2009
Messages
30,240
Reaction score
32,937
Location
Pasadena, Texas
and yes, lots of elbow grease and ibuprofen, it freakin hurts

this stuff will keep you young as it's killing you.........
During the last few years my shop has been my savior as far as keeping me sane goes....but lately my back and knees are saying enough already.
 

eldubb440

more miracles than Jesus
FBBO Gold Member
Local time
9:57 PM
Joined
Jul 17, 2008
Messages
14,140
Reaction score
35,773
Location
South Jersey USA
Sorry to jump back on your thread eldubb, but looking to see if you (or anyone else) has any advice before I start tacking the tail back on (had to put it aside for a few months, finally back on it).

I test fit the extensions, they seem to line up well with the body line across the tail panel.

View attachment 1439967

I have it all clamped up and ready to clean the weld thru primer out of the holes and start pluggin' holes. You can't really see it but there is a spreader in there keeping the sides the right spacing to keep my trunk edge gaps parallel.

View attachment 1439966

Fits pretty well all in all (this is not the original tail panel, came off a southwest car that had some dings in it but very little rust).

If there are any gotchas I should check before I start welding I sure would appreciate a heads up as it ain't coming back apart...

Thanks!

put a couple tacks where the clamps are in the trunk opening.......remove the clamps and close the trunk lid..... see what ya got, then fit the extensions
 

Robking

FBBO Gold Member
FBBO Gold Member
Local time
9:57 PM
Joined
Sep 22, 2013
Messages
143
Reaction score
83
Location
Raleigh, nc
put a couple tacks where the clamps are in the trunk opening.......remove the clamps and close the trunk lid..... see what ya got, then fit the extensions
Thanks, I was thinking that might be a good first place to tack, just to free my long clamps up for other spots. Definitely can't double check too many times.

Seems like the holes for the quarter extension mounting screws might have been used at the factory for alignment with the cutouts in the tail panel?
 

Robking

FBBO Gold Member
FBBO Gold Member
Local time
9:57 PM
Joined
Sep 22, 2013
Messages
143
Reaction score
83
Location
Raleigh, nc
put a couple tacks where the clamps are in the trunk opening.......remove the clamps and close the trunk lid..... see what ya got, then fit the extensions

All in all pretty happy with how it fits up. With the gaps parallel on the trunk lid, the rear edge of trunk lid on the drivers side is about 1/16" further back than the passenger side, but for a car that's been smacked in the *** at least once and is just supposed to be a driver I think it will be ok. I'm afraid if I try to tweak it to one side I may just make it worse.

Thanks for all the great advice eldubb440, I'm gonna finish welding this thing up and call this part of the project done.

PXL_20230329_002424317 (1).jpg


PXL_20230329_002447376.jpg


PXL_20230329_002506445.jpg


PXL_20230329_002620604 (1).jpg
 

eldubb440

more miracles than Jesus
FBBO Gold Member
Local time
9:57 PM
Joined
Jul 17, 2008
Messages
14,140
Reaction score
35,773
Location
South Jersey USA
little update.....was sidetracked a few weeks working on the house.....

anyway, pass side door and fender each needed a patch. I also had to fight the pass side fender every time I put it on; I discovered it was attached to the vertical brace crooked at the bottom, it actually was kicking out almost an inch behind the tire....... it required more surgery than the pics would indicate, the fender simply didn't fit without prying it into place, and was holding a lot of tension when bolted on...... this fender was the hidden issue, every car has one lol

I found unlike 68-70, the exaggerated body lines on the 66 and 67 make for inconsistent gaps..... ranging from an 1/8 in the tight spots, and a full 1/4 at the wide points....my ADHD will not allow it.....doesn't look like a lot, but there's at least a couple/few days here........ the good news is, my bodywork is 90% roughed in on this beast and I'll soon be on cruise control.....

IMG_20230417_154206743.jpg

IMG_20230417_154240975.jpg
IMG_20230417_154256222.jpg

IMG_20230417_154326566.jpg

IMG_20230417_223510882.jpg

IMG_20230417_223502093.jpg


IMG_20230417_223537170.jpg
 
Last edited:

HawkRod

Formerly hsorman
FBBO Gold Member
Local time
9:57 PM
Joined
Aug 8, 2011
Messages
5,919
Reaction score
11,059
Location
Lansdale, PA
little update.....was sidetracked a few weeks working on the house.....

anyway, pass side door and fender each needed a patch. I also had to fight the pass side fender every time I put it on; I discovered it was attached to the vertical brace crooked at the bottom, it actually was kicking out about 1/2 inch behind the tire....... it required more surgery than the pics would indicate, the fender simply didn't fit without prying it into place, and was holding a lot of tension when bolted on...... this fender was the hidden issue, every car has one lol

I found unlike 68-70, the exaggerated body lines on the 66 and 67 make for inconsistent gaps..... ranging from an 1/8 in the tight spots, and a full 1/4 at the wide points....my ADHD will not allow it.....doesn't look like a lot, but there's at least a couple/few days here........ the good news is, my bodywork is 90% roughed in on this beast and I'll soon be on cruise control.....

View attachment 1451962
View attachment 1451963
View attachment 1451964
View attachment 1451965
View attachment 1451967
View attachment 1451966

View attachment 1451968
Looks great!

Hopefully I can get @67BluonBlak 's 440 going too and make some good progress on that. It would be good to be able to slap the whole K-member and driveline in when the body is ready...
 

eldubb440

more miracles than Jesus
FBBO Gold Member
Local time
9:57 PM
Joined
Jul 17, 2008
Messages
14,140
Reaction score
35,773
Location
South Jersey USA
over 3 weeks? damn distractions......

split the hood open...... little nastier than expected, will blast the frame; skin has been soaking in molasses while other things get done

IMG_20230427_180259724.jpg
 

eldubb440

more miracles than Jesus
FBBO Gold Member
Local time
9:57 PM
Joined
Jul 17, 2008
Messages
14,140
Reaction score
35,773
Location
South Jersey USA
nothing glamerous.....frame connectors firmly tacked into place

necessary fuel and brake lines will stay and get wrapped up good for the rest of the process

IMG_20230511_194434065.jpg


IMG_20230511_194554438.jpg


IMG_20230511_194610123.jpg
 
Last edited:

roddodge

Member
Local time
8:57 PM
Joined
Jan 10, 2014
Messages
10
Reaction score
5
Location
DSM Iowa
I am really enjoying this thread.
I'm doing a lot of metal replacement and used the Bloxide primer you suggested. My question is what paint products are you putting on top of the weldable primer? From what I understand it is an etch primer?
And nobody wants you to mix products.
Thanks for your time.
 

Robking

FBBO Gold Member
FBBO Gold Member
Local time
9:57 PM
Joined
Sep 22, 2013
Messages
143
Reaction score
83
Location
Raleigh, nc
over 3 weeks? damn distractions......

split the hood open...... little nastier than expected, will blast the frame; skin has been soaking in molasses while other things get done

View attachment 1463610

Pretty damn cool.

I have a 68 Coronet trunk lid that I feel like is fixable (skin is good except for bottom lip but frame needs bit of work). Is it as simple as drilling the spots out and then gently prying the lip all the way around? I'd like to take a crack at fixing it down the road, have a glass one for now.
 
Top