For corroded float bowls (aluminum and cast iron-used to do a lot of tractor carbs) plug the jets/orifices and bead blast the bowls.
Mike
Mike
Some of the tools used to clean paint guns will also work on carbs.One carburetor I had on the Duster developed a blocked internal passage for the accelerator pump. The ethanol here is okay if you run the engine on a regular basis but fuel sitting inside awhile seems to lead to crud buildup.
How do you adequately clean a small passage? Nobody makes "pipe cleaners" that small.
Mig welding tip cleaners, they come in small case with various sizes, or maybe a wire pulled from a wire brushOne carburetor I had on the Duster developed a blocked internal passage for the accelerator pump. The ethanol here is okay if you run the engine on a regular basis but fuel sitting inside awhile seems to lead to crud buildup.
How do you adequately clean a small passage? Nobody makes "pipe cleaners" that small.
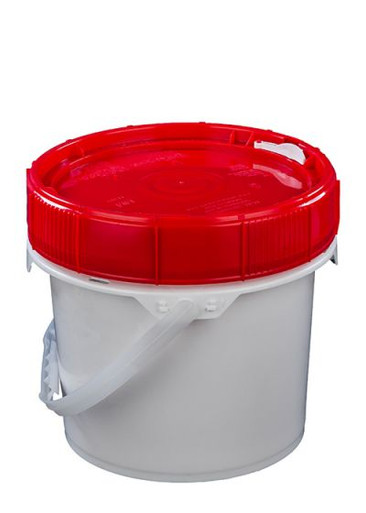
I bought a pail about 5 years ago ($125.00) and decided with the low volume of carb rebuilds I was doing now days, I had to add a chemical surcharge to my billing.I forgot to ask....
What about the solvent to soak carburetors in? Years ago, you'd buy one of those 5 gallon cans of that Berryman brand "Carb-Dip" or something like it. I had a can but once when I ran the weed eater, a small piece of gravel got smacked by the trimmer line and it punched a small hole near the bottom and it leaked out.
EDIT....Here it is.
Wow...the price really went up with this stuff!
View attachment 1651726
Oh ya, they took out the acid (probably replaced it with water). That's why it takes 24 instead of 1/2 hours to soak! I rinse them in my solvent tank and brush the pieces as I rinse.The Berryman stuff is not as potent as it used to be. It’s been neutered by EPA. That’s why I bought an ultrasonic cleaner.

something like this might be handyI see that 96 ounce jugs are commonly available but how the heck is a carburetor main body going to fit in a container smaller than a 1 gallon can?
I know that I don't need a full 5 gallons but I don't see an in between option.
From the Berryman website:The Berryman stuff is not as potent as it used to be. It’s been neutered by EPA. That’s why I bought an ultrasonic cleaner.
I learned about main bodies being warped back in the 70's. For sure they cause poor running and no matter what you try, just can't get them to run right due to internal leaks. When I first flattened them out, I used a single cut file. Later on I had an aluminum block made that would just fit on the bottom after you removed the throttle plate. I would put 80 grit wet or dry paper on, lube with water and slowly sand away, making sure to not rock it. When it was close, I would swap to 180 or so grit. Same on the metering block surfaces. When I was doing Holley's for side money, after cleaning in dip, I would sand the bodies. There is also a passage on the throttle plate that you could enlarge with a certain size bit, drill down a certain depth, put a small Phillips screwdriver in the passage, whack it a couple of times to score it and use one of the ball bearings supplied in the kit and put it in the hole before assembling. This was a no buck power valve block off for protecting the pv when you get a sneeze back or cough through the carb which will blow the valve diaphragm.As others have said, obviously clean, clean, clean.
One of the problems with Holleys are that that they warp. Then you can rebuild them all you want and they don't work worth s**t.
Once you get the main body separated check it for straightness. I'll almost bet that the body, behind the metering blocks, is warped (this is because people tighten the heck out of the fuel bowl screws). If it is warped, file or sand it until it's flat. Check also where the body connects to the throttle plate, although this area is much less problematic.
Here are a couple of pictures to explain what I mean.
This is near the beginning of filing. Note the dark areas that have not been touched, and conversely, the edges that are high and therefore have been filed.
View attachment 1585868
Here is another carb near completion. You can still see low spots.
View attachment 1585867
Bottom line is be sure the body is flat! If it is not, then you may end up with internal leaks that will make the carb impossible to tune!
See my post #18 in this thread....I don't know what else to do with it.
As others have said, obviously clean, clean, clean.
One of the problems with Holleys are that that they warp. Then you can rebuild them all you want and they don't work worth s**t.
Once you get the main body separated check it for straightness. I'll almost bet that the body, behind the metering blocks, is warped (this is because people tighten the heck out of the fuel bowl screws). If it is warped, file or sand it until it's flat. Check also where the body connects to the throttle plate, although this area is much less problematic.
Here are a couple of pictures to explain what I mean.
This is near the beginning of filing. Note the dark areas that have not been touched, and conversely, the edges that are high and therefore have been filed.
View attachment 1585868
Here is another carb near completion. You can still see low spots.
View attachment 1585867
Bottom line is be sure the body is flat! If it is not, then you may end up with internal leaks that will make the carb impossible to tune!


