• When you click on links to various merchants on this site and make a purchase, this can result in this site earning a commission. Affiliate programs and affiliations include, but are not limited to, the eBay Partner Network.

Vintage Air A/C hose routing - through firewall instead of fender well??

68 Sport Satellite

FBBO Gold Member
FBBO Gold Member
Local time
11:57 PM
Joined
Feb 10, 2010
Messages
2,310
Reaction score
1,562
Location
San Jose, CA
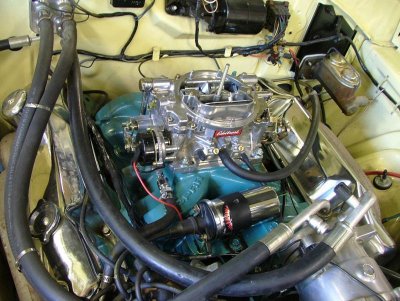
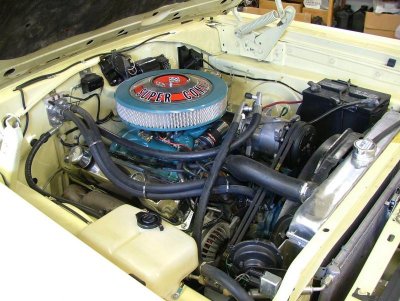
I'm intending to install Vintage Air aftermarket A/C in my 68 Sport Satellite. I want the install to look clean and as close to original as possible under the hood. I recall a thread where someone was saying to not follow the Vintage Air instructions that tell you to run the hoses via in-between the fender apron and inner wheel housing and instead to run them through the existing heater core holes in the firewall. Does anyone have any photos with it installed this way? Are there any special grommets (i.e. 4 in 1 or something?) Vintage Air instructions say to mount a block off plate onto the firewall and route the hoses through the fender removable plate (UCA adjustment access) and through the fender apron/inner wheel housing gap. From the instruction photos, I'm not a fan of their approach.

Comments?

- - - Updated - - -

image.jpg

- - - Updated - - -

Here's the vintage air diagram
 
I did the conversion on my '69 Coronet Convertible (non A/C car.)
I used the under fender routing because I got the whole kit.
I did make some hose changes because I have the Billet Specialities accessory drive kit, and the compressor mounting and hose connections are in a different location than where the compressor in the vintage air kit sits.
I think Vintage air will sell you a kit without the hose/lines if you want to route them different? Not sure how much difference in price.
You can make up your own hoses if you get the special hose end crimper. I used the MasterCool 71550 tool kit. It's $150 from amazon:
http://www.amazon.com/Mastercool-71...id=1459492566&sr=8-1&keywords=ac+hose+crimper

I think the hose ends are around $5/each except the ones with service ports that are $15 each. Cost of hose was reasonable too.
You need to mount the A/C unit and chech clearance where the lines go through the firewall, that you can access them and connect them.
A bulkhead connector will make a cleaner looking install, but more hoses and connections.
The hookups to the A/C in the car are on the passenger side of the box, that may be one reason Vintage air goes through the passenger fender firewall (this is not a bulkhead just 4 holes with gromets) it makes connecting the hoses pretty easy.
I also bought a set of harbor freight service wrenches (shorter than the standard combination wrenches)

http://www.harborfreight.com/15-piece-sae-service-wrench-set-93667.html

because I did not have room to tighten some connections with the long combination wrenches.
 
Clean and original, don't always go together.
 
Here's how I did mine, it's not finished but once done the hardlines will be turned down where they connect to the pump and heater fittings. I like the idea of being under the fender but where I live I just don't think it's the best route. Using hardlines really helps clean it up a notch.

20160326_232402.jpg
 
I don't think my setup is VA but the parts are similar, they routed the heater and a/c lines to what I assume was the original heater hose opening in the firewall but they added a billet bulkhead connector. I used the same type of setup on another installation I did and it worked very well. The only negative with the install on my GTX is that all the hoses block access to the distributor, I may re-route and lengthen the heater hoses at some point to fix this.
 

Attachments

  • DSCF2635.jpg
    DSCF2635.jpg
    95.5 KB · Views: 743
  • DSCF2628.jpg
    DSCF2628.jpg
    89.5 KB · Views: 544
Here's how I did mine, it's not finished but once done the hardlines will be turned down where they connect to the pump and heater fittings. I like the idea of being under the fender but where I live I just don't think it's the best route. Using hardlines really helps clean it up a notch.

View attachment 316539

I like that. Can you share more info about the hard lines?
 
You really need to run some rubber at some point on those lines. Vibration is a bitch!!!!
 
Here's how I did mine, it's not finished but once done the hardlines will be turned down where they connect to the pump and heater fittings. I like the idea of being under the fender but where I live I just don't think it's the best route. Using hardlines really helps clean it up a notch.

View attachment 316539

That looks great, how is the clearance/hose routing inside the car?
 
Mine was in fender well. And I rerouted under hood , and I like a lot better. Under fender the tire rubbed , and dirt all over hoses didn't look good

image.jpg
 
That looks great, how is the clearance/hose routing inside the car?
Clearance on routing inside was a breeze although the fittings on the A/C unit aren't much fun to get to without removing the glove box.
 
I used a Classic Air system and hid my A/C compressor. I ran rubber lines that run approximately where the heater lines run. Remember that no matter what, you need to transition to the engine compartment and route the lines to the compressor. I chose to "disguise" mine in plain sight.

Just another option for consideration...
IMG_4408.JPG
 
I'll try to get some pictures from under the dash next time I'm in the garage. I put the water flow control valve under the dash as well since I didn't want the wires in the engine compartment. The trick here is to order pre formed 90 degree heater hoses so you can have tight bends without collapsed hoses.

20160406_211424.jpg


20160402_213912.jpg


20160406_211424.jpg


If you look very closely beside the thermostat you can see the AN fittings that turn 135 degrees allowing the heater hoses to be routed under the A/C pump. I think it looks better not having all those hoses on top?

20160402_213912.jpg


In the end it made better sense to ditch the one hardline with this hose being so big and stiff. The original idea was to bend it down like the heater lines but the serpentine kit required the pump to be mounted sideways and there just wasn't enough space to allow for movement in the hose.

20160424_021452.jpg
 
Last edited:
Feel free to ask anything you want, so far it's working great with 30 degree temps coming out of the dash.
 
what compressor mount did you use?

Sorry, I've been offline a few days upstate...

I used a Bouchillon Engineering unit that mounts the compressor down low and out of sight. Pros about the kit is it does a very nice job of hiding the compressor. For my car, as an Air Grabber car, that was a must.

Cons about the kit are that you cannot run a mechanical fuel pump as the compressor sits where the fuel pump would sit. The other con is that one belt runs the compressor, and then a second belt comes off the compressor and powers the alternator. Getting this to all work well took a few times to adjust, and it is a bit of a pain to get it right. However, once it was right, I drove my car across country without issue.

So it has a few drawbacks, but I think the hidden nature of the compressor far outweighs the small hassles to install it.

Below is a picture of the engine before it was installed where you can better see how it is set up.
IMG_3322.JPG
 
For V Belts I like that setup accept the no mechanical fuel pump issue, you running EFI makes that a non issue though.:thumbsup:
 
Can I bring my car to you and pay you to install my vintage air system the way you did yours?? Incredible awesome meticulously detailed execution my friend! Holy cow that looks great.

Feel free to ask anything you want, so far it's working great with 30 degree temps coming out of the dash.
 
Auto Transport Service
Back
Top