• When you click on links to various merchants on this site and make a purchase, this can result in this site earning a commission. Affiliate programs and affiliations include, but are not limited to, the eBay Partner Network.

Yankee Express RestoMod Project

I have used the Lucas break in oil last refresh.

7.18.17 019.jpg
 
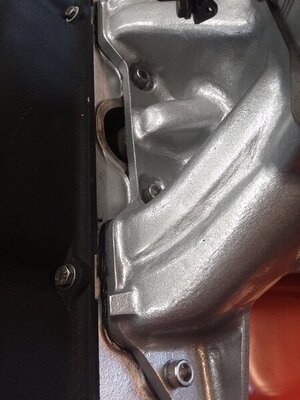
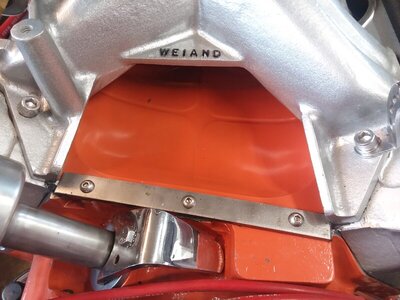
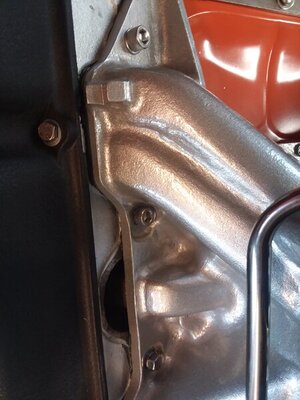
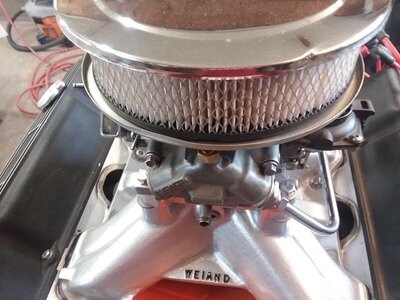
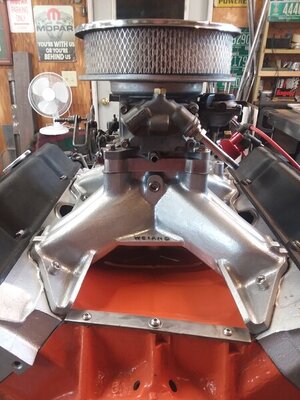
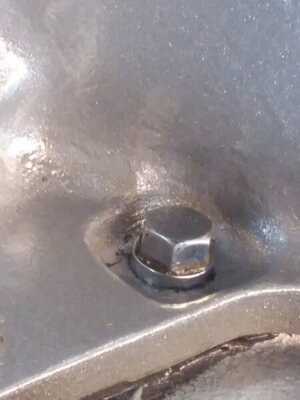
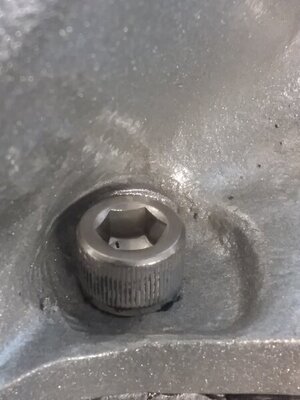
Got a little done today. Bolted on the intake manifold. Had to slice four mounting bolts down to 3/4" length to get past the wall of the runners. One spot I had to use a chrome plated bolt instead of the Allen head which wouldn't fit next to that runner. As it was, I had to tighten the ones I did get in with a pair of vise grips. lol. Thinking about slicing the end off a Allen wrench and sticking it in and then putting an open end wrench on the Allen to turn those tight. Should work. Bolted up the carb too. Worried about the carb base gasket that has the four big holes, one for each barrel, being above the 1" spacer plate wont the engine suck that gasket into the intake? Nothing supporting the center of that gasket. Hmmm....advice please....
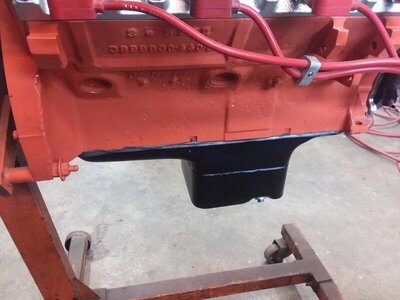
Also the oil pan is on.

20220418_161819.jpg 20220418_161835.jpg 20220418_161855.jpg 20220418_161906.jpg 20220418_161914.jpg 20220418_161922.jpg 20220418_161947.jpg 20220418_161958.jpg
 
I may yank that bolt head stud out of there and try again to get an Allen head bolt in there so that they all match. I got disgusted today and took a break before I started throwing tools...
 
Worried about the carb base gasket that has the four big holes, one for each barrel, being above the 1" spacer plate wont the engine suck that gasket into the intake? Nothing supporting the center of that gasket. Hmmm....advice please....
I wouldn't worry about it. But, if the center of the gasket is not doing anything, cut it out with a box cutter. If you didn't and it is installed, I wouldn't worry about it. I think there is essentially ZERO chance it gets sucked in to the intake.
 
I wouldn't worry about it. But, if the center of the gasket is not doing anything, cut it out with a box cutter. If you didn't and it is installed, I wouldn't worry about it. I think there is essentially ZERO chance it gets sucked in to the intake.
Well, it's a single plane intake so no supporting structure in the middle under the carb.
 
Well, it's a single plane intake so no supporting structure in the middle under the carb.
I get it. But I don't think it can get sucked into the manifold.

If you prefer, unbolt the carb and cut it out, since the center part of the carb gasket is doing nothing...
 
I get it. But I don't think it can get sucked into the manifold.

If you prefer, unbolt the carb and cut it out, since the center part of the carb gasket is doing nothing...
I think i will do that before i hook everything up. Might pop by the hardware store too and pick up four fancy bolts to hold the carb down'
 
This is the stripe package that is going on the Express fenders. The only change will be the red stripes behind each block. They will be electric blue on the Express. The hood will two panels of black like the 69 Dart that I posted up earlier that one of our members here painted. Roof is black. Rest is the bronze color. Hemi hood scoop in bronze as well..

P1180964.jpg
 
Took out that bolt and replaced it with the fourth Allen head bolt after cutting it down to length to miss the runner wall. I cut the end off of an Allen wrench to a length that would set down into the heads of the bolts and miss the runner walls. Then used a wrench to tighten those bolts down. Worked like a charm. Also cut to length the black Allen head bolts for the carb. Put those in and tightened down. Looks nice.
Filled up the truck. jeez.

20220505_084126.jpg
20220505_084137.jpg
20220505_084145.jpg
20220505_084603.jpg
20220505_084611.jpg
20220505_091431.jpg
20220505_102026.jpg
 
Looks nice Ghost...

I hadn't seen the progress in a while...

I like your graphic/stripes idea too

Your car will be a 1 of 1 for sure... I like it...

----------------------------------------------------------------------

I use the 12 pt headed Stainless Steel ARP bolts on my intakes
it uses a 3/8" 12 pt box wrench to instal or a 12 pt socket where I can
I use them on most all my builds,
I just make sure to put a dab of anti-sieze on them

I just buy the whole stainless 12 pt kit from ARP
ahs all the top end & front timing cover & oil pan bolts,
compact & easy to get a 12 pt box wrench or a socket on them

allens should work

I think your intake has some tighter spots, where the bolts attach it
I'm using a MP low-deck 6bbl intake, it does have some tight-ish spots too

MRE MP 383-400 & 413-426-440-6bbl intake.jpg


ARP 12 pt head Stainless bolts - intake.jpg


same thing on the heads & carbs, except for steel & black anodized
ARP 12 pt head Black Head bolts.jpg


carb studs & nuts for use with 1" spacers under my 6bbl etc.
I used reg 2 hole gaskets too
ARP 12 pt nuts & carb studs for spacers - black.jpg


ARP 12 pt nut.jpg


ARP 12 pt bolt & nuts full engine kits.jpg
 
Finally replaced the grill shell on my 08 Dodge Ram. The old one had the plastic chrome surface delaminating. Looks good!

20220519_155627.jpg
20220519_155650.jpg
20220519_155656.jpg
20220519_155705.jpg
 
I thought the center emblem would be snapped on; it isn't. I hammered away on the pins on the backside, nothing. So, I decided that I would pry it up from the front and if it was ruined, I would just buy another one. The dam thing is glued on. lol. So, I glued it back on the new one.
 
Most emblems these days are held on with adhesives, particularly two faced tape. The pins are only there for alignment.
 
Stuck the oil sender in the block. Mounted the rear wheel. Sliced the extra long studs down to 1 1/8" on the front rotors. Need to get 5 RH studs for the left rear wheel.

20220520_142743.jpg
20220520_144055.jpg
20220520_144117.jpg
 
I've got some funds to spend so i've ordered a "few" things to move this project along to completion.

The other rear wheel, both front wheels, RH studs for the left side rear wheel, LCA stops and UCA bumpers, 4 BF Goodrich Radial T/A tires (235-60-15 and 295-50-15), power window cranks with motors, alternator 100 amp single wire, headers, door seals, roof line seals, headliner, chrome dipstick tube and stick, windshield seal, firewall boot for steering shaft.
 
Question: On the A/N fuel tank fittings, 8AN, they're male nipples sticking up from the tank surface. I need them to be 90*. So, do I get a 90* fitting and attach it to that male nipple or pull the nipple and screw in a 90* in its place? I want to 90* towards the front of the car, then braided fuel line across the top of the tank, through a chip wood carpet covered panel and then attach to a rubber fuel line between there and the 3/8" aluminum fuel line hugging the frame up to the engine bay.
 
Question: On the A/N fuel tank fittings, 8AN, they're male nipples sticking up from the tank surface. I need them to be 90*. So, do I get a 90* fitting and attach it to that male nipple or pull the nipple and screw in a 90* in its place? I want to 90* towards the front of the car, then braided fuel line across the top of the tank, through a chip wood carpet covered panel and then attach to a rubber fuel line between there and the 3/8" aluminum fuel line hugging the frame up to the engine bay.
Can ya post a pic? Been years since I messed with any kind of a fuel cell but I'm thinking that you can remove the nipple and stick in a 90 but a pic would help clear up any doubt....
 
You can use either one. A 90 nipple off the tank will be shorter in height if that’s a concern and then use a straight AN hose fitting.
 
Auto Transport Service
Back
Top