• When you click on links to various merchants on this site and make a purchase, this can result in this site earning a commission. Affiliate programs and affiliations include, but are not limited to, the eBay Partner Network.

How To Install Camshaft Bearings.

RustyRatRod

Well-Known Member
Local time
8:27 AM
Joined
Jun 6, 2011
Messages
6,231
Reaction score
2,096
Location
In a house.
I have been wanting to do this for a while now and since I got my 383, no better time than the present.

This is how to install camshaft bearings.

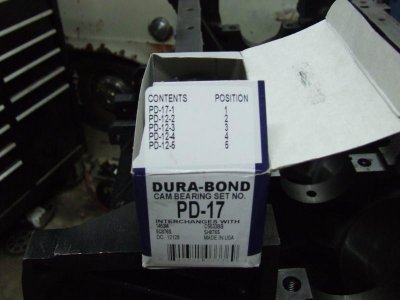
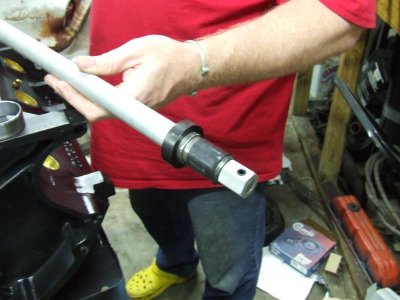
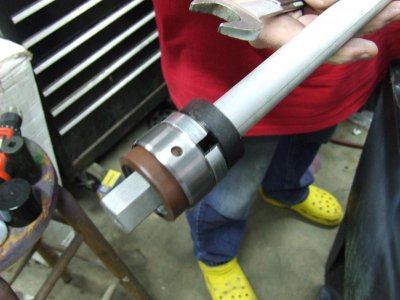
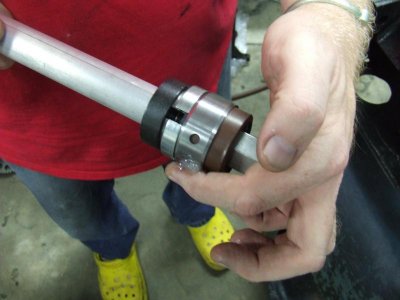
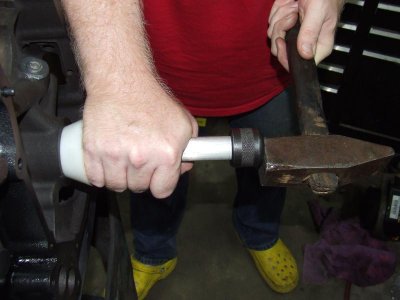
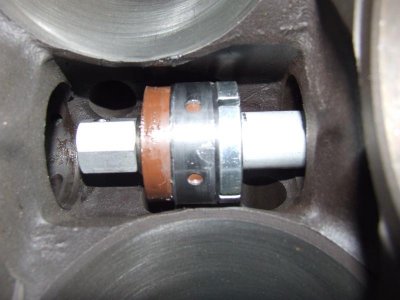
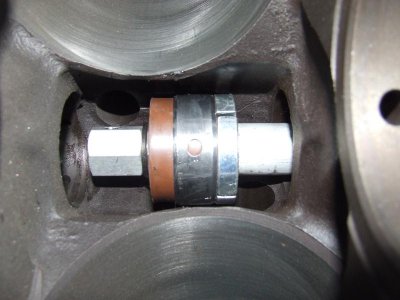
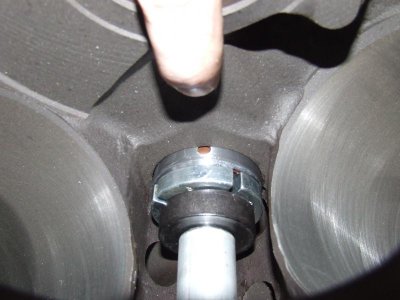
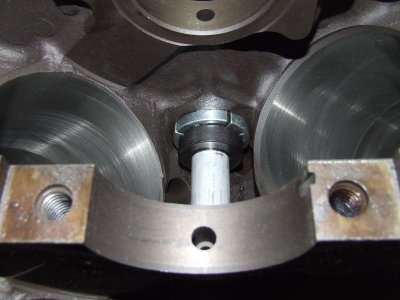
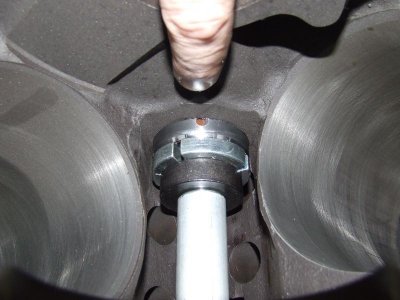
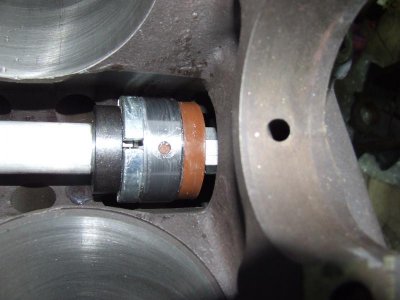
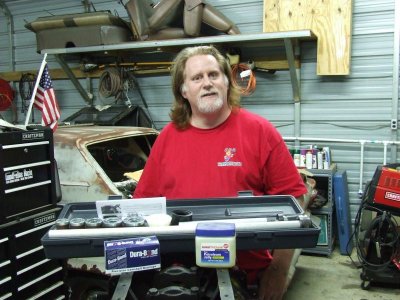
First, you need the right tool for the job. I've seen people use generic bushing drivers in the past, but the right tool makes it stupid proof and will provide good results everytime. Mine is the Lisle 18000 universal camshaft bearing tool. It will install and remove camshaft bearings in just about any engine made and it's a very affordable tool. I paid 115 bucks shipped for mine. You can easily offset the cost by telling your friends you have the tool and doing it reasonable for them. Here's how it's done.

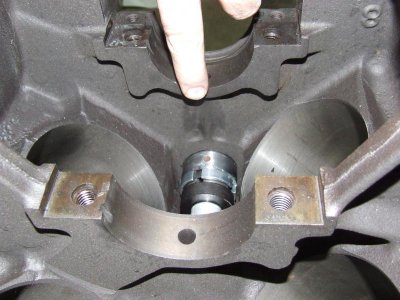
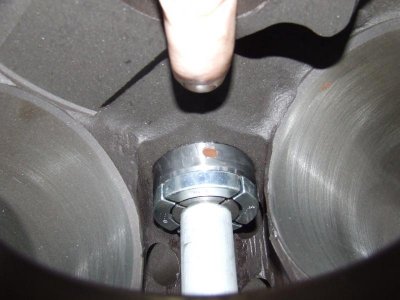
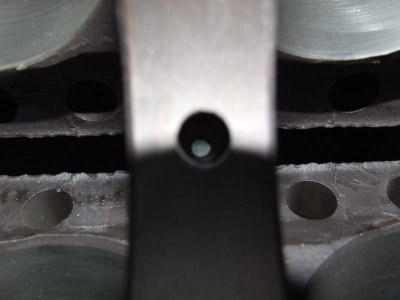
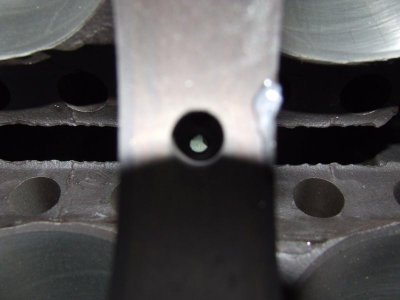
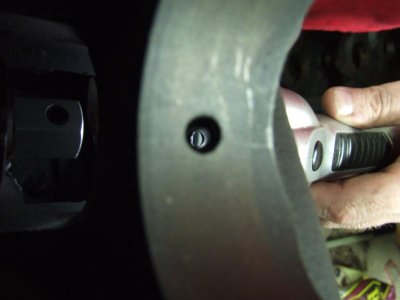
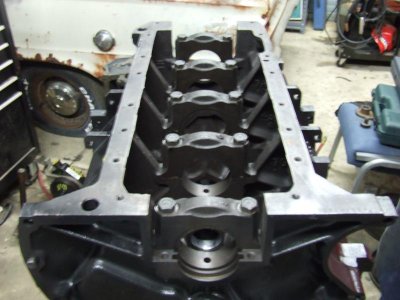
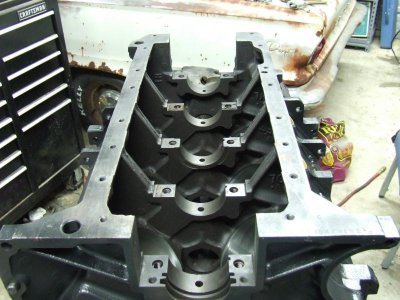
First, remove all the main caps so that you can see STRAIGHT through the oil passages through the camshaft bores.
 

Attachments

  • 002.jpg
    002.jpg
    72 KB · Views: 2,621
Last edited:
Pay close attention to this picture. Camshaft bearings have a specific placement in the engine. Notice each one has a different part number. USUALLY, they are in the box in the correct order, but you always need to read the individual part numbers on the bearings themselves, since the human equation loaded the box.
 

Attachments

  • 003.jpg
    003.jpg
    39.5 KB · Views: 1,726
The tool looks like this. It is an arbor with a screw in collet that expands as it tightens and has interchangable collets that slide on top of it.
 

Attachments

  • 005.jpg
    005.jpg
    54.1 KB · Views: 1,775
I start from the rear with Mopars since that bearing is the smallest. Here is the rear camshaft bearing in the tool and almost ready to install. You slide the tool with the bearing on it through the front of the engine and install the rear bearing from the front side.
 

Attachments

  • 006.jpg
    006.jpg
    51.8 KB · Views: 2,881
You need to lube the bearings up as you install them. Ommiting this will result in a difficult install and will gall the bearings on the back side causing metal chips to possibly fall into the engine. I use simple petroleum jelly to get the job done.
 

Attachments

  • 007.jpg
    007.jpg
    44.1 KB · Views: 1,671
Last edited:
Lining up the bearings with the main oil passages is nothing short of critical. It is also equally important to line them up as accurately as possible. If you get one in too far, or off center with a passage, turn the tool around and knock the bearing out and reposition it, or knock it back lined up with the oil passage. It's that important.
 

Attachments

  • 008.jpg
    008.jpg
    71.5 KB · Views: 1,788
Position the tool with the bearing at the start of the bore. Slide the plastic cone up tight against the front camshaft bearing bore. This centers the tool and keeps the bearing driving in straight. It is near bout impossible to drive a bearing crooked using this method. Remember when I said "stupid proof"?
 

Attachments

  • 009.jpg
    009.jpg
    45.9 KB · Views: 1,690
Continue gently tapping the bearing into place until the the hole is lined up with the oil passage perfectly. You may need to loosen and remove the tool to check the position of the bearing. It should look like this when right.
 

Attachments

  • 010.jpg
    010.jpg
    39.3 KB · Views: 1,787
Bearings with multiple holes can be tricky. Simply look closely at the bore it's designated for. Look at how the holes are spaced apart in the bore. Then look at the bearing. Notice here, how there are two holes close together. Those holes correspond with the two holes in the camshaft bore that feed the right and left lifter banks. No need saying how important lining up these holes is. Notice the two holes in the camshaft bearing bore.
 

Attachments

  • 011.jpg
    011.jpg
    55.2 KB · Views: 1,747
Last edited:
Notice the two corresponding holes in the camshaft bearing. They line up with the two lifter galley feed holes in the bearing bore.
 

Attachments

  • 013.jpg
    013.jpg
    46.1 KB · Views: 1,711
Notice the single hole in the bearing. As with the rear bearing, line this single hole up with the supply hole from the main bearing bore. lube the bearing up, line the single hole up with the main bearing supply passage and drive it in.
 

Attachments

  • 014.jpg
    014.jpg
    54.2 KB · Views: 1,663
  • 012.jpg
    012.jpg
    50.8 KB · Views: 1,681
When in correctly, the main bearing supply passage will line up with the hole in the bearing and the two lifter galley supply holes will line up with the lifter supply passages. This is perhaps the most important thing to get nailed, balls out on the money. Again, it will look like this when correct.
 

Attachments

  • 016.jpg
    016.jpg
    28.4 KB · Views: 1,621
The rest of the bearings only have one hole, so they are not as tricky. However, it is still equally important to line the passages up with the holes in the bearings perfectly. Line the hole up with the indention from the main bearing supply passage and drive in the lubed bearing. I knocked this one in a little too far, so I reversed the tool, came in from the rear and knocked it back in the proper location.
 

Attachments

  • 017.jpg
    017.jpg
    50.9 KB · Views: 1,733
  • 018.jpg
    018.jpg
    53.8 KB · Views: 1,609
  • 019.jpg
    019.jpg
    33.3 KB · Views: 1,627
Last edited:
Continue on driving the bearings in in the same manner. Lube the bearing up good, line the hole up in the bearing with the main oil passage and drive the bearing in. I use a heavy hammer, because I do not like hitting the bearings very hard. Gentle taps is all it takes. Anything more and something is wrong.
 

Attachments

  • 021.jpg
    021.jpg
    33.2 KB · Views: 1,574
  • 020.jpg
    020.jpg
    58.6 KB · Views: 1,570
Now, on the big block, the front camshaft bearing is pretty tricky. The main oil passage is at an angle going toward the front of the engine from the bottom. It is somewhat difficult to see the hole lined up. So, here is what I did. I positioned the hole in the bearing even with one of the slots in the collet. This gives a reference so you know where the hole is. Lube the bearing up, line the slot in the collet up with the main oil passage and drive it in. Make sure there are no metal chips anywhere by wiping everything down good, put the main caps back on and you're done.

I hope some of yall will jump on your own install after this. It's really very easy to do and you can get it dead on if you take your time and go slowly.

Please thank my beautiful wife Kitty for all of the pictures. I could not have done this without her. Thanks.

Rob
 

Attachments

  • 022.jpg
    022.jpg
    48.1 KB · Views: 1,669
  • 024.jpg
    024.jpg
    28.3 KB · Views: 1,643
  • 025.jpg
    025.jpg
    56.7 KB · Views: 1,646
Last edited:
I almost forgot. Here's a pic of everything you need. Includin a dead *** redneck to do the job. lol Hope yall enjoyed this. Don't hesitate to ask any questions.
 

Attachments

  • 001.jpg
    001.jpg
    82.7 KB · Views: 1,720
May I just ask where you bought this tool for $115 shipped.
Sven
 
Good Job Rusty , Just as a regular machinist would have shown us. Good info for guys who like to save $$$ and do things right themselves. I heard too many stories, especially on Mopars where the #4 bearing was not installed properly. Does not allow oiling of valve train , among other problems.
 
I hawked Ebay for a couple of weeks and found one that was cheap with free shippin with "make offer". I sent the seller a stupid offer and we met in the middle. They are on Amazon for like 139 free shipping right now. It's not hard to find them reasonable if you're not in a hurry. It doesn't bother me if I never get my money back out of it. It's a tool. When ya need it, ya got it.

May I just ask where you bought this tool for $115 shipped.
Sven
 
Last edited:
Auto Transport Service
Back
Top