• When you click on links to various merchants on this site and make a purchase, this can result in this site earning a commission. Affiliate programs and affiliations include, but are not limited to, the eBay Partner Network.

Filler Secrets 101

Spreading and sanding/ Word of Caution

I Will constanly repeat at this stage.....I am in a Re-discovery process...this by all rights is an experiment....Don't just cut into Your project with this w/o some testing....once You build a part as example, paint it black....leave it outside.....watch...you'll see some shrinkage surely. but fracturing...is what to watch for....Why, as per Photon's steering i'm going to the Epoxy resin on next fender...because as per the tech Photon posted earlier....the stretch and grow rate of eoxpy matches the stretch rate of the Fiberglass at 6%.....polyester resin only has a 1% stretch before tiny fissures begin....now i don't think steel skin of a car is going to expand more than 1%, but an ounce of prevention is worth a pound of cure. So the Operative word on this thread at this point is EXPERIMENTAL.....but i really like what's coming so far...shat is HARD...that just seems right....sanding is good amount of effort...stamina required.

....almost ready to do the dabs w/ finish putty....actually, for finish putty we've been using the 2 part AXIS urethane primer....makes a nice creamy smooth spread and has hold out & strength.....so tomorrow finish the last bit of blocking on this last spread, , wipe the little valleys and another spread on inner lip. ..block entire fender out w/ 120grit & re-prime.....Fender was already in poly prime from previouis work, so all i've built is on top of well cured poly....again, all feather edges are superb. j
 
If you ever have a need to know what your metal expansion rates are, consider that mild steel expands about 1/6 millionth of an inch per inch per degree Fahrenheit. Actually closer to .00000645 inches, which you can punch into your calculator.

Let's say you have a body panel that's 45 inches long. And say it's 60 degrees in your garage, and you put it in the sun where it warms up to 110.

So, 45 X .00000645 X 50 degrees temperature shift = .0145125, let's round it to .015, which isn't much. It's 3/200th of an inch, around 1/64". It's got a long way to go before 1% comes close.

But besides thermal stresses, you'll find more metal deformation with normal driving as the car shifts, twists and bends over irregular road surfaces. And where panels 'drum', flat surfaces that flutter with their own resonance if they aren't glued to the framework beneath. That's where you want to have good adhesion and resistance to stress loading. That's also where a set of sub frame connectors are useful.
 
Great post Photon....torsional stresses present more of a potential problem....sub- frame connectors are good insurance...some monster hemi 600 lb ft beast would be something of a test in an un stiffened uni-body. Flex agents to my knowledge can be added to everything..fillers, primers as well as paint.....my objection to flex agent is mashed potatoes....it's always on the move.

I wanted to jump into how i actually do my building and spreading. I don't just slap a bunch of mudd on and start carving...every shape has to be adapted to....this is what sets this game Far, Far apart from mechanics....there is nothing easy about working visualized results to SEE the shape in Your head so you know where to cut when. The term auto body mechanic is mildly offensive to me...apples & oranges...i do BOTH
When i have a surface feathered and ready to begin fill, i work the panel a section at a time..crude example a door with a single horizontal peak going through middle,, damage is on both sides of peak and peak itself is distorted....i find the correct line, tape it, full length, mask back a little, then i skim the whole 1/2 section, close to.....when kick starts and just like butter, pull the tape...gives a relatively accurate line. lay the mask back down in same place let it kick, graze it open and give it 30 minutes to vent before blocking...so one time may be enough or multiple, but repeat each time...then when Your 1/2 is starting to get to level...flop everything to other side & repeat these steps but ** when using tape with fillers , like hot paints, glass resin etc can soak the tape and it will impart glue...IMPERITAVE to Clean glue away before anything else goes on...tape glue trapped in layers of painted surface will gas and seperate when surface gets hot.....i use tape all the way through a job, it is cleaner looking progression of work and aids in getting stuff to look "straight" for it's given shape....give a try...it adds time, but gives me result i strive for take any thing...take something flat, tape half off, then build it to hav a peak when you're done...so You build & shape one side and You get half the peak built w/ desired pitch and height,,** the other side is taped off and you cut in to tape edge without tearing it up......the before taking the mask off, You run your next tape right along side of the mask, then pull the first mask...the reference is close to be exact..mask back off it and begin to build Your other side....keep that dividing tape edge clean when You sand...**also, before spreading second half, lightly scuff your new edge, break the tack, smooth it a bit, so a seam without void i created, when second half is spread in. Remember clean glue before each spread & pull the tape BEFORE it kicks..when like butter...when pulling tape pull straight back, or at angle away from spread..do not pull towards fresh plastic. The tape can be used for guidelines throughout whole blocking process. whether filler or primer or paint to be recoated.. if You want a sharp edge..(like the edge of a post it.. ) this method will help to achieve the result. Thing to consider here is that the sharper the line is, the straighter it must be.....but if you build panels in sections..get the to desired straightness keeping edge sharp..Then the edges, lines, can be softened to desired radius.

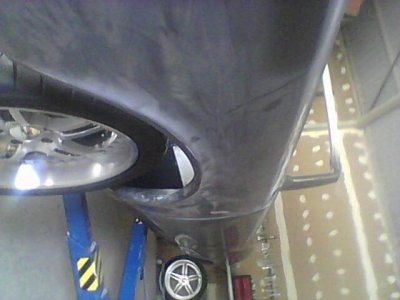
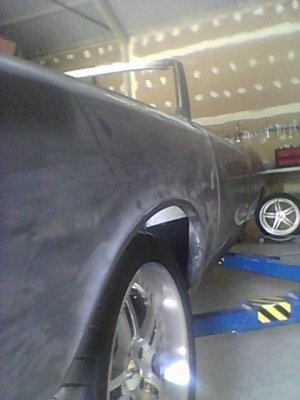
I'm going to carry into other arenas. get some pics up with a recap in a while. probably prime the fender this eve or AM...it'll sit a while..idle project...ideal for some time test...but i'm pretty confident right now..lot of things l love about this mix th.jpgsame style fender here so front of fender around side all along to end of running board/step...not whay you would call a precision piece of sheet metal, the lowe lip lip is also spread entire lenght....is all relatively consistent in color because each spread was full length except at front where that peak is ..i built that area in manner previously described with use of tape as reference and GUARD jimi buff-it
 
the Finessed Fake

The fender is ready to prime save i want to do one more complete thin spread on extreme inner lip, what's a bonus is that the same mix that stands up a paint in a small pile..and hangs vertically in a blob, that builds when applied nice, also can be spread in thin sheets...and it's all of structural integrity....this the Cab-o-Sil mix, which is a standard material, in glass boat industry.
i'll tape the edge , end to end, down sides, spread the lip, pull tape at beginning of kick when soft, block it down. then i will take and block whole fender with 120, radius the new edge to desired fatness.....shoot some urethane primer on....i said i was Using AXIS, correction, we're using a Canadian urethane, Brand name Pro-Form. As said, urethane or poly prime unreduced makes a nice spot filler thin wipes to to fill pins, pits, errant scratches . So that's that for a while....the glass in 120 is incredibly smooth...actually presents a gloss on the crowns.

I've more than likely been through a 100 paint facilities in my life between cars, aircraft & boats......production bodywork is NOT metal finishing...i don't care if it's a Benz. Bently, Lambo, Porsche etc, if it's an insurance job....the easily fallible materials are going to be used to facillitate said repair.....i know the game intimately....it's hard to fade experience. So in a production world i had to figure out how to use those materials in a finessed approach....i am into symmetry...# 1 rule in prod bdywk is one can not look at both sides at same time. Not good enough for me,,,so i had to learn how to fake the geometries...and each car is different shape and each distortion to overcome is different....just because it's plastik, doesn't mean it's easy!! It is sculpture plain & simple I DO BOTH if You haven't seen my aluminum sculpture ( Blades Ego thread), mechanics are not sculptors mechanics is more in line with exact science, which bodywork and the materials are APPLIED science....so unpredictable in nature @ times. I've wrenched all my life too....doesn't mean i think that that's something accomplished with a hand tied behind back....it just means i know the difference.

So beyond the idea that i am experimenting with a material, the procedures i'm using are along my normal approach....i do metal finish,,,,sometimes a metal repair can be faster than a fill repair... i can lead, but i sure wouldn't waste my time with it on my own stuff. HEAVY pain in the *** to do and it checks just like old fill will,,,& moves......Long Hair chop is resillient stuff...get your metal within an 1/8", don't need long hair...short will be plenty adequate....work in progressive coats...keep surface decontaminated with occassional solvent wipes(acetone because of evap rate)...don't saturate. but generously wet..it works great for picking up the tack/sticky on a fresh spread, so you don't clog up expensive sandpaper) wet followed by clean dry) if You try the tape, watch the imparted glue, never cover that, when sanding to tape edge, don't tear it up, your just sanding tape glue into filler. Using store bought materials, after short chop Dura/Dyna glass, for bondo type filler, mix the duraglass, with two part polyester finishing putty to desired consistency...MIX THEM THOROUGHLY BEFORE adding creme hardener....this will make a decent intermediate fill.....for finishing thin wipes...use unreduced poly or urethane primer, w/ their respective catalyst. EVERYTHING WATERPROOF!!!! low moisture and debris traps, work cancer from back side. BONDOE is NOT WATERPROOF CHECK IT....with a waterproof fill against a spot rotting from back side, the plastik.. is going to refuse entry to moisture...car will litterally deteriorate around the plastik..

Any time you sand a material on surface, whether it's fill or old paint, it is material that can be used to advantage, in leveling, as a guide coat if accurately blocked to read the hi and lo spots in surface.....The way to look at this.....80% is all about how you sand....the biggest factor in Your final results.....Faking nice can be costly as hell, to do a restoration in all metal is totally unrealistic anymore ...it's going to run no less than 50.00 an hour on an open clock

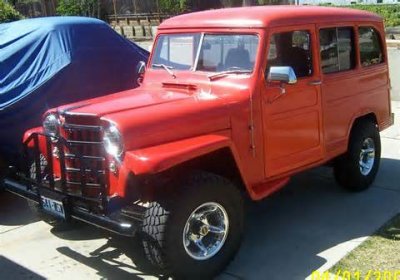
747 pro-touring resto-mod documented a very clean repair repair He had to do on his rockers...pretty much full lenght on both sides from what i can tell.....He doesn't have as much plastik any where i don't think as what i have built close to the edge on this jeep fender. look @ His work, well orchestrated...this finesse fake of mine is also pragmatically orchestrated.

Benefits:
1. cost....epoxy resin is 80.00 a gal...mat is reasonable in cost... so a qt. of chop can be made for 20.00 or less...the intermediate fill is the Cab-o-Sil. haven't priced it yet but it's probably something like 5.00 a lb.
2. the spreadablity and working time. i worked spreads for better than 10 minutes without it drying out on me, could spread smooth right to initial heat.
3. Waterproof
4 tough as nails, can't dig thumbnail in...and it holds shape easier as You work, definitions are more easily established and retained.
5. like modeling clay...You can mold it onto a vertical surface with your hands and it will not fall off....it's almost the consistency of cool whip. so learning how to get it on to full benefit will take a minute.
6the feather against all mediums is superb, not a hint of sharpness in feather edge from glass resin.....i feel that this fender will develop other problems before any problem with the sculpture....i'd do it to mine. There's a million stories in the naked city...this is one
i'll get the pics up sometime in a couple weeks i hope. Meanwhile anyone with trix..., technical info, material/labor related, any questions, fire away.

Thought that maybe this could be a think tank
the GTO was approached withe tape and build approach...is a rotiss, had aftermkt qtrs(not AMD{before me])..all wheel arches were built in sections as described with kitty, duraglass, ,, duraglas/finish putty combo. it's mini-tubbed, so there was a lot of blending arches with new wheelhouses. Have photos from car on jig to a rough assembly if anyone wants to see them. jimiGTO side in 400.JPG
 
Thanks for straightening me out Photon...i must learn ho to do it myself, huh?

Ski......KGB!!
 
Well, Sunday afternoon...had some other things to do at weeks end, so i'm headed out to finish the last bit on fender, spread inner lip one more time and a couple dabs here & there & i'll prime later after it cools off. Sure glad i got reacquainted with the cab fill before i cut into my own project because this the chit for me! nomobondo

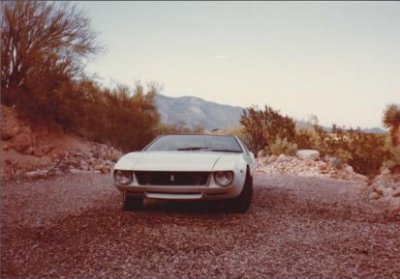
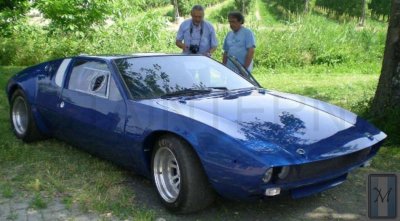
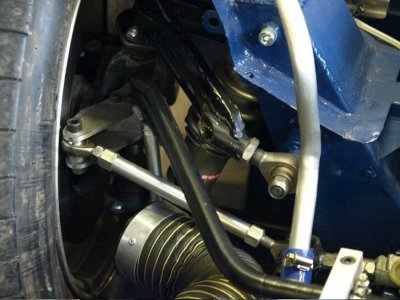
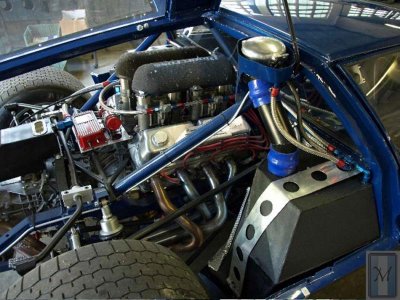
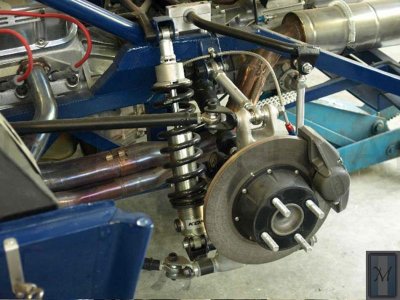
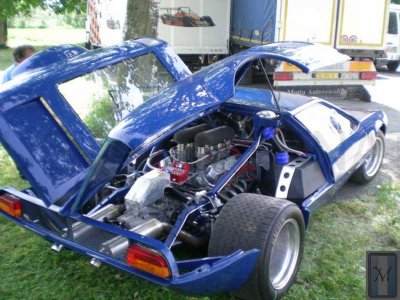
attaching photos of Goose because......well because it was mine & the only GD car i've ever been able to do for myself...hell of a practice canvas...now if this had been Yours, wouldn't You be prone to reveling in & reliving the memories? Wouldn't You be likely to show it off and say, this was mine...i may be an also ran, but i DID run. substitute a Daytona or Superbird.....damn right You'd be singing to beat the fat lady....dem Mopars are still production assembly line cars...da Goose is hand beaten, hand built.....only 401 so it's apples & oranges @ end of day........my 68 post Coro was a faster car though....the Goose was an undeveloped prototype, possesed with the right hardware, just wasn't ever R&D'd & sorted...the main handling ill was unpredictable rear camber due to manner in which ZF was hung...takes 200.00 worth of fab work to cure the problem...couple little trix and they'll kill a hell of a lot more than Cobras, but in stock form, they behave on a well kept line, offer wonderful feedback & feel within adhesion limits, but i could drive circles around myself with a stock 318 B-Body.Screen Shot 2015-03-29 at 4.23.49 PMGoose A.jpggoose C.jpggoose D.jpggoose E.jpggoose F.jpggoose G.jpg8ma580-001.jpg8ma580-003.jpg8ma580-005.jpg8ma580-007.jpg8ma580-009.jpgMine is 8MA-1148....the metallic blue car is 8MA-580.....this Guy got real serious...this is pure race car **note doors with plexi curtains** rear frame completely re-worked, machined His own steering knuckles ..i know why cuz i snapped one one night....stock spindles/bearings & knuckles are Fiat 124, but amazingly, with all that rework, those are the OEM Girling brakes, same as 289 AC Cobra......very good brakes. My Goose never once refused to run.
 
Yesterday brought problems. not with fender but my Pup Dana ran into something and poked Her eye or She got glass inint...swole shut. fender is fine, scuff out some DeSoto parts and prime all this evening. The repait so far is puss...when put into 120 , the fill takes on a gloss...so using this as fill. one can get a reflection to work by before primer...anyone that does bodywork as a rule can easily understand the benefit of reflection. So next week i'll drag the other fender into the mix and start roughing it out. Took phone pics..when i get it refilled, i'll get potos uploaded. I think that one application & blocking of primer will be adequate to put fender in 360 wet for color. Anything of MINE that i do in future will be in cab-o-sil in place of mudd and all foundation will be done w/ Chop mixes. I'm going for epoxy resin, have to figure out which epoxy will be best.

A note....for me, Tape is a tool i use all the way through my processes.....i want the tape edges as clean as i can get....people arbitrarily throw their tape rolls anywhere, set em down in ****......the sides of rolls are....guess.....STICKY, so they pick all the **** up ...then the edge no longer comes off roll clean....BE NICE TO YOUR TAPE and it will serve You better in the end...if You use tape in bodywork as i do...Keep Those rolls SEPARATE from top coat masking!!!!!!!!!! Also, get in the habit of standing the rolls up rather than laying them on sides, ... make a little box with different width dividers to carry around job with, for stowing tape prudently....little things in concert do a lot toward trying to execute work well done...remember that the memory of the job's QUALITY will last far, far longer than the memory of the money it brought . depends on what You want in Your grey box filing cabinet.....i like to look back and know that i ALWAYS Tried My BEST!
 
Thanks Bladecutter for sharing your knowledge and Photon also. I am always open to new ideas and when I get time will try this. Very interesting stuff and that Goose is a crazy ride.
 
Was Working on GTO today.....wrapping it up for final prime 600+ hp/550 ft lbs LS-2 married to Tremec 6 speed....that just the beginning...full undercarriage menue bumper to bumper...Hotchkiss/Wilwood (SIX piston/14.5").

Anyway....a tape method ....when trying to make a corner with tape...pick up inside edge of tape as You make the radius....keep the inside edge picked up high, the tape conforms to the radius easier....drug out the other Jeep PU fender yesterday..Pete did some bending on it & i'll start the process with it...still fine tuning the first one....weekend is almost here hell yes!! L8R Gang
 
I thought Cabosil & Aerosil was used in powder coatings to help the surface flow out and eliminate pin holes. Learn something new every day.
 
callofthemopar......it's quite possible that it could be an agent used in powder coating, makes sense maybe because the heat would liquify the cab probably which could be in alignment with a flow aid. Before starting this thread, i thought cab was just finely ground fiberglass strands, Photon gave me the correct info on the nature of it. My experience has been that the glass boat industry uses cab mixed with resin...i worked at Warlock fast offshore boats for a while....did gel coat repair and any medium fill> prior to gel was cab fill. Where i 1st learned of it was in South Tucson...a glass sailboat builder....kinda funny... deep draft sailboats...mfg'd in the desert across the street from a custom/producton straightening/refinishing outfit i toiled in. Was building three of the alphabet Ferrari 250 GTO Body kits for Datzun Z cars...used cab on those.....two of the cars got SB 350 chebbies, so a lot of jacketing frame rails, connectors, also triangulated box tube between frame rails and rocker boxes. Anyway, it just didn't dawn on me to use it as filler on metal.....i'm nonplussed with what i've got so far.....i think that as long as the glass content is kept rich....stiff so it will hold a shape and not run....resin fracturing will not be a problem even with generous builds, but i wouldn't much exceed an 1/8" in areas after sanding.....but i'll put my money on a chop foundation up to a 1/2"...it won't break...not long strand.....not if it's done with finesse....24 grit the metal....spread a film in area thin with force..get it worked into those 24 grit teeth marks, then start spreading the build to desired thickness......always, when doing spreads with whatever type fill...get a film of filler spread over entire area Firmly, then ice the cake.

Bottom line.....Plastik repairs can be done on rusted out rockers and other goodness that if done with some thought and planning, will outlast the car around them.....and i will opt on MY stuff plastik over lead any day of week 24/7. When i have my B project...after the metal work is within a n 1/8", i'm bustin out the trowels and skimmin and carvin'.....and it will be the shape it's supposed to to be, but exponentiated'
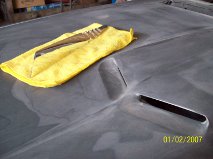
Seeing the Goat today after not having done so for a while....well You know what it's like to get off something that your eyeballs have been popping out of your head on a daily basis for 7 mos...can't leave the job at the end of the day, wake up in middle of night stressing one thing or another, every little inconsistency is in Your face....and then You finally get a divorce.....time goes by....all those glaring problems all of a sudden have shrunk and the overall picture looks really f-in Good and You're entitled to congratulate Yourself "Effort Equals Results.....Regardless" **Roger Penske** This GTO, Due to the efforts of many, including the owner(Lot of His Fabbing) Is going to be the envy of Goatheads...it's going a dark anthracite....i wish it wa going black....i laid a damn good foudation, Pete has fined tuned behind me because He is the straightest block i have ever known....this sonofabitch is a fugging arrow....the reflections only bend where they are supposed to......the bumpers are things of true beauty all tucked in nice and TIGHT to car(MAJOR fabbing) and will be brush finished.....Yeah...Teamwork....when the whole becomes larger than the sum of its parts. Plan is after Car is shot, cured, cut, recleared, cured....then i'll put on my jimi buff-it hat, and spend a month doing the cut & polish...and do all stainless and aluminum trim . May God keep smiling and my hood scoop stays glued togetherGTO 2.jpgBettie GTO.jpgBettie GTO 2.jpg(cam date wrong..2014) **note that scoop is also now a functional item** You can bet that there is major insulation against back side of hood....undecided whether scoop wil be ducted or just be free cooling air....i don't think those inlets are large eouugh for forced induction....at any rate, i'm not a fan of form w/o function, so we opened it up so it can be called real.
 
Bladecutter and all others Thanks for telling us about how to do use this stuff. I'm getting ready to start working on mine. Mike
 
Thank you Mike. I again stress that i'm experimenting the repairs are very satisfactory in many regards i feel...longevity is the criteria, but keeping the cab-o-sil mix rich & stiff with the cab and not exceed ing much more than an 1/8" in lows after sanded..is a broad saftey margin...anything more than an 1/8" should really have some chop mix initially. The fenders are happening in between doing other things...pictures will come.

Using store bought fills: i quit using non-structural, non waterproof pourous 'bondo type' fill sometime ago...what i started doing was mixing Dura Glass short glass chop filler w 2 part polyester finishing putty...they're both waterproof & the chop is of structural value. They both are poly resin based and they both use creme hardener. Pre-mix the two components THOROUGHLY prior to adding hardener. You can adjust the ratio of the two according to how much You are going to build......30% poly finish putty to 70% duraglass will yield a decently smooth spread with a build. For skims i've gone 50/50. I say look into what is available in epoxy resin based fillers....if cost is not drastically different....the epoxy is going to shrink and move less than polyester it's sounding like to me. But i have no real exposure to epoxy filler....@ Warlock Boats, they used Vinyl ester....was superior in strength to poly, but shrunk badly. I've used All Metal, that might be epoxy based.....never took it into account before. Anyway, i guess the moral of this diatribe...,.come up with an alternative to 'bondo'....get Waterproof....it makes the difference whether the rocker boxes are gonna start blistering again in a couple years. Moisture gets in like Life just does....if the back side of Your surface isn't barriered against moisture..i mean surface against metal, then deterioration will work from inside out. I have stripped paint off cars...full panels fully top coated, and the metal is orange under paint. I recommend strongly to all to use structural, waterproof materials. asta'
 
Boogie Test

Working on second fender which is a bit rougher than 1st..plus found some things on 1st i want to dial in a little tighter, neither is in prime yet...also doing other things, but at the end of the day, i will end with some time in them..hand massaging.

I breathe a lot of crap all the time, so the cab sanding dust is no different except for it literally begins to restrict air intake into the nose, so i couldn't help but notice that my boogs took on a bit of a composite nature, got some tinsel strength going though them...stretched like Rex Reed in Fantastic Four. I'd say that's a somewhat positive indicator of the integrity of the cab fill, albeit an unusual barometer. Out of resin now. have a couple speads of mix left which will just about stretch to the end....my second batch of cab mix was even stiffer w/ the cab-o-sil than before, which reduced the 'tack', still offers gloss in 80 grit when sighted down. A Good Day
 
Primed

The pair of fenders are in prime now.. Not bad for the first go round....left fender has a bit fatter compound curve in the area that that transitions from fender deck and ramps down to the next 90 degree that flattens into short running board(Jeep PU, see pic in a previous post) ,that compound shoulder running the length is fatter....it's been straightened before.....my main aim was to get the lip and face, peaks, and block out the rest of what had been done ahead of me....not my metal work.......could be factory too...not a matched pair, no telling how many years apart....tooling can vary sometimes......it's a subtle in consistency, any way, it's not a concourse jeep, the theme was to do a reasonably tidy job with an alternate filler. Have taken cell phone pics throughout, including potos of the cab powder and the mix itself. Get pics up soon as i can.

I had a 1/3 gallon of Pro-Form short chop filler that had dryed out becase people don't put lids back on well....anyway i loosened it back up with polester resin and also took apart some rather nice glass cloth because im momentarily out of mat, into approx 5" strands and added generous portion to the filler and that works qite well both as base fill and an intermediate....shapeable, yet can be spread fairly thin and smooth....smooth enough to replace bondoe, yet its water proof and you've got glass hairs criss crossing throughout the sanded substrate....move to catalyzed finish putty from there, and then do the catalyzed unreduced primer for the REALLY thin skim coats.

Oh, i finished the fenders out in 120 grit, for primer....the hold out is pretty choice. the cab fill areas are very smooth and the prime is not sucking into the feather lines.....so we're riding some notches above slammed out production work, just not flawless. As said before...A Finessed Fake

Photon....Thanks for that chassis info btw....i had no idea of the B relation...sweet. Also the spring info from Your book...that's positive direction. Mafe an interesting discovery tonight, the two compound curve corner fairings, frome house to cab, i always figured the were glass..nope..aluminum...Bonus!! and they are almost pristine. The whole kitty is pretty straight. I'm gettin excited now.

A Mopar little trik i got turned onto in the 89....68 only......the button markers.....take them apart, fronts unscrew if i remember, the rears have little cast ears that You carefully straighten, pop out the plastic lenses and replace with blue dots, You can even take the tabbed bezel that comes with dot, cut the tabs off it and it can go in......my last B, the 68 post Coro....20.00 and it looked so
Surreal.....gave me a lot of pleasure for a paltry sum....G' Night
 
Photos after 7/12

Will have process shots up by the 12th barring setback, plus will inc lude some other photos, progress on 62 Poncho GP and Pete's new acquisition, a 63 Stud Hawk GT that's pretty puss, causing me to rethink some strategy as i can see myself in that Car...takes me back...the cowl vent doors in sides remind me of my Old Man's XK-120 too....all the stainless is bitchin shape, no damage, no previous repair. bone straight pinch welds, killer dash, killer smell! 289 w/ BW 4 spd.....could be a sweet turn key w/o a career. i had just committed myself to starting a project w/ my 73 Fireball......the two of them together would be so period correct....an ensemble. got a few shows and auctions working this year....if i sell a couple big pieces, i can do both, and be enjoying them both by spring. Gotta stay inspired.
Anyway, Photos and recap of operations will be soon forthcoming, plus one fender blocked and ready for next prime to show comparison beteween two stages.

I'm upset that the forum removed my "Sovereignty" thread that i started yesterday, and i told them i was upset and l thought they were being leftist PC, so i may end up banned before long......in the words of Alfred E Newman(we got a black one, albeit just another yesman, carrying out the actions of bringing down our democracy),
"What Me Worry?"
 
Auto Transport Service
Back
Top