Gather round the campfire boys & girls and I’ll tell you a tale of bused knuckles and sore backs.
The players for this little mellow drama are:
Mr Shifty Automatic, our resident MOPAR guy with tools and a lift and all automatic transmissions in his garage, Mr Blueoval Bowtie, a friend of Shifty’s who has mechanical skills related to a manual transmissions, but no MOPARs. Shifty shanghaied Blueoval because of those aforementioned skills. And the 3rd ,member of the cast, me, Mr Rookie Mechanic.
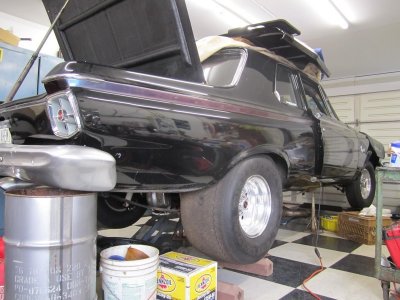
Our story opens as Rookie and Mrs Rookie arrive at Shiftys at 9:15 AM to change the transmission in Rookies GTX. They are going to swap the regular 4-speed for an overdrive 4-speed. In previous conversations, Shifty says that it won’t take more that 2 or 3 hours to do the swap, so Mrs Rookie has come along to socialize with Mrs Shifty.
Shifty has all the tools laid out, the work area is spotless and all is ready to start work. The GTX is put up on the lift and allowed to cool down as it was a 40 min drive to get to Shifty’s house. Once cooled down, the job begins. All the pieces come out with no problems. And in short order everything is ready to start re-assembly. Shifty says “ Have a look at your flywheel, Rookie” Oh fudge! There are little cracks all around it.
OK. Out comes the flywheel and we take it to a friend of Shiftys at a local garage. He will send it out to get it resurfaced and gets it back to us in a couple of hours. By now it is 2:30PM
Now we begin the re-assembly. All the new pieces, pilot bearing, pressure plate, disc and throwout bearing go in without any fuss. Now the new gearbox: 150lbs of cast iron, but we had a transmission lift so it wasn’t too bad.
We slide it into the bell housing and it stops..?? Huh? Looking into the housing, we can’t see anything to cause the hangup, so we pull it back out and look in to the clutch disc area and still no clue. Blueoval has been here for a while and he’s at a loss as to why. Lots of sliding the trans in and out up and down, side to side and now it’s getting dark! It’s been 11 flippin’ hours, so we toss in the towel and Mrs Rookie & I head home in one of Shifty’s cars.
Day 2:
I arrived at 8:30 and after tossing and turning all night, had compiled a list of what to check.
First we pulled the trans out so we could check the pilot bearing to verify that we put the correct size in. We pulled the pressure plate & disc back out and tried to measure the bearing. No go. The caliper ends are too short to reach in to get a proper measurement.
Ok.. Move on to the next possibility, the disc. I picked up the disc and TRIED to fit it over the input shaft and damned if it wasn’t too small!! By golly, it was a 23 spline disc instead of an 18!!! Well, a few choice words were uttered, and then a phone call to the vendor that provided the trans. It seems that it wasn’t his fault, as the company that supplies his clutches is in California, his shop is on the East Coast, so to expedite shipping, the clutch company shipped it direct to me. Transmission man arranged to have the correct disc shipped to me the next day so we could continue the installation.
Day 3
A soft knock and a whispered “UPS” at 5:30AM produced the correct clutch disc and Rookie was off to Shifty’s to get it finished!
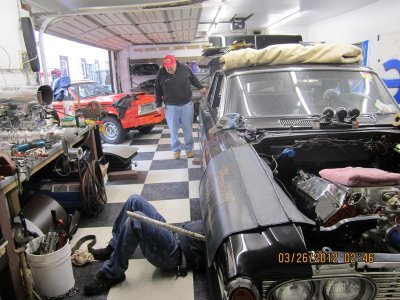
The assembly process went smoothly until we put in the clutch fork. It just was being fussy. Ultimately, it went in and we moved ahead. Finally, we get to the final adjustments and the clutch is engaging right off the floor and not the greatest feel. Blueoval and Shifty were on the ground and Rookie was up in the GTX. It seems the more we adjusted it, the worse it got. Finally, Rookie said, enough! He called a towtruck, and trucked the GTX down to Mr Pro Fix-it.
Pro puts the GTX on the lift and begins to root around. 10 min later, he says “ Got it!”
The problem: The little spring steel clip on the rear of the clutch fork was broken. Pro said it was most likely has been broken for a long time and by removing the clutch fork, we disturbed the delicate balance.
OK.. The new fork was ordered and now we wait….
The weekend passes and Monday afternoon Pro calls and says, “the fork is in and there is still a problem”. It seems that the company that built the pressure plate set the fingers (Borg & Beck type) too low in the housing so when you push the clutch in the fingers drag against the disc!! OK, this is beyond funny now.
We sent the package (disc, pressure plate and flywheel) to a local company that specializes in clutches and $100 later we’re back in business. They were able to reset the pressure plate fingers to the correct height. Also found the disc was not true and was wobbly when it spun. They fixed that as well. That and some new parts in the z-bar and it shifts smooth as silk.
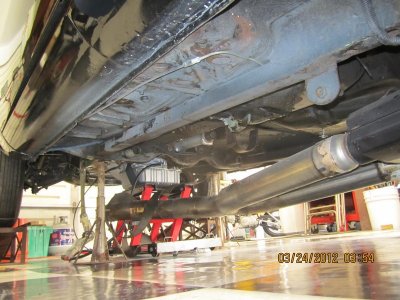
While it was in Pro’s shop I had him put disc brakes on all 4 corners. Got tired of the excitement of trying to stop the GTX with drums.
We used the Hydro Boost system to pressurize the brakes. It uses pressure off the power steering pump. No vacuum unit required.
It was a bit touchy at first but I got used to the pedal, but what I will say is WOW.. This car stops.. No fuss no muss, just whoa!. Just like a modern disc brake setup.
Now, the moral of the long story is: Always, always, always check your parts for fit before you plan to do the job!
The players for this little mellow drama are:
Mr Shifty Automatic, our resident MOPAR guy with tools and a lift and all automatic transmissions in his garage, Mr Blueoval Bowtie, a friend of Shifty’s who has mechanical skills related to a manual transmissions, but no MOPARs. Shifty shanghaied Blueoval because of those aforementioned skills. And the 3rd ,member of the cast, me, Mr Rookie Mechanic.
Our story opens as Rookie and Mrs Rookie arrive at Shiftys at 9:15 AM to change the transmission in Rookies GTX. They are going to swap the regular 4-speed for an overdrive 4-speed. In previous conversations, Shifty says that it won’t take more that 2 or 3 hours to do the swap, so Mrs Rookie has come along to socialize with Mrs Shifty.
Shifty has all the tools laid out, the work area is spotless and all is ready to start work. The GTX is put up on the lift and allowed to cool down as it was a 40 min drive to get to Shifty’s house. Once cooled down, the job begins. All the pieces come out with no problems. And in short order everything is ready to start re-assembly. Shifty says “ Have a look at your flywheel, Rookie” Oh fudge! There are little cracks all around it.
OK. Out comes the flywheel and we take it to a friend of Shiftys at a local garage. He will send it out to get it resurfaced and gets it back to us in a couple of hours. By now it is 2:30PM
Now we begin the re-assembly. All the new pieces, pilot bearing, pressure plate, disc and throwout bearing go in without any fuss. Now the new gearbox: 150lbs of cast iron, but we had a transmission lift so it wasn’t too bad.
We slide it into the bell housing and it stops..?? Huh? Looking into the housing, we can’t see anything to cause the hangup, so we pull it back out and look in to the clutch disc area and still no clue. Blueoval has been here for a while and he’s at a loss as to why. Lots of sliding the trans in and out up and down, side to side and now it’s getting dark! It’s been 11 flippin’ hours, so we toss in the towel and Mrs Rookie & I head home in one of Shifty’s cars.
Day 2:
I arrived at 8:30 and after tossing and turning all night, had compiled a list of what to check.
First we pulled the trans out so we could check the pilot bearing to verify that we put the correct size in. We pulled the pressure plate & disc back out and tried to measure the bearing. No go. The caliper ends are too short to reach in to get a proper measurement.
Ok.. Move on to the next possibility, the disc. I picked up the disc and TRIED to fit it over the input shaft and damned if it wasn’t too small!! By golly, it was a 23 spline disc instead of an 18!!! Well, a few choice words were uttered, and then a phone call to the vendor that provided the trans. It seems that it wasn’t his fault, as the company that supplies his clutches is in California, his shop is on the East Coast, so to expedite shipping, the clutch company shipped it direct to me. Transmission man arranged to have the correct disc shipped to me the next day so we could continue the installation.
Day 3
A soft knock and a whispered “UPS” at 5:30AM produced the correct clutch disc and Rookie was off to Shifty’s to get it finished!
The assembly process went smoothly until we put in the clutch fork. It just was being fussy. Ultimately, it went in and we moved ahead. Finally, we get to the final adjustments and the clutch is engaging right off the floor and not the greatest feel. Blueoval and Shifty were on the ground and Rookie was up in the GTX. It seems the more we adjusted it, the worse it got. Finally, Rookie said, enough! He called a towtruck, and trucked the GTX down to Mr Pro Fix-it.
Pro puts the GTX on the lift and begins to root around. 10 min later, he says “ Got it!”
The problem: The little spring steel clip on the rear of the clutch fork was broken. Pro said it was most likely has been broken for a long time and by removing the clutch fork, we disturbed the delicate balance.
OK.. The new fork was ordered and now we wait….
The weekend passes and Monday afternoon Pro calls and says, “the fork is in and there is still a problem”. It seems that the company that built the pressure plate set the fingers (Borg & Beck type) too low in the housing so when you push the clutch in the fingers drag against the disc!! OK, this is beyond funny now.
We sent the package (disc, pressure plate and flywheel) to a local company that specializes in clutches and $100 later we’re back in business. They were able to reset the pressure plate fingers to the correct height. Also found the disc was not true and was wobbly when it spun. They fixed that as well. That and some new parts in the z-bar and it shifts smooth as silk.
While it was in Pro’s shop I had him put disc brakes on all 4 corners. Got tired of the excitement of trying to stop the GTX with drums.
We used the Hydro Boost system to pressurize the brakes. It uses pressure off the power steering pump. No vacuum unit required.
It was a bit touchy at first but I got used to the pedal, but what I will say is WOW.. This car stops.. No fuss no muss, just whoa!. Just like a modern disc brake setup.
Now, the moral of the long story is: Always, always, always check your parts for fit before you plan to do the job!


")


