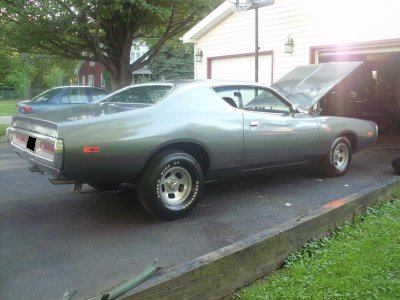
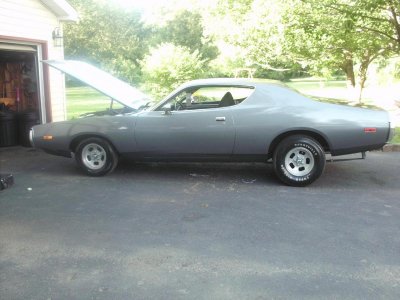
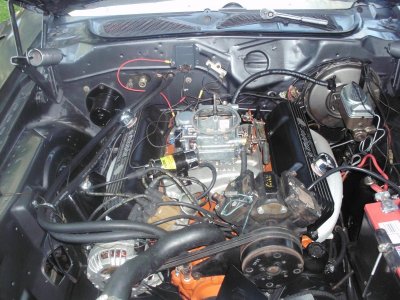
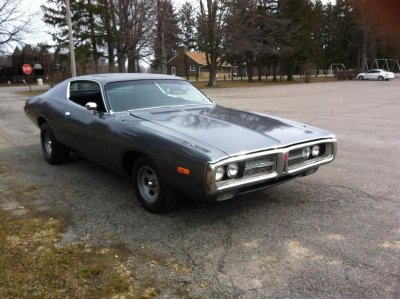
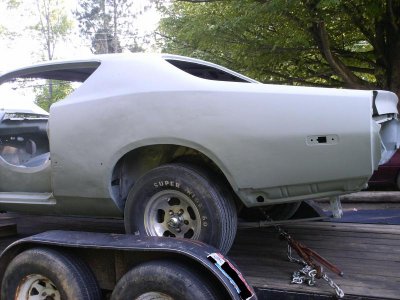
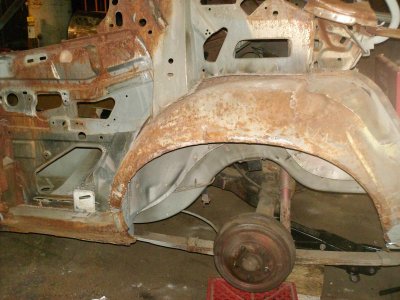
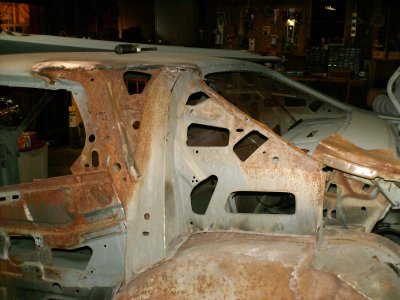
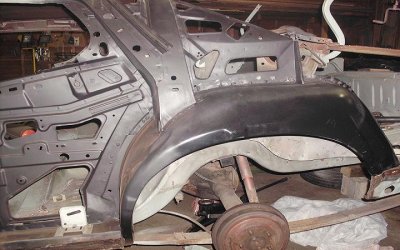
• When you click on links to various merchants on this site and make a purchase, this can result in this site earning a commission. Affiliate programs and affiliations include, but are not limited to, the eBay Partner Network.

My 72 charger project

72 charger

Well-Known Member
Local time
11:43 PM
Joined
Jul 7, 2010
Messages
177
Reaction score
5
Location
OH
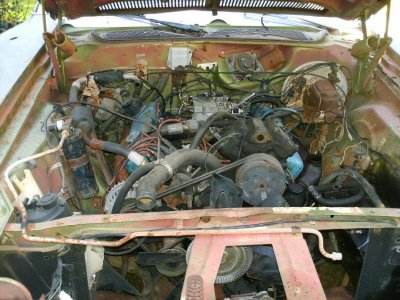
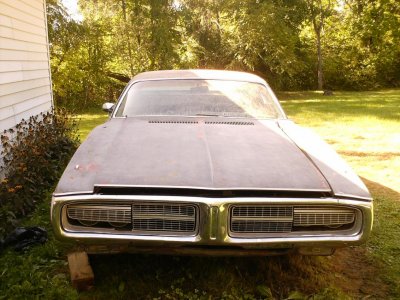
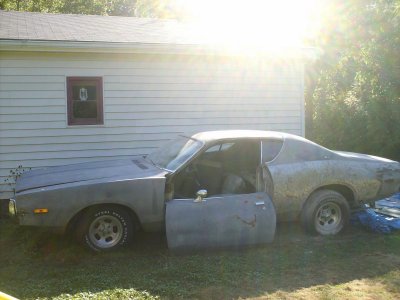
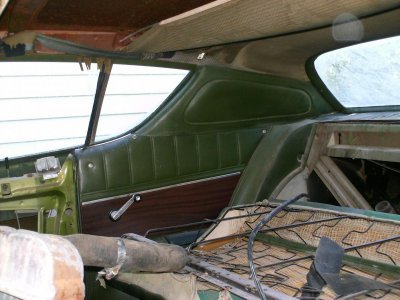
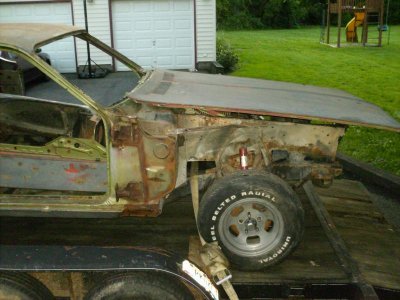
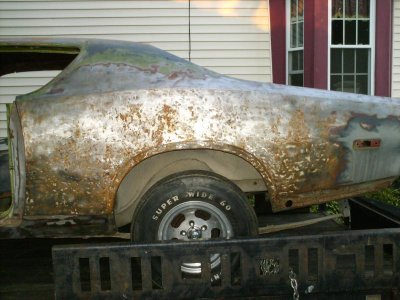
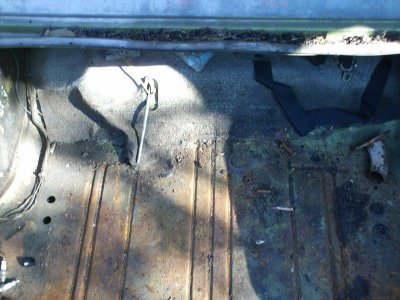
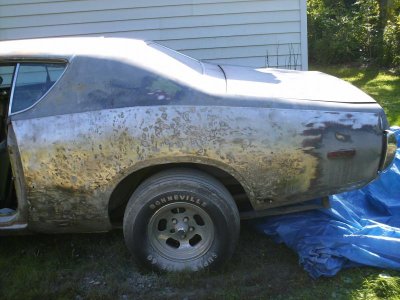
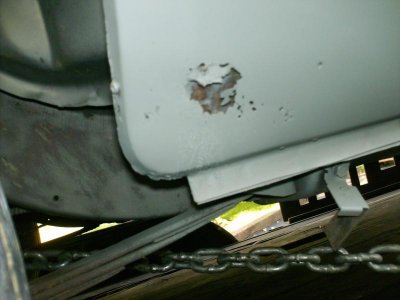
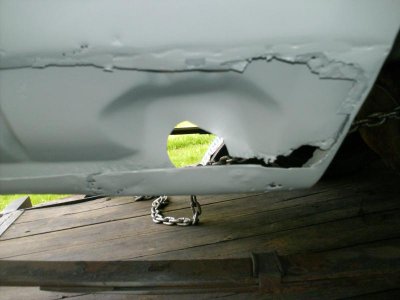
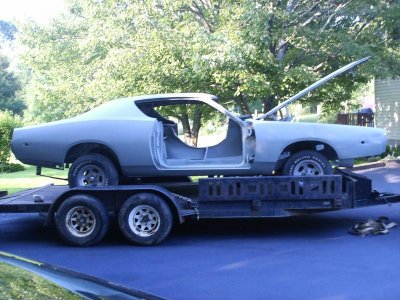
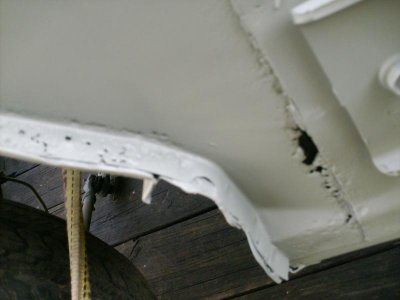
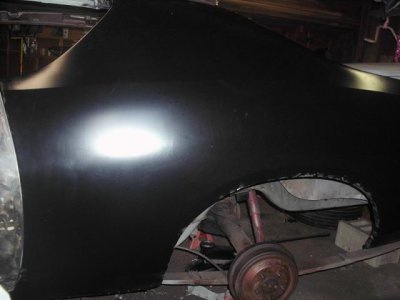
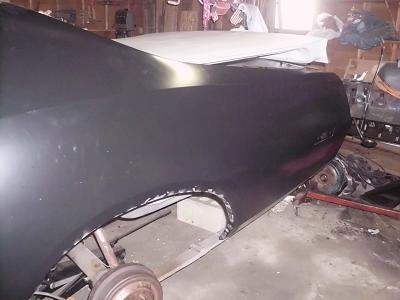
Been working on my charger project for about two years now. Was originally a 318 auto with bench seats hardtop, hideaway headlights and medium metallic green in color. Came with a matching drive train 383/727 combo. Now charcoal grey in color black interior still in progress.
 

Attachments

  • HPIM0557.jpg
    HPIM0557.jpg
    180.5 KB · Views: 423
  • HPIM0559.jpg
    HPIM0559.jpg
    199 KB · Views: 425
  • HPIM0591.jpg
    HPIM0591.jpg
    117.1 KB · Views: 428
  • HPIM0583.jpg
    HPIM0583.jpg
    138.6 KB · Views: 432
What it looks like now.
 

Attachments

  • DSCI0634.jpg
    DSCI0634.jpg
    151.8 KB · Views: 432
  • DSCI0632.jpg
    DSCI0632.jpg
    137 KB · Views: 415
  • DSCI0637.jpg
    DSCI0637.jpg
    174.3 KB · Views: 403
Nice job has come a long way.One question was the 318 in it when you started or the 383 i have been told that the small block chargers have a different passenger fenderwell and a bigblock will fit but the exhaust manifold/headers won't fit did you or the previous owner change the inner fender on the passengers side or modify it in any way. We are doing a 73 also a 318 car going to be a 440/727 when done. Hopefully it will look half as nice as yours.
 
Wow, You sure did a good job, Looks great,,,,, Enjoy!!
 
Nice job has come a long way.One question was the 318 in it when you started or the 383 i have been told that the small block chargers have a different passenger fenderwell and a bigblock will fit but the exhaust manifold/headers won't fit did you or the previous owner change the inner fender on the passengers side or modify it in any way. We are doing a 73 also a 318 car going to be a 440/727 when done. Hopefully it will look half as nice as yours.

The 318 was not in the car when we bought it in fact the 383 was sitting in it and i don't believe that any modifications were made to the fenders.
 
Looks great. Love the color better than granny green:headbang:
 
Here are the most recent pics of it. Sometime I will upload more of the actual resto pics.
 

Attachments

  • New.jpg
    New.jpg
    72.3 KB · Views: 330
  • 422468_377759825586815_100000584012064_1344878_1573909713_n.jpg
    422468_377759825586815_100000584012064_1344878_1573909713_n.jpg
    82.2 KB · Views: 298
Here is a more extensive description of what we did to the car; we orginally bought it from Kansas trailered it home where i started to sand away all the bondo. The drivers side quarter was full of almost half inch thick bondo and poprived to the door post so we decided to replace that almost right away, after that was done we just decided to have the whole car soda blasted and tore it down to just the shell and had it blasted. Car came out way better than expected minor rust holes in trunk and lower parts of quarters other than that car was solid just a lot of dingers. We then proceed to replace the quarter but found a poorly repaired outter wheel housing that we decided to replace (they placed a new on on top of another part that was cut out with just pop rivets) after this was done it was onto mudding and pounding out the dingers that we could manage on our time schedule eventually we had someone else finish the body and paint work due to time restraints. The motor we tore down that came with the car it was a 69' cast date 383 two barrel took it to the machine shop to have it bored .30 over because of cylinder wall rust. Put in stock cam and added a four barrel intake/holly 600. Rebuilt the numbers matching to the 383 tranny that came with the car as well. Car came with what we believe is the original 8 1/4 rebuilt the drums and put in new seals and are using that for now. After we got it back from paint started reassembly after undercoating the bottom of the car. And that is basically how she sits now, in need of interior half vinyl top and a new rearend :headbang:, and thanks to the turd who we had paint it, a repaint. But at least now she can stretch her legs again. Thanks for looking.
 
Here are pictures of where I sanded the ruined quarter and the pin holes in trunk then after dis assembly on the way to get soda blasted.
 

Attachments

  • HPIM0862.jpg
    HPIM0862.jpg
    73 KB · Views: 319
  • HPIM0858.jpg
    HPIM0858.jpg
    73.7 KB · Views: 293
  • HPIM0857.jpg
    HPIM0857.jpg
    74 KB · Views: 293
  • HPIM0572.jpg
    HPIM0572.jpg
    77.1 KB · Views: 303
  • HPIM0562.jpg
    HPIM0562.jpg
    70.4 KB · Views: 314
Here she is after coming home from blasting, and the rust spots that emerged. Which to our surprise was very little.
 

Attachments

  • HPIM0869.jpg
    HPIM0869.jpg
    43.6 KB · Views: 310
  • HPIM0868.jpg
    HPIM0868.jpg
    38.8 KB · Views: 301
  • HPIM0870.jpg
    HPIM0870.jpg
    94.2 KB · Views: 311
  • HPIM0864.jpg
    HPIM0864.jpg
    33.4 KB · Views: 301
  • HPIM0863.jpg
    HPIM0863.jpg
    73 KB · Views: 322
In these pictures you can see the ruined outer wheel house if you look towards the post you can see the remnants of the original wheel house that was cut and a new one pop riveted underneath it after we removed the old quarter panel which you can see the extensive damage to it in the previous pictures.
 

Attachments

  • HPIM0915.jpg
    HPIM0915.jpg
    74.3 KB · Views: 304
  • HPIM0916.jpg
    HPIM0916.jpg
    68.1 KB · Views: 296
  • HPIM0917.jpg
    HPIM0917.jpg
    67.2 KB · Views: 275
You really had your hands full there looking at these photos, you did a great job, The outcome sure turned out super! Its a beautiful ride!!
 
You really had your hands full there looking at these photos, you did a great job, The outcome sure turned out super! Its a beautiful ride!!

Thanks a lot Ron, My dad and I did have a heck of a time restoring it as "back yard do it yourself-ers" but it was worth all the effort.
 
Thanks a lot Ron, My dad and I did have a heck of a time restoring it as "back yard do it yourself-ers" but it was worth all the effort.

Well, someday you'll look back on all that you both did and im sure it will bring back many memory's, i know even now looking back at some of my pictures i get a kick out of them thinking of some days that were really nothing less then frustrating as i imagine you both can to, its all part of the fun though lol, Ive seen some truly gifted folks here in the project thread, i wouldn't be afraid to let any one of you do a car for me... You both have a great deal to be proud of! give your dad a thumbs up from the Ron guy here! Have fun with her.
 
Well, someday you'll look back on all that you both did and im sure it will bring back many memory's, i know even now looking back at some of my pictures i get a kick out of them thinking of some days that were really nothing less then frustrating as i imagine you both can to, its all part of the fun though lol, Ive seen some truly gifted folks here in the project thread, i wouldn't be afraid to let any one of you do a car for me... You both have a great deal to be proud of! give your dad a thumbs up from the Ron guy here! Have fun with her.

Oh trust me just looking back through the photos today bring back memories! and its only been two years since we started her :tongueflap: But I appreciate the kind words as well as my father. It means a lot to hear that being im only 18 and to have learned so much from this project, and my pops :tongueflap:
 
Wow! Lotta work! Great Job. love the dark silver...looks great on the car.

Thanks Prop, Ive seen a lot of other build threads and compared to some of them this was a cake wake lol! But I appreciate it. Cant wait to have the paint fixed and finish the build:headbang:
 
Here is a picture of the new wheel housing installed and the inner body bracing painted as well as the new full quarter installed. Not to bad of a fit was from amd had a bit of an issue with the door post though due to previous damage.
 

Attachments

  • 004.JPG
    004.JPG
    125.3 KB · Views: 296
  • DSCI0115.JPG
    DSCI0115.JPG
    56.8 KB · Views: 289
  • DSCI0116.JPG
    DSCI0116.JPG
    54.4 KB · Views: 291
Auto Transport Service
Back
Top