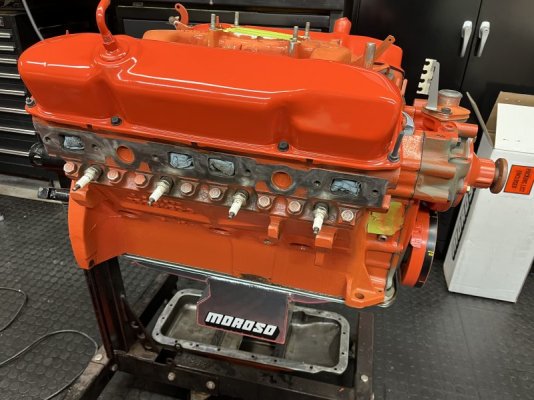
• When you click on links to various merchants on this site and make a purchase, this can result in this site earning a commission. Affiliate programs and affiliations include, but are not limited to, the eBay Partner Network.

Winter Project - ‘69 GTX Engine Compartment Rehab

More stuff…

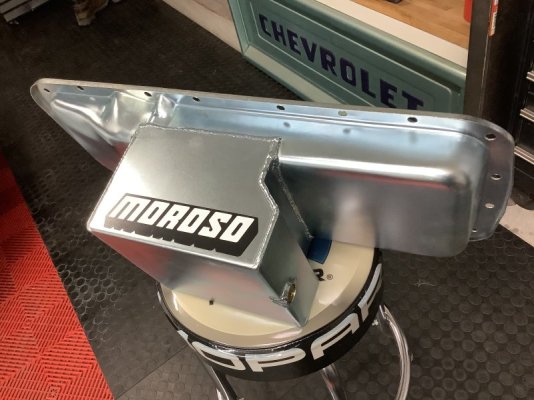
The new pan showed up today. No regrets, even though it was an extra expense I hadn’t planned for. I’m pretty sure it is the same part number as the orange pan, but it’s evolved over the past 20+ years. The notch in the sump provides an inch more clearance for the steering center link. I think the revised drain plug location is also an improvement. It looks damn good in silver (zinc) but it will end up being HP Orange like the rest of the motor.
EE6E5EA2-F2EE-44B4-BA33-3DD30331BA15.jpeg


523FE6CD-128C-4215-9DE4-865F3D843EA8.jpeg


While looking for the other valley pan end plate, I stumbled across the original trans dust shield that got damaged because it wasn’t compatible with the new, smaller than stock 10” bolt pattern on the converter. I ended up cutting the damaged portion off so it can go back on the car. I still need to clean up the edge a bit…

0211CFCE-917E-4811-8414-CA6A0C1E9A0C.jpeg
 
Last edited:
Easy project for tonight, install trans cooler before something bad happens to it…

image.jpg
image.jpg
 
My son had car trouble so the grandkids didn’t come over, I had to install the pan without my little helper. The windage tray needed some minor work to play nice with the pickup. The pan went on nicely, I did a super thin coat of ultra gray on the block to seal up the rear seal retainer and timing cover transitions. I used Mahle gaskets which have a stainless core encased in a rubber and cork compound. Other than the ultra gray on the block surface everything was installed dry. I also got the water pump installed.

The plan for today is mask and prepare the engine for paint. Fun fact, the lid from a Duplicolor paint can is just the right size to mask the distributor opening…

DF205220-B137-4D63-964C-C186BFA8C27E.jpeg
7C2773BC-5740-4766-AA86-C1FADABCDEA6.jpeg

ACB818FC-4D34-4CDF-8227-0CF09059ECB9.jpeg
 
Dipstick tube was a bitch because it needed to be reshaped to work with the headers. I don’t know what kind of steel the tube is made of but it’s a lot tougher than brake tubing. Using a tip I read in another thread, I compressed the OD with a flaring tool. I ended up using it to drive the dipstick tube in too. It went in hard so I am confident that it will not leak.

image.jpg


FFDA600A-1DC0-4F75-988A-D20CD1DE564B.jpeg


C7A9D182-9901-4048-BBEB-BD98631B369F.jpeg


1AB3A043-0C62-4C08-8611-079EEEC554E0.jpeg
 
I had a brand new ‘70 heater core when I built the car so that’s what I used. It uses 2 different sized hoses so I ordered the’70 hose nipple set thinking it would fit. It turns out that the small nipple on a ‘70 is 1/4NPT and my housing has 3/8NPT threads. I dug out the old fitting and wheeled the old paint, rust and thread sealer off. It will have to do.

The temperature sender is also new.

87DF1B15-3BDB-41D2-883F-CFD08C273241.jpeg


Now to find the fuel pump bolts and get that on…
 
I’m about as far as I can go with the engine until the powder coating is done. Most of the subassemblies are done too.

image.jpg
 
I got the black parts back from powder coat so I can start piecing things back together…

image.jpg
 
That's one huge *** pulley on that alternator! Were you able to charge at idle with that....
 
That's one huge *** pulley on that alternator! Were you able to charge at idle with that....

It will discharge a little at idle when the lights are on. In the 22+ years since I put it on, I’ve never had a charging problem. With 4.10 gears I thought I’d give the alternator a break by slowing it down a bit. I’m buzzing at about 4 grand when I keep pace with traffic
 
I worked until midnight welding up a few pinholes that showed up in the collector after blasting the drivers side header. It’s not pretty but it will buy me some time. Tonight I hope to get the steering gear bolted on and possibly the transmission, we’ll see how it goes…

C04F08FB-3104-48E7-9F33-2D487D2B25CF.jpeg
 
I grabbed a fuel filter on the way home and spent a little time tweaking the hard lines so they look right and nothing touches.
543E6E48-565F-4E4A-90B8-7BDD563E764C.jpeg


C51CEB9B-0729-4293-85B2-38BF0FBB67B1.jpeg
 
The steering gear and hoses are on, I put the 3/32” shim back on the Single bolt side.

image.jpg


image.jpg


The powder coat guy texted to let me know that the headers and lower control arms are done. I can swing through on the way home to grab them. Up next is the transmission, I just need to figure out how to do it without busting a nut…
 
Last edited:
I changed the front seal on the trans, put some trans fluid in the converter and on the snout. I fumbled with it for a minute or two until it fully seated. My brother-in-law helped me lift the trans into place on the dowel pins while I got a couple bolts started. The KD linkage is set in place, I can’t adjust anything until I find the baggie with the clips and washers.

Done for the night…

A49D7199-E382-4D52-B750-30A922FB763E.jpeg
404E6969-DBD5-4560-9420-CF3A1C91717D.jpeg
 
Last edited:
I lied, when I got the headers out of the truck I couldn’t resist loosely bolting them on…

2FDD0E71-CDFF-4737-A4E9-77F7BA903855.jpeg


FEB0DCDF-BC89-4862-BB67-5DDF9E941A91.jpeg
 
Auto Transport Service
Back
Top