• When you click on links to various merchants on this site and make a purchase, this can result in this site earning a commission. Affiliate programs and affiliations include, but are not limited to, the eBay Partner Network.

'64 330 Street Hemi build

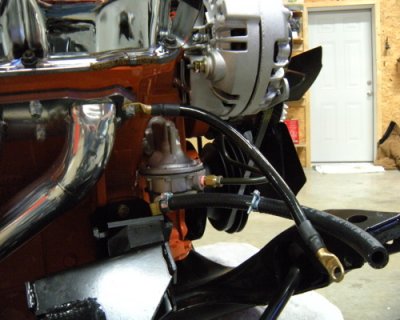
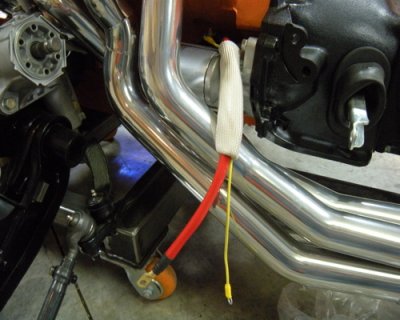
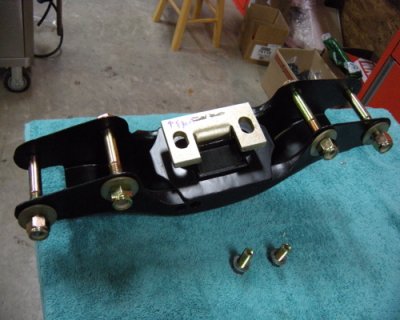
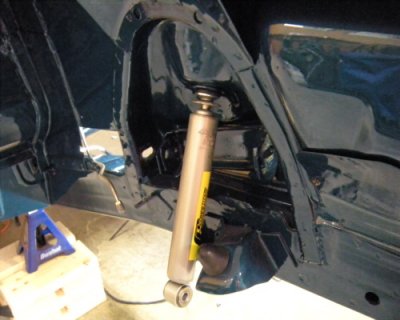
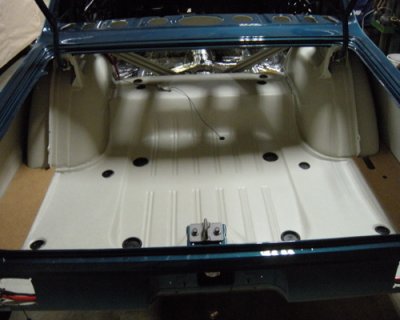
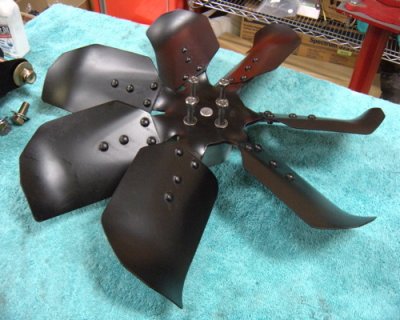
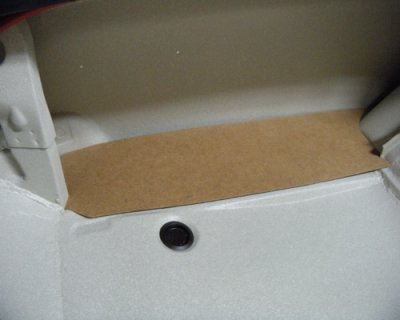
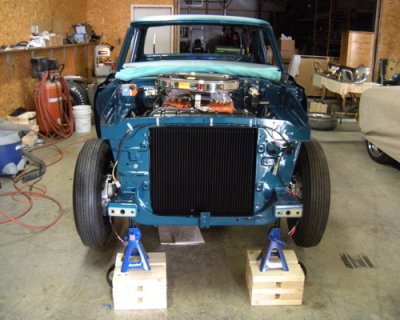
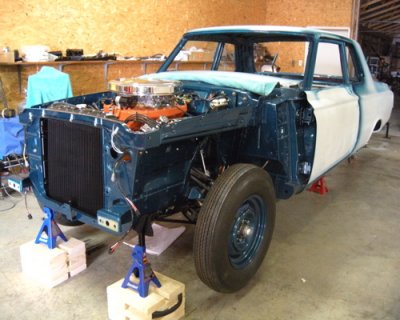
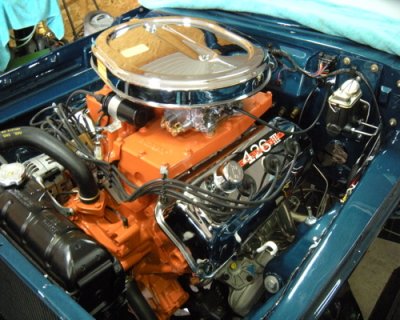
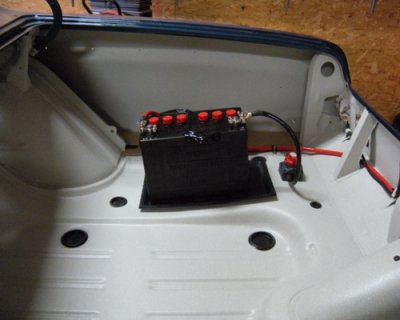
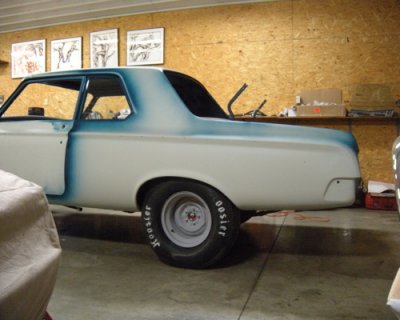
nothing really earth-shattering this past week. detail clean up, getting ready to set the engine next saturday. we will fire if i don't run into a clearance issue with the fan to core... still need to mount the battery in the trunk, hardware should be here this week from mancini... front shocks, fuel hose, engine ground, starter pig tail, trans x-mem., heater hose, correct fan belt. all ready.
 

Attachments

  • final507.jpg
    final507.jpg
    91.3 KB · Views: 801
  • final508.jpg
    final508.jpg
    92.2 KB · Views: 818
  • final509.jpg
    final509.jpg
    91.1 KB · Views: 792
  • final510.jpg
    final510.jpg
    75.4 KB · Views: 789
Nothin' really to report. Had to move the engine install date back to next Saturday, forgot this is Easter weekend. Yesterday put the rear on the ground with temp. tires, vacuum bled the rear brakes, fabbed the front lift bar, tied in the tach signal wire to the harness. It stuck me last night that I didn't check the dip switch settings on the tach. might have to take the dash apart and double check them. Not a big deal, just a little time consuming.

- - - Updated - - -

Also have plan "B" for the fan clearance if it's an issue with the clutch fan set-up. Took the fixed 7 blade and spacer off of a 318 poly i have in the shop. Restored it and will use if I need to. That stock set-up gives me an extra 1/2" with the stock spacer. I can always reduce the spacer size if needed.
 
Nothin' really to report. Had to move the engine install date back to next Saturday, forgot this is Easter weekend. Yesterday put the rear on the ground with temp. tires, vacuum bled the rear brakes, fabbed the front lift bar, tied in the tach signal wire to the harness. It stuck me last night that I didn't check the dip switch settings on the tach. might have to take the dash apart and double check them. Not a big deal, just a little time consuming.

- - - Updated - - -


Also have plan "B" for the fan clearance if it's an issue with the clutch fan set-up. Took the fixed 7 blade and spacer off of a 318 poly i have in the shop. Restored it and will use if I need to. That stock set-up gives me an extra 1/2" with the stock spacer. I can always reduce the spacer size if needed.
I believe most all are set to 8 cyl by factory default.... I would run it first.....
 
ya, probably will run it first and check the reading.

I won't set the steering column until later so it will be less of a problem to drop the dash. i'm also not certain that the heater core and valve will not leak. not saying it will, i didn't do the restoration on it, SMS did. I'm sure it's fine but gonna wait until after we fire to check the system under pressure. Went to test fit the trunk mat yesterday and found it to be too narrow and the die cuts are not in the right place. I need to go back and see who I ordered it from and what I ordered. It's been months, doubt they will take it back. will just sell it after I get it identified.

Here are the trunk wings (had to trim them on the band saw to fit correctly) and the "Plan B" fan.
 

Attachments

  • trunkwings511.jpg
    trunkwings511.jpg
    106.2 KB · Views: 733
  • trunkwings514.jpg
    trunkwings514.jpg
    70.7 KB · Views: 716
  • trunkwings515.jpg
    trunkwings515.jpg
    105 KB · Views: 716
  • trunkwings513.jpg
    trunkwings513.jpg
    59 KB · Views: 728
Damn, that is coming along nicely!!
 
weekend of "good and bad". The "good" first... the engine is in and it SHAKES THE $H!T OFF THE WALLS. seriously, if you watch the vid, the cat walking to the right of the screen, late in the vid, was pushing stuff back on the shelf that was vibrating off. not bad for a street car. the clutch fan clears the core by about 3/8" and the blades by ~3/4". all the gauges work well and the dash looks cool when lit. the tach appears to be set correctly.

the bad. the heater core temp valve leaked when we got it to operating temp and pressure. i pulled the hoses and nipples and plugged the pump housing for now. i'll be calling SMS in the morning. not very happy about that. the light in the radio does not work. need to pull that out and see whats up. had one of the torsion bar dust boots split at the seam when installing so couldn't set the bars. here's the biggest one, the rear brakes will not build pressure at the master cylinder. tried to bleed the system and the fronts lock up like crazy, but when we pump the peddle, there is no pressure for the rear circuit. will be calling master power tomorrow. looks like a bad master cylinder. still need to finish off the battery hold down. all-in-all, a good weekend plus; it is a beautiful day here. first taste of spring.... life is good...
 

Attachments

  • engine install518.jpg
    engine install518.jpg
    103.5 KB · Views: 693
  • engine install519.jpg
    engine install519.jpg
    103 KB · Views: 688
  • engine install520.jpg
    engine install520.jpg
    123.8 KB · Views: 688
  • engine install521.jpg
    engine install521.jpg
    67.2 KB · Views: 677
Nice start, looking forward to the build here is a photo of our 63 330's you just dont see them at the shows
 

Attachments

  • IMG_3230AA.jpg
    IMG_3230AA.jpg
    108 KB · Views: 630
RE the TB boots: Put it/them in a pot of boiling water for a few minutes to make them more pliable. Shouldn't have any problem slipping them on after that.
 
ya i did that using a suggestion from this forum, was probably you that said it before. anyway, the first one went on like a champ the second one split at the mold seam on the boot. probably a weak spot.

RE the TB boots: Put it/them in a pot of boiling water for a few minutes to make them more pliable. Shouldn't have any problem slipping them on after that.
 
update on a couple things. called master power they sent out a new master cyl and i need to send the other back for credit if found to be defective, they will credit. emailed sms and they said if i remove the core/valve i can send it back for replacement or have it repaired and they will reimburse. neither one out anything on the front side. i'm sure it will all work out. really can't complain, thought both were reasonable as it's been since Oct of last year when i bought them. mounted the 29" Hoosier street pro's on one of the rims and test fit on the car. looks a little to "NASCAR" for me. nothing wrong with NASCAR, just not what i'm goin for with this build. gonna mount the 31" Hoosier Quick Time's on the other rim tomorrow... have a ton of room in the well for more tire. we'll see. yes, i know, it's on the wrong side. just for fit and look right now...
 

Attachments

  • street pro526.jpg
    street pro526.jpg
    55.9 KB · Views: 622
  • street pro527.jpg
    street pro527.jpg
    72.2 KB · Views: 601
My first time on this thread and just wanted to thank you for your in depth information and pics on your build as it has helped me greatly with my own 65 Hemi Coronet build.
 
My first time on this thread and just wanted to thank you for your in depth information and pics on your build as it has helped me greatly with my own 65 Hemi Coronet build.

First of all; Welcome aldal!! you'll find a lot of great information here on just about every topic. glad this thread could help! Good luck with your project!
 
aldal hi and welcome to the site ,yup 2059 has a nice post going on about his ,and it sure is coming along very well thanks for posting updates :headbang:
 
this is much better. 31x13.5's. have a "palm width" all the way around the outer well and to the frame rail in street stance.
 

Attachments

  • hoosier tire528.jpg
    hoosier tire528.jpg
    59.2 KB · Views: 583
  • hoosier tire533.jpg
    hoosier tire533.jpg
    79.9 KB · Views: 582
Auto Transport Service
Back
Top