• When you click on links to various merchants on this site and make a purchase, this can result in this site earning a commission. Affiliate programs and affiliations include, but are not limited to, the eBay Partner Network.

1969 Charger R/T resurrection

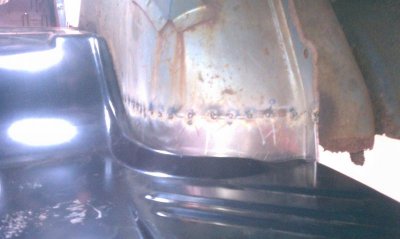
Moving right along, we got the new frame installed tonight. This ended up working out really well. I was worrying for nothing. If anyone is having to replace rails, I highly recommend finding an original set and changing them like I did. I can't imagine how many hours would have been spent modifying aftermarket Taiwan metal.
P1100171.JPGP1100172.JPGP1100173.JPG
 
Last edited:
This project flying! I cant believe how far you have gone in the time.. looking great!
 
Thanks Ron. As long as no big projects come up with work and I can spend afternoons in the garage, we will continue with the new metal replacement. I will admit it is going faster than I thought it would. What are you doing up 3:42 A.M. ? And I thought I was bad rolling out at @ 4:30 - 5:00 in the morning.
 
Im just not sleeping well right now, i always was one for being up before day break so its normal in a way.. Nothing like a morning coffee and the resto thread though! :) The way your flying here, this one could be over quick, Ill be honest im really impressed over the amount of work you get done in a days time, i hope it continues to go this smooth for you!
 
What are you doing up 3:42 A.M. ?

Ron is in preliminary training to be a dairy farmer.....Up before the crow flies and aspires to paint everything John Deere Green. Good luck buddy! Got Milk?
 
I have a strange affinity for this kind of mental retardation; doing the impossible, and delivering on the dream! I like this thread, congrats on your insanity, seems like you're in good company with a few of us mental cases whom undertake such insane tasks! I love it! You're right, original metal is best!
 
Ron is in preliminary training to be a dairy farmer.....Up before the crow flies and aspires to paint everything John Deere Green. Good luck buddy! Got Milk?

If the price gos up, i could be tempted into the dairy farming, milk easier to get! lol.. Thanks for the laugh Will! always can use them.. And besides Its fun waiting for the birds to start singing with the coffee perking on the stove, unless it be winter and be watching the snow blowing outside, always something good about the start of a day! I don't know about that John Deere green thing though, go with Case, resembles Chrysler orange :)
 
I have a strange affinity for this kind of mental retardation; doing the impossible, and delivering on the dream! I like this thread, congrats on your insanity, seems like you're in good company with a few of us mental cases whom undertake such insane tasks! I love it! You're right, original metal is best!

Thanks for the kind words Donny. You, Matt, Will and a couple of others are why I joined this website. I never would have thought I could do a project like this 5 years ago, but after watching you guys I decided to attempt it. And this is the reason for posting this thread - to maybe help someone else see what is involved in restoring these fine old cars.
These are the kind of thoughts that were dancing through my mind when the car was jigged up for the frame removal - am I nuts or what. I keep telling myself that their just aren't enough dry southern cars for all of us. This is the only way to properly save one of these rust belt cars. The positive is that I will know how it was put together and there were no corners cut.
 
Can you believe 260 5/16" holes in my trunk pan? This is not counting the flanges for the drops. I guess it shouldn't fall out of there. It fit fairly well with the only complaint I would have is the down turn flanges that attach to the inner wheelhouses should be longer. There is a portion that is only about 1/4" flanged. Kinda hard to make a nice looking 5/16 plug weld in that area.
Also cut my frame connectors from some 2.5 x1.5x 1/8" tubing. This works good on these car, fitting snugly around the front of the rear frame rails and butting to the torsion bar crossmember. I will weld these in while the car is all braced up.
P1110176.JPGP1120177.JPGP1120178.JPGP1120179.JPGP1120181.JPG
 
This is a great thread. Im learning a lot and am not afraid to try this on my car.
 
Yep, ditto. My wells look just like his did. I was going to put in new ones till I saw how easy he makes that lower rear edge repair look.
 
Where did you get your rear cross-member, shown in the last pics in post #59?
 
Where did you get your rear cross-member, shown in the last pics in post #59?


All the aftermarket metal I am using is AMD stuff.

- - - Updated - - -

Yep, ditto. My wells look just like his did. I was going to put in new ones till I saw how easy he makes that lower rear edge repair look.

The passenger side was quite simple, but because the drivers side patch went up farther it starts to cup in slightly. We used a shrinker to get this bend correct. It wasn't hard if you have to right tools, and a kid helping you who is a metal fab God. I think it is a very acceptable patch, and just as good and a whole lot easier than replacing the entire inner wheelhouse.
 
I'm having trouble finding that rear cross member for my 68. I could not find it listed at AMD.
Thnx for all your info here. Great work!
 
I see some one is keeping busy, looking very good there ,thanks for sharing
 
I'm having trouble finding that rear cross member for my 68. I could not find it listed at AMD.
Thnx for all your info here. Great work!

It should be the same as a 69. AMD # 870-1468. Give Jeff @ 521Restorations a call, I'm sure he can get you set up.
 
This car is starting to remind me of a Penguin. White epoxy primer and black AMD metal.
Got the frame connectors welded in and started on repairing the "new" AMD taillight panel. I figured it took about 6.5 hours to drill out the 44 spot welds holding the buckets in, fixing all the holes, and welding them in where they should have been in the first place. I don't know how the other repops are, but this panel is certantly not of the best quality. Even though they get complaints on almost every one of these sold, they refuse to make the Taiwans build them better. The only good thing about it is that it has no rust. Hopefully it fits on the car ok.

P1140192.JPGP1140193.JPGP1130182.JPGP1140187.JPGP1140186.JPGP1140188.JPG
 
I patched one of my wells like you did, I think it came out pretty good. Thnx for the idea!
 

Attachments

  • IMAG0946.jpg
    IMAG0946.jpg
    37.7 KB · Views: 848
Auto Transport Service
Back
Top