• When you click on links to various merchants on this site and make a purchase, this can result in this site earning a commission. Affiliate programs and affiliations include, but are not limited to, the eBay Partner Network.

1969 Charger R/T resurrection

Oh boy, You arent going to name this project Penguin are you! lol, Yep, im still watching, (insert thumbs up here)...

Penguin.jpg ;)
 
Oh boy, You arent going to name this project Penguin are you! lol, Yep, im still watching, (insert thumbs up here)...

View attachment 98222 ;)


You don't think Pistol Packng Pete the Penquin arises from the dead would be a good title?
 
P1150196.JPGP1150199.JPG

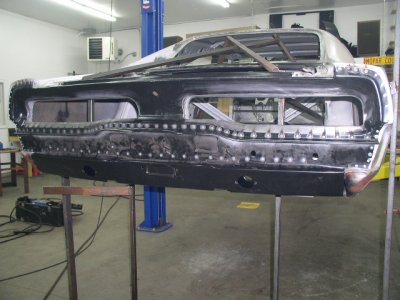
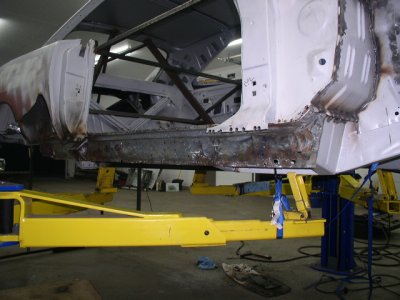
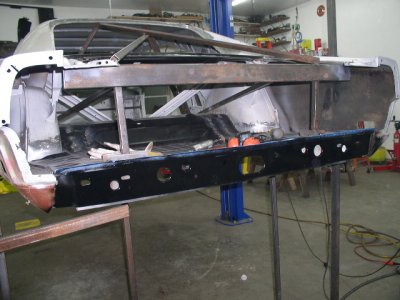
Moving right along - we got the taillight panel and rear valance welded in place. They both seemed to fit fairly well. We left the old quarter and caps on to use as a reference. So for big parts to replace I am down to quarter skins, outer wheelhouses, and outer rockers. I am thinking the rockers will be the biggest challange because of the welds going through about 3 layers under the doglegs. Anybody replaced these that would have some helpful tips?
 
You're right...the rockers are not fun. A guy could easily hang a quarter in less time it takes to change out an entire rocker. Besides the many many spot welds to remove, you also have to deal with the tac welds in the hinge pillars, lead and solid weld near the quarter to rocker transition and forward rocker to side kick panel welds. The worst will be around the hinge pillar and the rear interior panels where the outer rocker is pinched and spot welded between the outer rocker, inner rocker and interior rear panel. Prepare to have to get inside the slot opening on the inside of the car for the lower hinge bolts to remove weld. A right angle die grinder with a slightly wore down 3" cuttting wheel should do the trick. Rear interior panel area, a plasma cutter would be a real plus to just burn them out, but if not, prepare to battle with the spot weld cutter for a while. Also there will be tac welds on the outside of the hinge pillar (front leading edge) to remove from the old rocker. There's also internal supports towards the rear that you must drill out the spot welds for, located on the bottom side of the rocker just aft of the door opening. Dont's forget the ones that weld the backside of the rocker to the outer wheelhouse as well. Expect the door opening curve of the rear lower jam to be junk, Easy enough to fab up a new one though. There is an intergrated support for the rocker located toward the front, near the hinge pillar. Save that if you can, you cannot get that after market and your AMD rocker does not come with it. Either that or fab a new one up I guess.

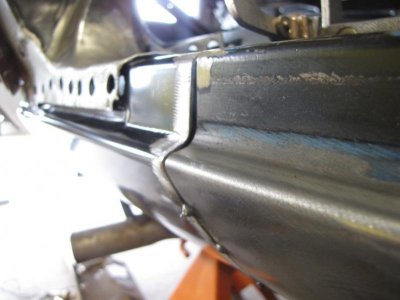
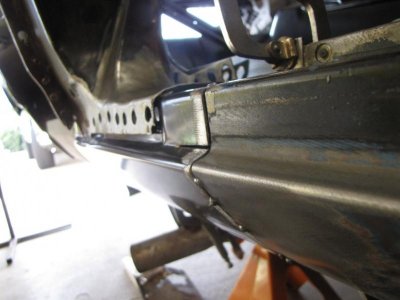
You'll probably notice if you look close that the AMD rocker has slightly more than a 90* step when transitioning out of the door opening than the OEM metal does. They may have recently fixed this, but I kind of doubt it. Either you have to live with a slightly larger door gap at the bottom or try to fix in a break if possible. Another fix would be cut down the inner radius of the bend, Reset the angle and reweld...A lot of work! I was able to bend in the correct angle on my bird on the full rocker replacement drivers side. The areas I grafted in on the passenger side I was able to transition by the use of relief cuts and shaping. This pic may give you a little idea of the offset angle between the two....Good luck

h1.jpg

h2.jpg
 
Thanks Will, that is what I was looking for. We do have a plasma cutter so hopefullly that will make things a little easier. I do have some rust in the lower door opening curves. Not alot, but I do have all 4 pieces as well as the internal braces from a donor car in case I need them. This part just seems very intimidating to change. It almost looks like the rockers were the first parts put in the jig and the car was built around them.
 
Rockers on any car are critical, and take a long time! The Rockers on the 49 Chevy I'm doing (inner and outer) have taken a LOT of time, and the Frankenstein welding hack fab job I did on my GTX I likely will un-do and install new ones, but, we'll see. More pics my friend, more pics!
 
Thanks Will, that is what I was looking for. We do have a plasma cutter so hopefullly that will make things a little easier. I do have some rust in the lower door opening curves. Not alot, but I do have all 4 pieces as well as the internal braces from a donor car in case I need them. This part just seems very intimidating to change. It almost looks like the rockers were the first parts put in the jig and the car was built around them.

No sweat. They are tough, but don't be intimidated. With the class of work you've been doing around the rest of the car, you'll knock those rockers out no problem. :icon_thumright:
 
Looking good, I'm glad I didn't have to replace my rockers from the sounds of it. Good luck
 
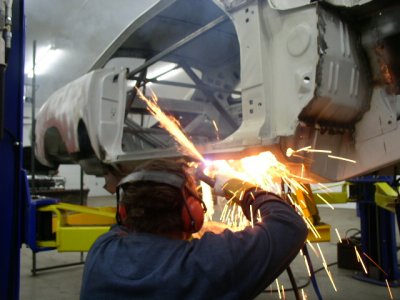
No pictures tonight. I was to wore out from getting the pass. rocker off to take any. This was by far the worst piece of the car to remove. On top of how well it is attached, there was still some grease inside. This in conjunction with a plasma cutter made quite a smokey, firey show.

So Will, on the full rocker you replaced, you were able to make the bend a little tighter in the area you mentioned? And if so, how did you do it? Drive it in with a big dull chisel?
 
I take it that obviously AMD hasn't fixed the offset in the angle huh? Stinks to hear. On my roadrunner, what I did is used a 1/16" cutoff wheel and made stitch cuts right in the inner radius of the 90* bend, about an inch long cuts seperated by an inch or so. I relief cut perpendicular just outside the door opening area on the front and rear. The cut extended a bit above, thru and a bit below the step transition area. These cuts weakened the entire step area. I secured the rocker firmly in place in my vise, using rags and a couple 2 x 4's to get it secured in a fasion that made good access to manipulate the bend (same orientation as like mounted in the car). From there I used a 1" W X 1/2" Thick X 24" long piece of straight steel stock I had floating around. I layed it on the lip so the 1/2" width rested on to the offset angle surface down the panel and secured in place. I took my half a hockey puck looking dolly and the body hammer and started tapping on the steel, working down it in a progressive equal manner till I achieve the proper angle down the panel. Welding in the cuts was real easy. I welded them from the inside of the panel while using a copper backing on the outside. That way all there was was touch up welding from the outside and minimal grinding/cleaning/shaping on that inner radius.

On a '68 Super Bee rocker change I did for a local Mopar Club member last year I ended up using the 10 ton press at work, an aluminum jig I made from angle cut metal and and that same chunk of steel. I used a 2" X 4" between the piston and the piece of steel to distribute the force. I slowly worked front to back, adding a little more pressure each cycle. It worked well, but took quite a bit of time. I also had to weld in reinforcement brakets from the top of the rocker to the bottom so the rocker would not collapse on itself, but would give in the offset radius area.

I'm catching your drift on the dull chisel idea. Never tried it, but seems like that could also be an option. I spoke with Kelly at AMD a few times about this issue and many others i've found, but have given up because I always get "we've never heard of that" or "fit up was good on our model". Besides that, nothing really seems to ever change anyways. Pretty sure I was wasting my breath, even though I was told by AMD that they would appreicate my feedback for further development. Ah Well.

Hope some of this makes sense to you and helps. Get past these rockers and you're over the hump. Like Donny mentioned they're critical, but once done you can consider yourself over the hump and on the downhill side of your sheetmetal work.


At this point I honestly am not sure how bad the angle is off. Now that I understand exactly where your problem was, I will check closely tonight. I hope they changed the stamping, but I really doubt it. I don't understand either why they would not want to get their parts as correct as possible, since they claim to be the best out there. I've talked to Aaron @ AMD several times who has been helpful, but admits there is alot of room for improvement. The problem is the big dogs overseas making these parts won't admit they could do better. It's just not the way you or I would run a business in the USA. I know I would not be sucessful with that mindset.
Yeah - once these rockers are in it should be a walk in the park. I sure am glad I don't have to replace the inner rockers.
 
Ive had to cut out bad metal and make repair pieces for welding in, I have to admit i never had to replace a rocker.. Ive been trying to visually follow along what all that was involved with this and now im sure that i hope i never have to replace one.. Its good Will has been thru this and can offer some help on it, sounds like a pain in the back side especially having to fight the new ones because there not correct.. Sure hope your sheet metal work gets a bit easier now..
 
The problem is the big dogs overseas making these parts won't admit they could do better. It's just not the way you or I would run a business in the USA. I know I would not be sucessful with that mindset.

Amen to that Brother!
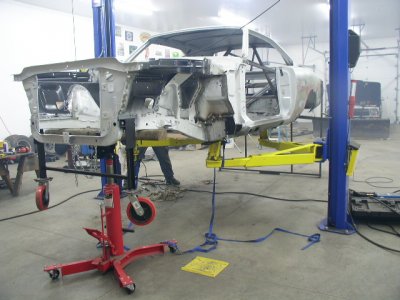
- - - Updated - - -

Amen to that Brother!

Ron, the biggest issue with replacing Mopar rockers is when you realize it's 20 more times work than you thought. Was for me anyways. Grafting/patching in new metal vs. replacing the entire panel is much more easy. But, these good old mopar projects aren't getting "Un-Rusty" by any means. A few patch panels a decade ago is now a car the requires some serious thought and experience behind it, just like this thread.
 
P1160207.JPGP1160205.JPGP1160210.JPG

Here are some pictures of the passenger side rocker being removed and the inner nice and cleaned up. Very thankful this doesn't need replacing. If anyone ever tells you casually that they replaced a rocker on one of these cars, they are probably bs'ing you. I will get some Rust Bullet brushed in tomorrow afternoon and hopefully have a new rocker installed tomorrow night. We got the drivers side off tonight and it is ready for clean up also.

- - - Updated - - -

P1170216.JPGP1170217.JPG

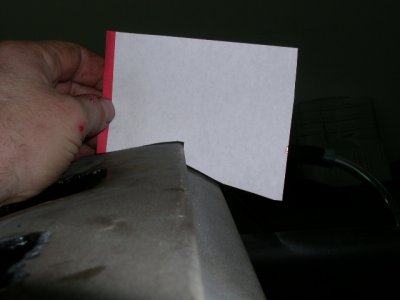
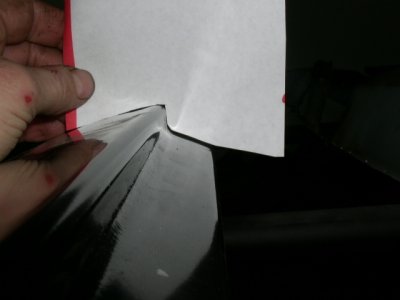
I made a quick template to check the original and replacement rocker angles that were in question on Props' car. Mine look awfully close so I am hoping the stampings were adjusted at the factory. We should know tomorrow.
 
They do look real close. I had to fix one of my rockers and will was extremely helpful to me in that area also.
 
It's always a pleasure relaying the "what in the hecks" and the "who in their right minds" I've dealt with over the past to you gent's. If it's enough to save you some headaches, mission accomplished. All these resto threads here at fbbo are priceless and without a doubt have contributed to many more dreams coming true, as well as many more mopars coming of death row to back on the pavement where they belong. I'm glad to see that the rocker issue may have fixed hunt2elk. As you obviously know, just the normal remove, replace or repair is a staggering amount of nitty gritty work. To add to that because of improper craftsmanship in the hands of vedors could be considered cruel and unusual punishment and happens a bit too frequently IMO.
 
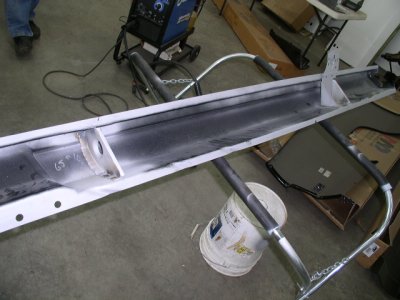
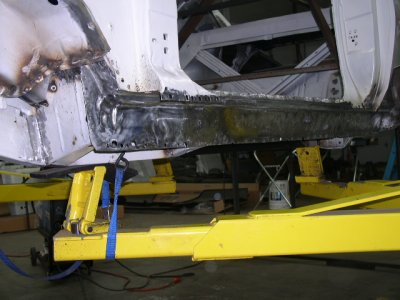
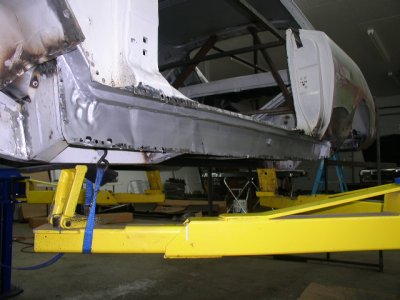
Well the rockers went in a whole lot easier than the old ones came out. The angle Prop was having issues must have been corrected because mine fit fine with a decent bottom door gap. They were both about 3/8 inch shorter than the originals and the front of the passenger side needed the correct angle cut for the end cap to fit the way it should. Overall I was pleased with their fitment. Will post pictures of the final outcome later as I forgot to take pics. I put a couple of coats of Rust Bullet on the inner rockers where no welding was happening. We welded in the 2 braces first, welded the tops in, and then pushed up the bottom with a floor jack and piece of wood to get it in the proper position.
P1200230.JPGP1180218.JPGP1180221.JPG

- - - Updated - - -

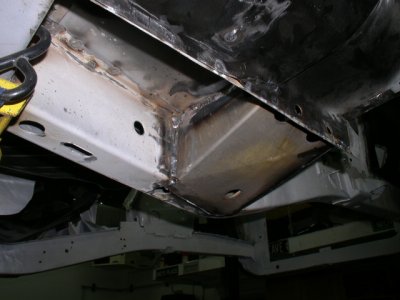
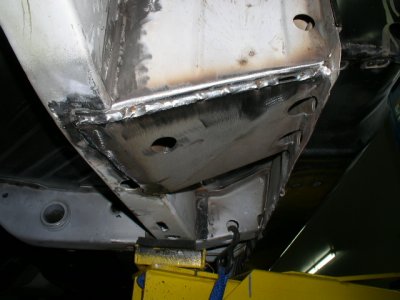
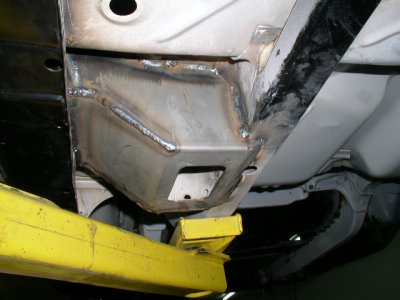
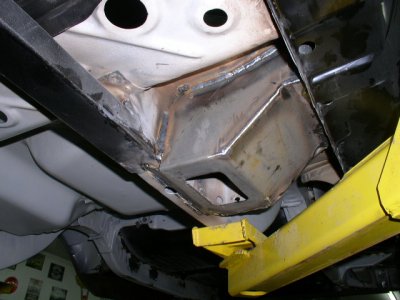
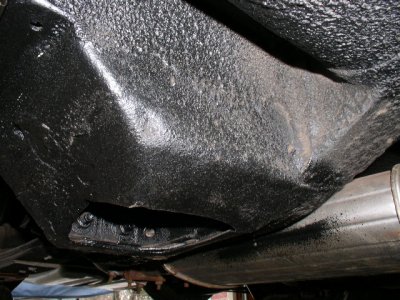
Tonight we installed the US Car Tool torque boxes. This ended up taking about 5 hours because the fitment wasn't the best. Ended up adding metal to the tops of all of them to get a nice looking and functioning job. I ended up using this brand because they were about 1/2 the price of the original looking ones. They are ok as a starting piece, but need a little help. It looks like they are cut out with a plasma cutter and then hand formed. The black undercoated picture is a shot from an original on my convertible. You can easily tell the difference, but I new that before I bought them. This along with my frame connectors should prevent any body flex.

P1220235.JPGP1220236.JPGP1220237.JPGP1220238.JPGP1190225.JPG
 
Last edited:
Looking great Elk!!

- - - Updated - - -

Looking great Elk!!
 
Auto Transport Service
Back
Top