• When you click on links to various merchants on this site and make a purchase, this can result in this site earning a commission. Affiliate programs and affiliations include, but are not limited to, the eBay Partner Network.

1969 Charger R/T resurrection

Wow, there seems to be allot of issues with the AMD stuff. I bought AMD full quarters for mine and the fit was great, only requiring a little filler where I welded the side markers in and one spot on each side right behind the doors. Other than that they blocked out with only primer and I used a long block on them. Makes me wonder if I was lucky or if they are getting damaged in shipping or just wearing out the tooling. Propwash gave me hell for saying how good they where "I'm starting to see why". If you try another brand I will tell you the ABS stuff I bought was horrible, the inner fender required a BFH to make fit. Keep up the good work

"ABS stuff" what brand is this?
Also is your car a charger?
 
"ABS stuff" what brand is this?
Also is your car a charger?
Yes, it's a 69 charger. The ABS stands for Auto Body Specialties.

- - - Updated - - -

Chargers look awesome whatever color they are but my favorite color for them is orange, mine will be House Of Colors Tangelo Pearl with a charcoal hood, rump stripe and taillight panel.
 
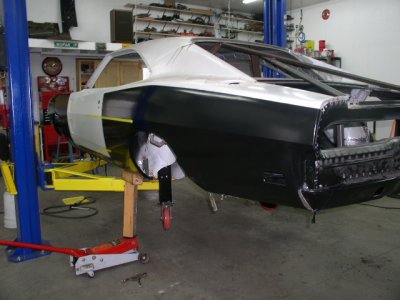
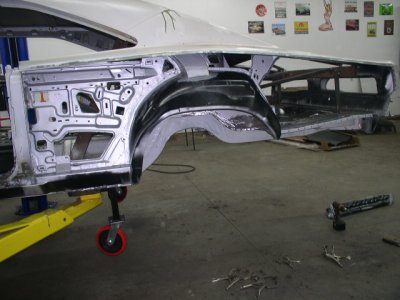
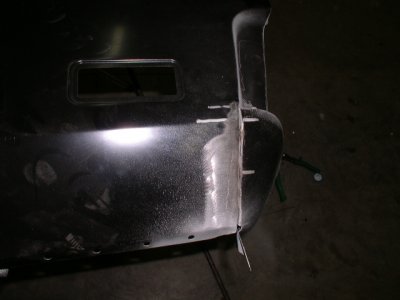
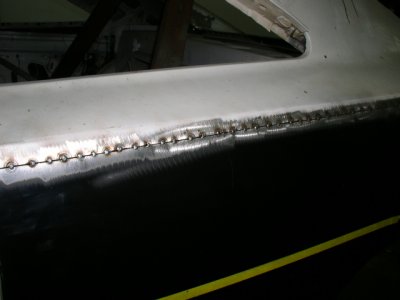
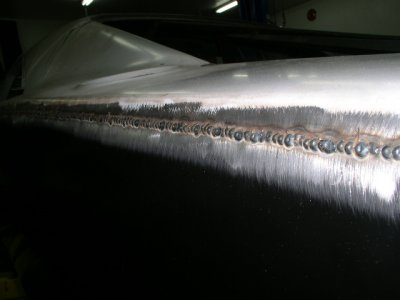
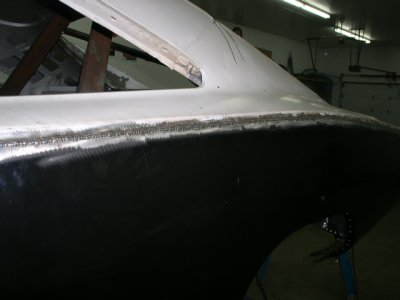
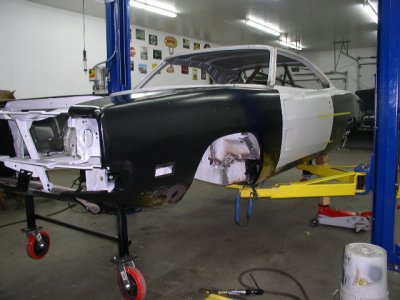
This sucker is actually starting to look like a car again. Put on both front fenders, doors, front valance, and grill support to make sure everything would be in adjustment range and that the body lines of the door matches the quarter. The pie shaped piece near the rear corner turned out great. 7' feet 3 inches of stitch weld later the top of the quarter is rough welded on. Just have to finish the wheelwell area and this side is done.

P1300271.JPGP1300272.JPGP1300273.JPGP1300275.JPGP1300277.JPGP1300279.JPGP1300280.JPG
 
Looks great! Good work, you have way more energy than me. It appears you butt welded the quarter skin at the top seem. I thought flangeing was the way to go there. How did you hold each of the edges straight preweld? What are the pros and cons to each way of attachment? Anyone?
 
We did butt weld it about 1 inch down from the top corner. I think the flange method would be easier, but I did'nt want to take the chance of moisture getting between the metal and rusting. Also I thought it would not be possible to hide the seam in the trunk if a lap joint was used. We started at the door jamb area and worked back. First with a spot every 8 inches cutting the gap as we went and using one of those butt weld spacers farther down the seam to hold it even. We did have to go back and recut a couple of the welds to compensate for the metal movement on such a long seam. I can't say enough good things about the kid helping me. Very meticulus and precise. I could never weld as well as him.
 
Looks like you have a excellent helper there Elk! Everything looks so nice, neat and good -N- solid for sure..
 
Thanks Ron. Yeah, things would not be going nearly as smooth without him. I can't get over him being only 27 years old and the talent he has. It is getting very solid, I don't think I am cutting any corners anywhere. I think it will be stronger and better aligned than when it was new. Now the thing is really looking like a penquin or maybe a big ol panda bear.
 
Looks Awesome!! You'll be ready for paint in no time. Rock on.

Thanks chicken. It is coming right along - and I still have'nt decided on a color yet. This is causing me some sleepless nights.

- - - Updated - - -

Looking really good! Butt welding is the hardest to do, but, yields the best results, and the easiest to F up too!

Exactly what the kid said. He would tell me exactly what the metal would do after just one tack and he was right. I think this is quite important - to know what is going to happen as the tack process continues. I was surprised how much the metal moved from even minimal heat. It would be very easy to ruin a new quarter if you are not extemely careful. I am more than happy with the results though.
 
that is how i hang my quarters. it is the only way to do partials and blend the right.
 
I don't think I am cutting any corners anywhere.

Dang right you're not. Great to see things done right! Refreshing. Hope it inspires others that surf your thread to do the same.
 
Would any of you know where I can find a set of hood mounted turn signal delete plates for this car? 68 and 69 are the same. I have been looking around for quite some time and can't seem to locate any. Or would it be possible to make a set.? Do any of you Charger owners have one off your car that could post a pic. of?
 
I have owned many 68 & 69 Chargers (318, 383, 440 R/T) all had hood turn signals. The 70 Charger had delete plates. The 69 Daytona had delete plates because they used the 70 Charger style hood. The 70 Charger hood turn signal opening & design is different than the 68/69 hood opening so wouldn't be able to bolt up 70 delete plate to 69 hood, unless you do some custom work. I am enjoying seeing another Charger saved - car is looking great.
 
I have a set of 70 delete plates and you are right , they must be alot different. I'm fairly certain this car did'nt have the turn signals. I was told there would be a code for them on the fender tag. This car has the A01 light group, but that doesnt include the signals.
 
Auto Transport Service
Back
Top