• When you click on links to various merchants on this site and make a purchase, this can result in this site earning a commission. Affiliate programs and affiliations include, but are not limited to, the eBay Partner Network.

Salvaging Uni-body parts for a 69 Charger restoration

Now it was time for the rockers where I started on the passenger side.
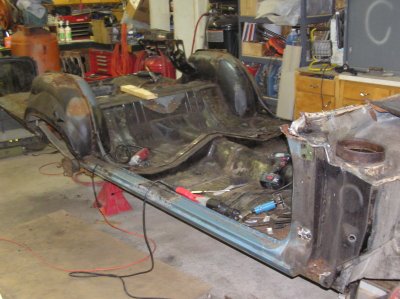
39.jpg

Spot welds galore! Thanks to this site I knew there were some spot welds on the inner wheel house so I removed those.
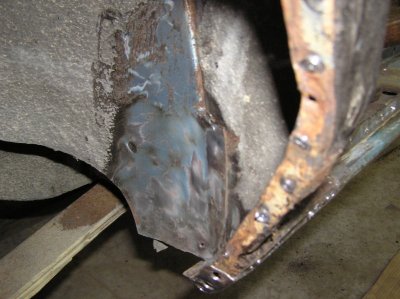
42.jpg

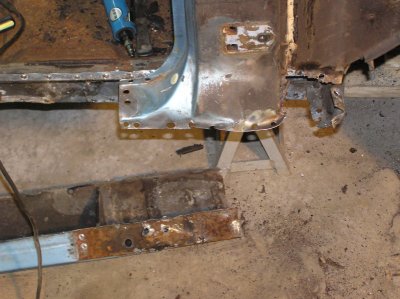
Then I moved to the front A-pillar or where the front of the jam meets the rocker.
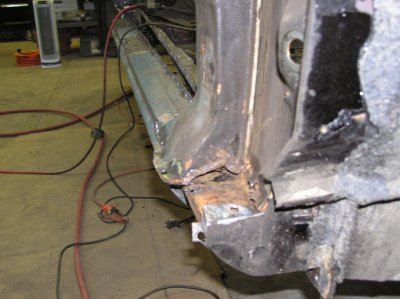
46.jpg

The biggest problem I had, was not realizing there was a spot weld or maybe it was a factory weld, inside the A-pillar.
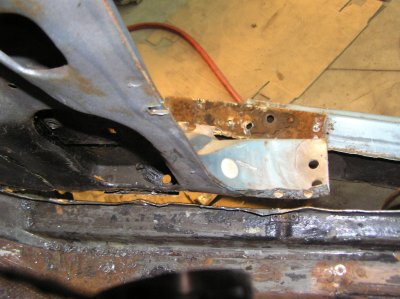
51.jpg

I didn't know this until I had pried the rocker down far enough to see underneath it.
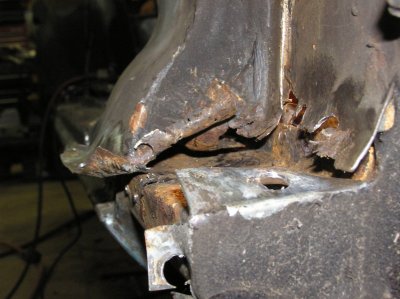
47.jpg

It took a while, (a day and half) but I finally got it!
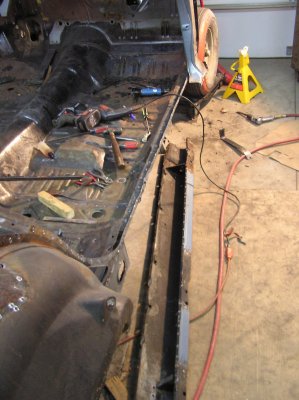
48.jpg50.jpg


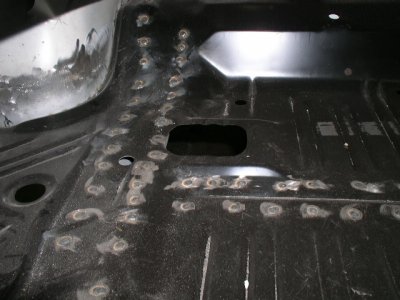
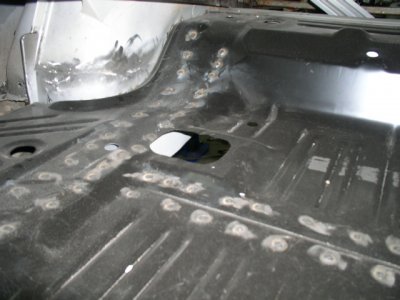
Next I removed the foot well floor pan.
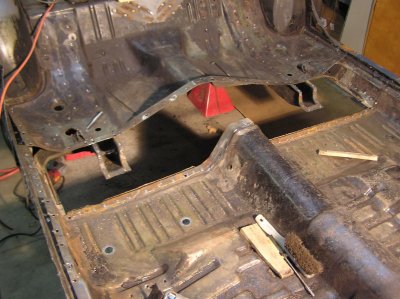
52.jpg55.jpg
 
A big plus to drilling out original pans is that they are then pre-drilled for the install.
AMD pans you have to drill/punch the 200 some holes to plug weld them in.

- - - Updated - - -

Also there are about 5500 welds on a car.
 
A big plus to drilling out original pans is that they are then pre-drilled for the install.
AMD pans you have to drill/punch the 200 some holes to plug weld them in.

- - - Updated - - -

Also there are about 5500 welds on a car.

Just trying to save some money!

5500 welds? seems like I've done that many so far.
WOW that's a lot of drilling
 
I have a little 90* angle drill to get those pesky welds inside of the Jam/rocker.

- - - Updated - - -

around 5500 was the body specs on a 65 A-body, soooo yours might have a few more.
 
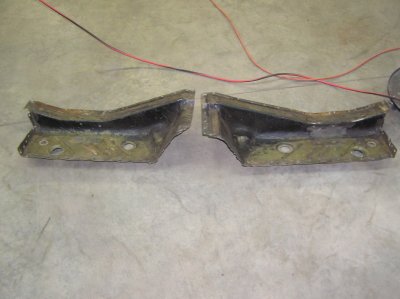
That sure was a nice find - very solid looking parts for that Charger.
 
I think it's great the way you are taking everything apart like you are. You know what shape the pieces are in. That way you can clean em up, sand /blast 'em epoxy/etch primer and know where they go when the time comes to put them back on your car. I'm kinda curious how much you are saving by doing it this way then buying new metal including the price you paid for the parts car.
 
OIC what you're doing! I didn't 'get it' at first! This is a spot welding nightmare, especially if you have a two step drill process, and your metal has crud and dirt on it!
 
I think it's great the way you are taking everything apart like you are. You know what shape the pieces are in. That way you can clean em up, sand /blast 'em epoxy/etch primer and know where they go when the time comes to put them back on your car. I'm kinda curious how much you are saving by doing it this way then buying new metal including the price you paid for the parts car.

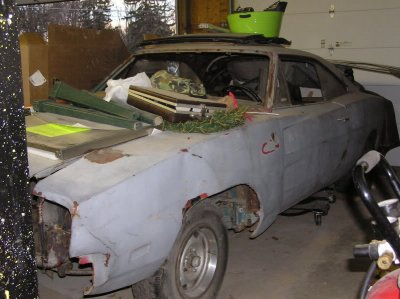
Thanks RRman, when I first ran across this 69 4 door Coronet, I thought I might be able to use some of the metal, but I just wasn't sure.
Then I got on FBBO and posted a thread asking how much of the metal could be used in a 69 Charger.
Moparmarks advised me that I would be able to use most of the metal. (which I have to thank him)
http://www.forbbodiesonly.com/moparforum/showthread.php?44722-69-Charger-Uni-body-parts-interchange
From there I looked up AMD prices and it didn't take long to go over the $3000 mark. (I think it was $3500 total) But AMD's cost for the rear frame rails alone are $800. I paid way less than that for this car. And anything left over (like the entire front clip) I can sell to a fellow enthusiast like all of the members on FBBO!
For me, It's well worth it. Not only am I saving some money, but I am gaining experience taking the car apart. Which will help when I get started on the Charger
nov232010142.jpg

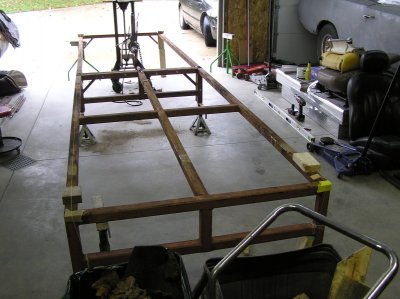
And the frame jig I built for it
P1010252.jpg
 
OIC what you're doing! I didn't 'get it' at first! This is a spot welding nightmare, especially if you have a two step drill process, and your metal has crud and dirt on it!

Donny,
I have to thank you for what you have done and are continuing to do.
You see, your restoration thread or threads truly inspired me! When I saw what you did (great pics by the way) and how far you've come with your projects I knew that I could do it ..... I just cant thank you and others on here enough. Those who come to mind are Propwash, Detmatt, SGTpaul, hunt2elk, 68chicken and many others!
What I really appreciate is seeing the different ways to get the same thing done, this helps people out there (like me) Because what works for one, may not work for others!
This is what this forum is all about.... people helping people!:hello2:

About the drilling, I use Blair's spot weld cutter with a spring loaded pilot.
I first hit the area with a wire wheel on a grinder. This helps me find the welds. (If I can see the spot welds I don't do this) Then I center punch and drill with the spot weld cutter. I have to admit on some welds the cutter wants to skip off, usually due to the fact its not a flat area, if I can flatten it with a hammer, that will usually work. If it still stubborn and wants to walk off, I will take a 1/8 drill bit and drill just deep enough for the pilot to grab like a 1/16 deep. this does the trick. I have yet to drill all the way through with a drill bit, then use a spot weld cutter. Hope this helps. (Kudos to propwash for this tip)
 
mopar4don....utterly amazing post!!! i have heard about this, but never seen it done!! great great job and i agree that you are much better off with this if you have your skill...did that amd price include shipping or would it have been free since your would have been spending 3500??LOL!!!
by they way, and members please don't respond to this here, i have a really nice 70 coronet four door that will be a nice donor for this and it will be ready to go soon....if you are interested post mail and do not respond here!!mopar4don, keep up the great work and keep posting the pics when you make some progress....pardon the pun, but this is riveting reading and viewing!!!
 
Just tossing it out there. If the coronet trunk pan is nice and solid I would just use it in the charger. They for the most part are the same other than where the filler neck goes threw to the tank. You just need to cut the razed part around the filler hole and weld it to the coronet pan.
This what I did with my 69 charger, I had a very nice trunk pan from a 4 door also. I can send pics of mine if needed.

Dan

Dan, or anyone,
can you send me a picture showing the raised part around the filler hole. where the filler neck goes threw the trunk pan
 
Dan, or anyone,
can you send me a picture showing the raised part around the filler hole. where the filler neck goes threw the trunk pan

Here are a couple of pictures of my new trunk pan showing the hole. It is just stamped out right through the ribs. Let me know if you need more.

P1220233.JPGP1220234.JPG
 
If you are needing this much metal, why not have just drilled and welded the charger roof/ rear structure onto the 4 door? Its all going into the charger anyway.
 
Auto Transport Service
Back
Top