• When you click on links to various merchants on this site and make a purchase, this can result in this site earning a commission. Affiliate programs and affiliations include, but are not limited to, the eBay Partner Network.

1964 Plymouth Savoy Build

Finished installing the moldings around the front and rear glass and installed the hat shelf

IMG_1697.jpg IMG_1698.jpg IMG_1699.jpg IMG_1700.jpg IMG_1701.jpg IMG_1702.jpg IMG_1703.jpg IMG_1704.jpg
 
Putting the door seals on the front doors and red pipping on 1/4 window and installing the red trim pieces with the rear view mirror

IMG_1708.jpg IMG_1709.jpg IMG_1710.jpg IMG_1711.jpg IMG_1712.jpg IMG_1713.jpg IMG_1714.jpg
 
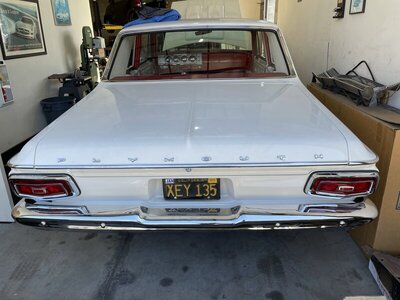
When I found this car for sale a few years back I wanted this one because it came from Arizona for one thing and the other was it was a WW1 paint with the LR1 interior. Those 2 colors really are classic looking and go well together! It POPS! Lol!
 
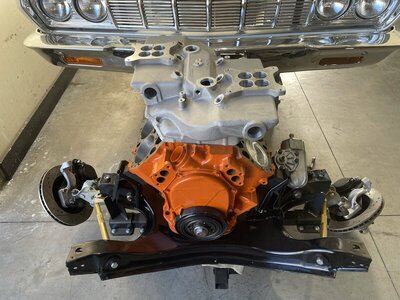
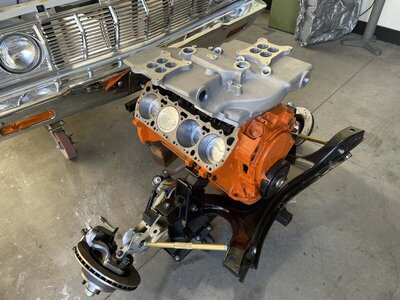
Because the engine is going to put out some horsepower and torque more then the 426 max wedge I wanted to make sure I can stop it so I did go to dual master cylinder with 11” discs in front and 11 x 2 1/2 drums in rear. Engine is a 466ci 440 with 7.1 mulnar rods offset grind crank to 3.90 with .040 over Ross pistons.
 
When I was getting ready to make the engine ground cable for the savoy I researched one and found an original one on line for sale. It have a small hole end on one and the larger one on the other for the bell housing connection. It also said it was 15 inches long and 1 gauge wire. So I bought a 1 gauge welding cable 15 inches and made this. I also researched and discovered the holes in the fire wall that is used where I think the voltage regulator goes, the max wedge cars are attached to the upper hole while the hemi cars are attached to the bottom hole or at least that's what I found in my search. Also got the cross ram manifold from A&A Transmissions and it looks really nice, exactly like the original. He had one date coded for 1964 too. I will be taking it to JDM Racing Engines to clean and match port to the heads.

IMG_1722.jpg IMG_1723.jpg IMG_1724.jpg IMG_1725.jpg IMG_1726.jpg IMG_1727.jpg
 
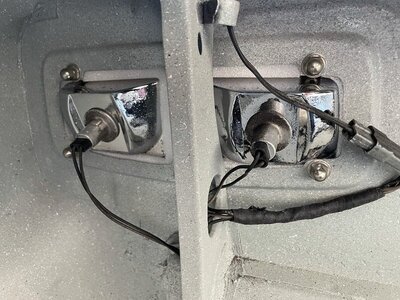
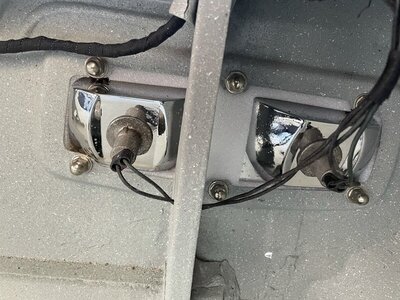
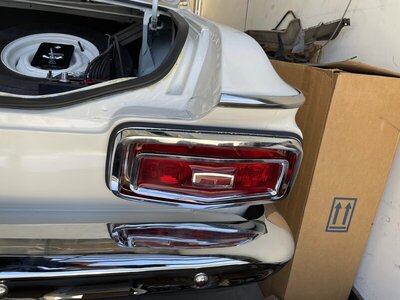
Finally got the nuts to mount the tail lights, The original's are no longer available but I researched and found that the 70's mopar side molding mounts used similar one to mount side moldings. so I contacted Herb's Parts and he new the nuts I was looking for and researched the right ones to fit. So if anybody wants original looking tail light nuts new, Herb's can set you up. Tell him what you want and he will know what you need. I asked him to hookup Joe Suchy with these to sell to other people. They look sweet!

IMG_1729.jpg IMG_1730.jpg IMG_1731.jpg IMG_1732.jpg IMG_1733.jpg IMG_1734.jpg
 
Just came across this thread.
"Wow, what a beauty!"

The reward of your labor is in front of you and you must feel on top of world with this one.

I have a 1963 Plymouth Savoy, ruby red, 426 Stage II Max Wedge that is my next project after I finish my 1964 Dodge 440 426 Street Wedge 4 speed that I am working on right now.

So a Big Thank You for the pictures and sharing.
Thank You! The thing I most enjoy is sharing the photos and The wonderful praises. That makes me feel on top of the world for sure. This car was almost a 63 dodge 330 but I was out bid. found this Car about an hour later and purchased it. Got it cheaper then the Dodge. I figure it was meant to be mine. Yeah The white with Ruby red are the Beauties! Chuck. When its finished I would like to take it to Carlisle.
 
Finally got the heads back from JSM in Monrovia. Had the Stealth heads completely gone over and springs changed to support my cam, changed the keepers to 10 degree, resurfaced to cc the chambers. Ported the intakes and exhausts to match the manifolds. Painted them Race Hemi Orange

D83851F8-0D79-4F3E-B92D-EEE6BE4B41E8.jpeg B2CFE89C-898F-4293-93D4-A0478882B8CD.jpeg 98185A89-271A-46CD-8D2C-5B9B8FDECDD2.jpeg
 
Mounted the heads with Felpro gaskets .039 with ARP bolts but used hex head and not 12 point. Leaving them black rather then painting over them

IMG_1845.jpg IMG_1846.jpg IMG_1847.jpg IMG_1848.jpg IMG_1849.jpg IMG_1850.jpg IMG_1851.jpg IMG_1852.jpg IMG_1853.jpg IMG_1854.jpg
 
It's a BCR Aluminum Main Caps and girdle kit. It's expensive but it's the best! Well made. And I have no clearance issues with the max wedge oil pan to the K member
Cool ...............Thanks!! It Looks Like It Fits Great!!
 
Auto Transport Service
Back
Top