• When you click on links to various merchants on this site and make a purchase, this can result in this site earning a commission. Affiliate programs and affiliations include, but are not limited to, the eBay Partner Network.

$500- 68 charger

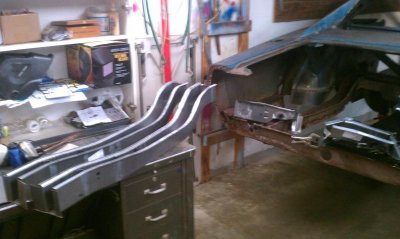
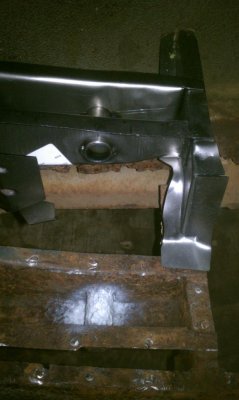
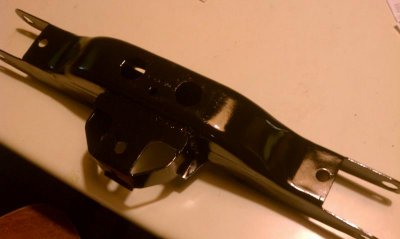
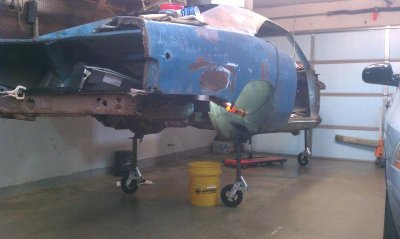
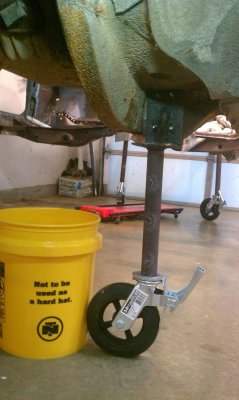
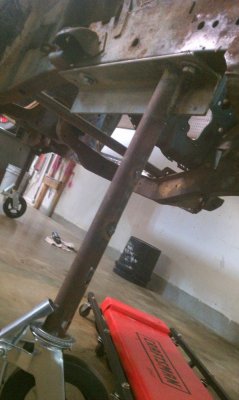
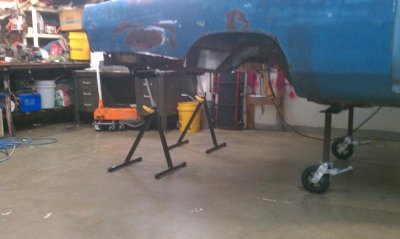
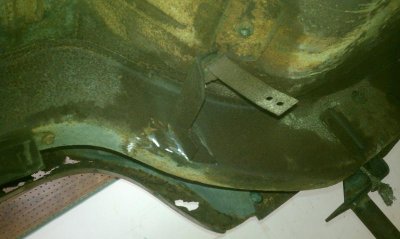
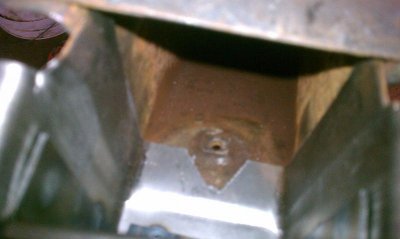
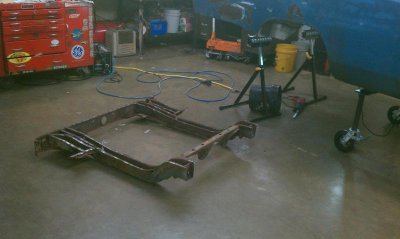
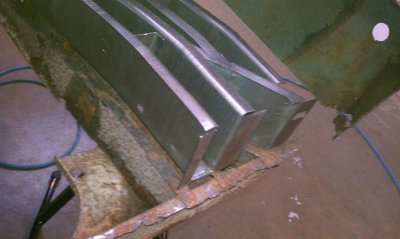
The new partial rails from RPC came today. I ripped the box open at the curb just outside the door of the ups truck. The drivers always ask how the car is coming along. Some have even came in and looked at it while I was dragging the boxes into the shop. These rails look great, just like propwash said, a few little holes to drill but other than that they look perfect to me, as do the leaf mnt brkts. I'm working 10 hours a day, 8 days on- 6 days off, rotating shifts, and to beat to do much till my days off. Hoping to get a lot done on the rails next 6 days off.
Talked to a friend at work tonight about buying one of his 426 hemi motors., he has a few of them and made me a great offer. If I do get it I would go ahead with my plan for a stroked 440 to race, but have the hemi in a stand in the corner of the shop, ready to put it in from time to time, hot-rod gatherings, ect.

http://s1284.beta.photobucket.com/user/daytonakid/media/68 charger/IMAG0983_zpsc7f49231.jpg.html
 

Attachments

  • IMAG0983.jpg
    IMAG0983.jpg
    51.5 KB · Views: 1,088
Good to hear you're happy with them! And heck of a nice score on finding such a good price. I bookmarked that company for further use down the road. I see you bought Shackle Mount brackets from them as well. How do you like the quality of those? I've used AMD thus far and are of good quality, but the hole for the rear shackle to mount through is around 1" off (too far back). Keep up the good work!
 
Looks good. Let us know how you like them for ease of installing them. May have to get some of those myself after taking my bumper off and seeing my rails. Mine are worse than I thought.
 
Good to hear you're happy with them! And heck of a nice score on finding such a good price. I bookmarked that company for further use down the road. I see you bought Shackle Mount brackets from them as well. How do you like the quality of those? I've used AMD thus far and are of good quality, but the hole for the rear shackle to mount through is around 1" off (too far back). Keep up the good work!

Thanks. They all look great to me, but I have never seen any other than the pitiful abominations on my rust-rod. The shackle hole is located perfect. I haven't had time to do any work lately but will be working on it for 6 days & nights starting friday. Will post how it goes and pics. I feel confident but the unknown, first time, frame spice operation has me anxious, with a hair of nervousness. I've got a few more things to get before I start, like some tall utility stands for supporting the rails, off and on. Going by Habor Freight tomorrow.
Any suggestions on the best tool for cutting the rails?
I have a lot of different saws, die-grinders, etc. Just haven't figured which would be best.
SRY I can't figure out how to make the pics smaller.
 

Attachments

  • IMAG0988.jpg
    IMAG0988.jpg
    64.9 KB · Views: 1,066
I've been using a pneumatic air saw that takes a blade about 2 inches long for the more intricate cuts. It also alows you to cut out inside corners that can't be reached with a cut off wheel, and does a much neater than a plasma cutter.
 
other than the pitiful abominations on my rust-rod
LOL.....Some day you'll look back on this thinking it was fun ripping that garbage out of there. Thanks for the input on the Shackle Mounts.

That thick heavy stuff I either use my Reciprocating Sawzall or my Plasma cutter (using a straight edge guide). Sawzall will take a firm hand, but will leave a nice cut if guided right, and will cut quick. I agree with elk on the air saw. Will definitely give you the most finesse. Personal preference, I just use that on standard sheetmetal being the delicate blades/teeth and longer cut times. All will work for you, including a cut off wheel. Getting into this you're going to figure out your personal preference with what tools work best for you and on what.
 
I bought one of those air saws from Harbor Freight, but it didn't work, much. It would cut off every 5 seconds. I returned it and got another one, thinking it might have been faulty but the new one doesn't work either. I have 3.8 cfm @ 90psi on my compressor, do you think that is enough to run one of those?
I'm going to get a better one and see if it will work, but I'm going to have to have on of those, that works. I have a sawzall I will try to use for now on the rails.
I made some bolt on rolling stands. The wheels are for scaffolding, $25 each at Northern Tool, 750lb cap rating,. They slip up into the stand pipe/legs or I can remove them, push the handle down to lock the caster in any position 360 degrees and the brake when needed. I am going to cut some length off the back stands. I made them a tad to tall. I may add some bolt-on cross braces, they are a little wiggly. Also I blasted and painted my 1st part, the trans Xmember. Ain't it purdy?
 

Attachments

  • IMAG0998.jpg
    IMAG0998.jpg
    45.6 KB · Views: 1,043
  • IMAG0997.jpg
    IMAG0997.jpg
    27.7 KB · Views: 1,019
Last edited:
Is there any kind of stripper that will take off all the undercoat and crud? Or is the heat and scrape method the only/best way to clean the underside?
 
I use an air needle gun...Either way works and makes a mess, but at least I don't have to spend hours smelling or inhaling that garbage.
 
Got the stands fixed up. Cut some off the back ones, but it is still pretty high. It is very stable now tho.
 

Attachments

  • IMAG0999.jpg
    IMAG0999.jpg
    41.4 KB · Views: 1,054
  • IMAG1000.jpg
    IMAG1000.jpg
    84.5 KB · Views: 1,060
  • IMAG1002.jpg
    IMAG1002.jpg
    72.1 KB · Views: 1,024
Like how you made the stands and I got a kick out of that warning on the plastic bucket.
 
The yellow buckets came with these utility carpenter stands ($20 each at Northern Tool)., to help hold the rails up while I "amputate" them. Northern had a bucket sale going on, everything you could put in a bucket was 15% off. I got the 2 utility stands and the 4 scaffold wheels in 2 buckets, buckets were $3 ea.. saved $20..ha! I'm not scrimping on parts for the car but any stands, etc., that won't be a finished part of the car, I will make or find the cheapest that will still do a good job. That's more $ for the car parts.
 

Attachments

  • IMAG1004.jpg
    IMAG1004.jpg
    39.3 KB · Views: 998
What is this bracket for? I think it is for the emergency brake cable. It is on the inside of the left rear rail just before the axle hump. I was about to cut it off. Thought it may be something someone added for exhaust.
 

Attachments

  • IMAG1006.jpg
    IMAG1006.jpg
    46.3 KB · Views: 1,032
Last edited:
You cannot steal what is shared grasshopper! They are great. Finding pipe the right size for them to fit in snug might be tuff. I lucked out and found and old piece of scaffold pipe. I plan on making some stationary foot plates to plug on to the legs to make it even more stable without the scaffold wheels. But with wheels on and all brakes and casters locked it wiggles very little. Good enough for now.
 
:sSig_goodjob:looking very good there ,keep posting your updates :headbang:
 
What is this bracket for? I think it is for the emergency brake cable. It is on the inside of the left rear rail just before the axle hump. I was about to cut it off. Thought it may be something someone added for exhaust.

Not sure about this. Maybe someone tried making an exhaust hanger? The angle iron doesn't look to be stock. Mine doesn't have it anyway. Got an pics. from the front looking back?
 
I cut off that bracket, can weld back if needed. Thnx anyway.
I cut the old rails off with a sawzall, worked great! For anyone doing the partial rail replacement I will show how I do it. There are a few things I want to do before putting the new ones on. One thing that I noticed that needed doing was a V notch cut in the bottom front splice-flanged lip of the new rails where they go into the old rails at the splice cut. The new rails lip would interfere with the front nutplate for the axle bumper/snubber that is left in the remaining rail. The the rail splice cut goes between the 2 nutplates and like someone previously mentioned, I'll have to drill and tap for the rear ones.
Here's a pic of the V notch and the old rails out.
 

Attachments

  • IMAG1010.jpg
    IMAG1010.jpg
    33.2 KB · Views: 1,018
  • IMAG1009.jpg
    IMAG1009.jpg
    39.8 KB · Views: 1,026
Last edited:
The lip tabs on the top rear of the rails and leaf brackets are missing., it's probably easier for the mfg to make them without those, no big deal tho. I will add them as I install the rear cross member. Here is a pic of them laying on top of the old ones.
 

Attachments

  • IMAG1007.jpg
    IMAG1007.jpg
    42 KB · Views: 988
Auto Transport Service
Back
Top