• When you click on links to various merchants on this site and make a purchase, this can result in this site earning a commission. Affiliate programs and affiliations include, but are not limited to, the eBay Partner Network.

Body Building 101- 1968 Charger

BarrsRestoration

Well-Known Member
Local time
6:04 PM
Joined
Jul 4, 2013
Messages
157
Reaction score
100
Location
Greenville, North Carolina
After seeing some of the work done by others on here, I thought I would share some pictures of one my past projects.
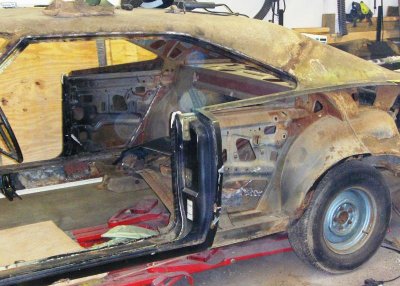
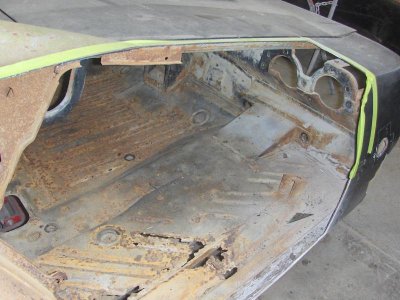
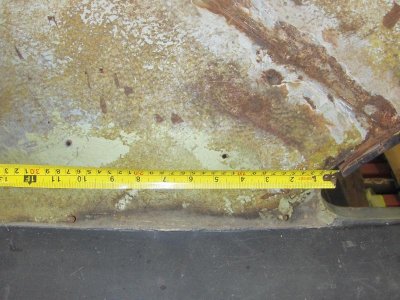
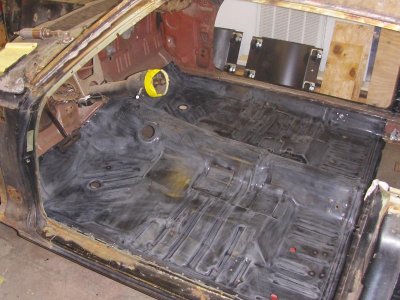
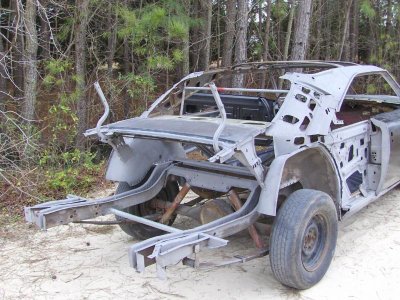
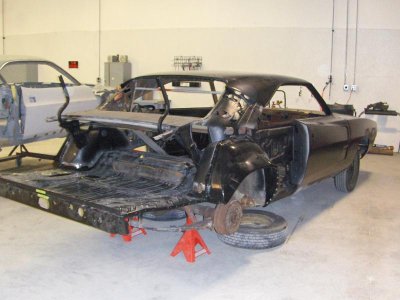
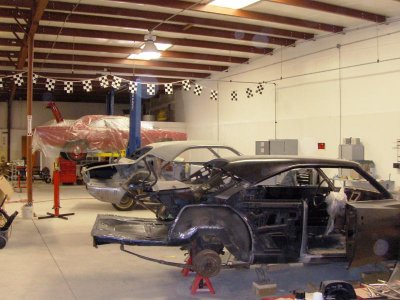
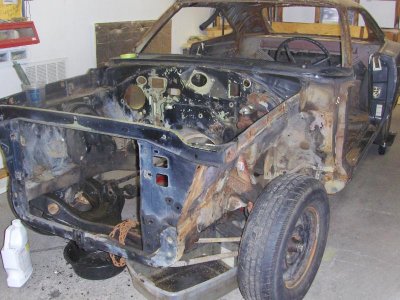
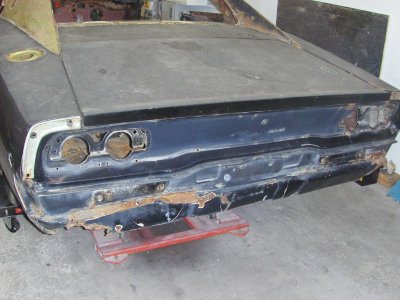
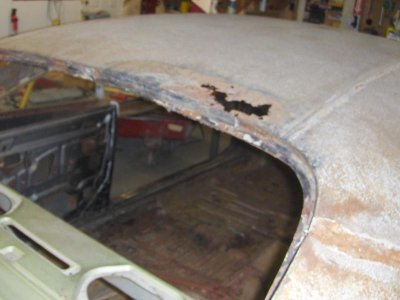
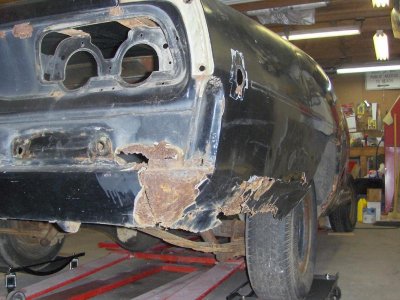
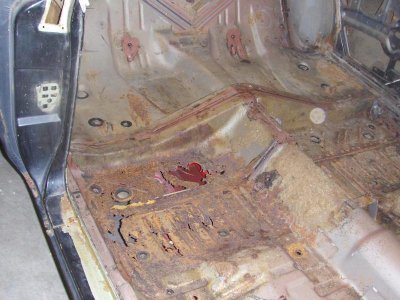
This '68 Charger belongs to a customer who has also become a friend. He bought it a few years ago as a surprise for his son, with the intention of them building it together. After they had the car apart and saw the extent of rust damage, they decided to find someone else to handle the body issues.
It proved to be difficult finding a body shop to take it on, which I think was a good thing for them considering how that usually turns out. At the time I was working at/managing a body and paint shop for a restoration business and had lots of experience with Mopars. We met, and after some discussion we decided I would begin on the car during my spare time and balance that with his budget.

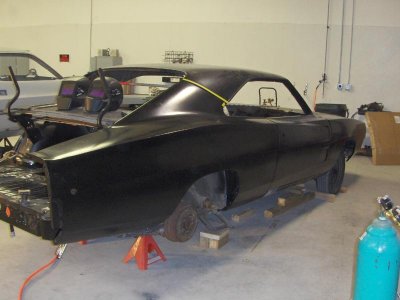
Fast forward to today.
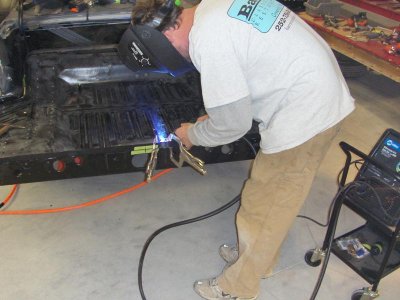
Since then I've quit my job of 10 years and opened my own restoration business. This Charger was my first "customer" car, straight from my home shop.
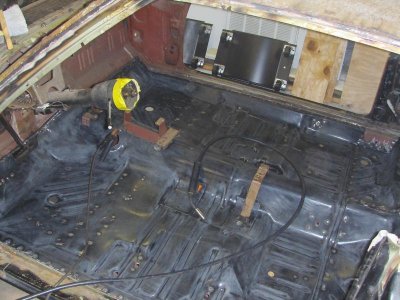
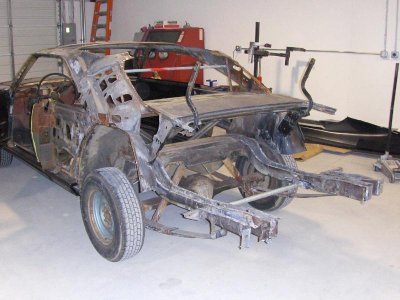
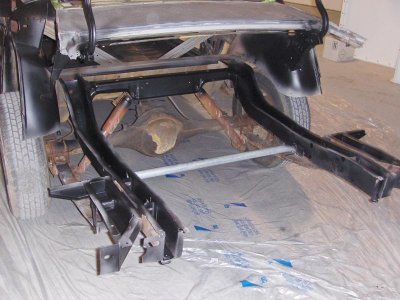
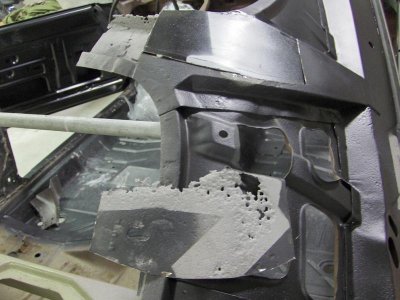
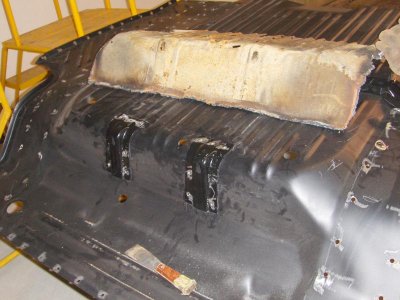
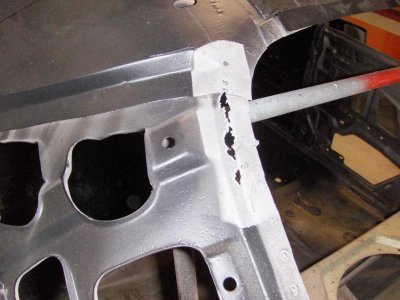
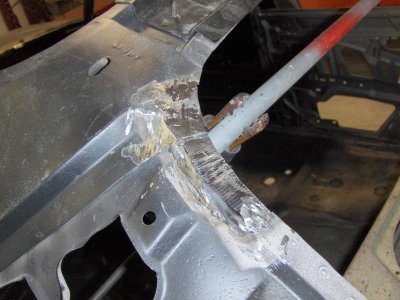
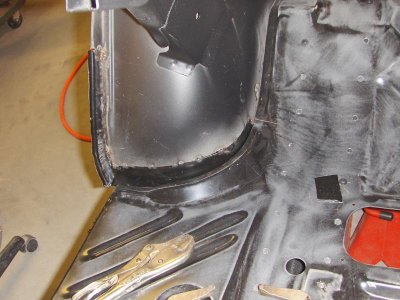
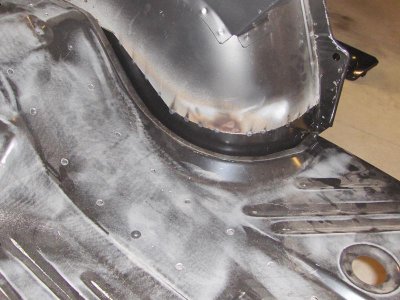
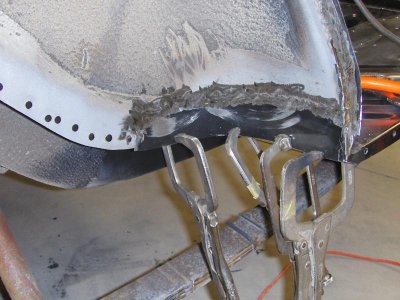
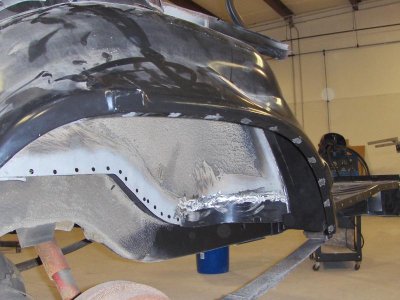
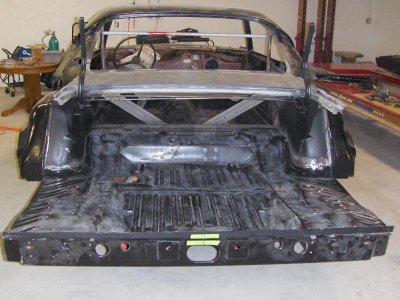
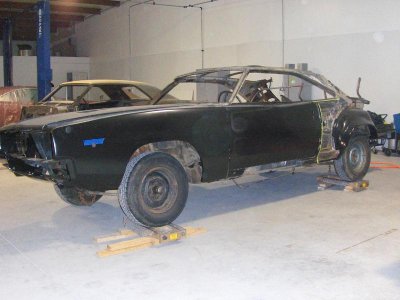
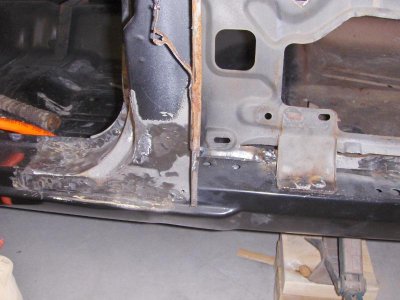
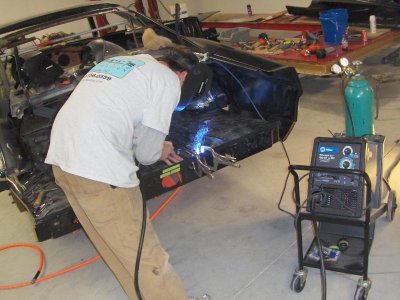
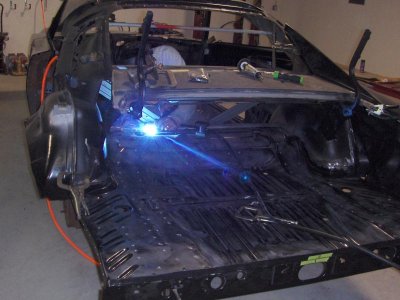
After rebuilding and replacing much of the body, the Charger has paint on it. Along the way it got new floors, trunk pan with drop-offs, a rocker, new quarters, outer wheel housings, dutchman panel and tail light panel. It also received new doors, fenders, valance and even a roof. There was also some frame repair and pulling to fix a bad prior repair. In the end, this car has it's original hood, trunk lid and one rocker panel. The frame rails and front structure are also original, but repaired.

I've had lots of cars (including several other Mopars) pass through here, but my favorite will always be this one. If there is enough interest I'll post pictures occasionally of the process and progress that was made.
 

Attachments

  • Picture 144.jpg
    Picture 144.jpg
    85.7 KB · Views: 1,564
  • Picture 146.jpg
    Picture 146.jpg
    69.6 KB · Views: 1,756
  • Picture 148.jpg
    Picture 148.jpg
    43.3 KB · Views: 1,365
  • Picture 150.jpg
    Picture 150.jpg
    78.6 KB · Views: 1,374
  • Picture 151.jpg
    Picture 151.jpg
    79.6 KB · Views: 1,253
Lets see some more pics of it my man! Great story about success seems like?
 
It's all about Documentation!

You can never have too many pictures or measurements. I documented measurements in a notebook as well.
Today I tell my guys to get pictures of everything, and take two of them each time. With today's cameras it so easy to delete that blurry or bad shot, but sometimes impossible to go back and get a good one later.
Hole or bracket locations, bolt or clip style, part orientation, whatever it is get pictures!
 

Attachments

  • Picture 299.jpg
    Picture 299.jpg
    85.8 KB · Views: 1,241
  • Picture 334.jpg
    Picture 334.jpg
    74.5 KB · Views: 1,219
  • Picture 340.jpg
    Picture 340.jpg
    75.4 KB · Views: 1,221
  • Picture 341.jpg
    Picture 341.jpg
    67.8 KB · Views: 1,201
  • Picture 350.jpg
    Picture 350.jpg
    84.2 KB · Views: 1,197
In these pictures you can see some simple bracing I made to keep the roof structure square while the skin and rear roof bow were off. The tube you see connecting the rear frame rails is welded to a piece of angle iron on each end. Before the trunk pan and rear cross members are cut out on B bodies, I tack weld this brace to the under side of each frame rail. It keeps the rails square with each other and prevents rising or sagging rails while it's apart.
It clears the spare tire well, plus it's easy to remove after everything is welded into place. Hit 4 tack welds with a cut off wheel and it's out of the way.
 

Attachments

  • Picture 378.jpg
    Picture 378.jpg
    79.3 KB · Views: 1,242
  • Picture 384.jpg
    Picture 384.jpg
    76.6 KB · Views: 1,191
  • HPIM8725.jpg
    HPIM8725.jpg
    70.1 KB · Views: 1,226
  • HPIM8747.jpg
    HPIM8747.jpg
    111.8 KB · Views: 1,205
  • HPIM8749.jpg
    HPIM8749.jpg
    72.5 KB · Views: 1,200
My god man, not much to work with. Better cars have been scrapped, but thank you for "saving it. Might be better to dig one out of the Nevada desert sand than start with a third of the roof gone. All the best. I'm sure his son was surprised. Hard to find a shop? It's hard to find a decent shop to work on a solid car.

Took mine to Shelly's Auto Body in Danielsville, Pennsylvania. Liar and thief are the two best words to describe. A Shop like yours is difficult to find today and the locals are blessed.
 
my favorite car (68 Charger:love4:) but I would have definitely pushed this to the scrapyard ...glad you saved it ..keep pics coming
 
Love this thread not sure I am working with much more car than you started with. That means it can be done!!!!!!!
 
awesome thread, how far are you from roanoke VA? i have a 71 gtx i am still collecting parts for but would love to get some prices on fixing it. i dont know of any real good body guys and this is my first restoration project so i want a professional to do the work. looks like your qualified thats for sure. thanks for the pics and keep the pics coming
 
Keep posting pics when you can. They say you never forget your first (one).
 
Barrs I feel your pain. If it was any other model besides a Charger I would have cut it up for pieces.

I've seen pictures of nice builds the others have done, and I think a bunch of you have felt my pain!
And thanks for the praise everyone, but you haven't seen the hardest work yet. This is just getting it apart and cleaned up. Plumgtx, I'm only about 4 hours from you (1 hr. east of Raleigh N.C.). I'll send you a PM with my site link.

These seem to be common areas for these cars to rot out.

- - - Updated - - -

The trunk floor has been temporarily clamped in to help with shaping the inner wheel house repairs. Same with the outer wheel housings. The roof skin is also temporary as we will soon try and see how close the quarter panels are to fitting.
But first, we have to install a new rocker panel. That will be next, along with putting in a new rear roof bow and dropping another down to clear the roof skin.


EDIT: As you can tell, this is a bit of an abbreviated version of the build. I don't want to over load the thread with pictures of no interest (I have hundreds just on this car), or endlessly yak. But if anyone has a question about what I have pictured, or how I've done something, just throw it out there.
Thanks for the interest.
 

Attachments

  • HPIM8759.jpg
    HPIM8759.jpg
    66.3 KB · Views: 1,157
  • HPIM8760.jpg
    HPIM8760.jpg
    66.7 KB · Views: 1,173
  • HPIM8785.jpg
    HPIM8785.jpg
    63.8 KB · Views: 1,154
  • HPIM8787.jpg
    HPIM8787.jpg
    68.9 KB · Views: 1,155
  • HPIM8789.jpg
    HPIM8789.jpg
    69 KB · Views: 1,168
  • HPIM8790.jpg
    HPIM8790.jpg
    73.1 KB · Views: 1,156
  • HPIM8792.jpg
    HPIM8792.jpg
    73.8 KB · Views: 1,141
  • HPIM8799.jpg
    HPIM8799.jpg
    66.2 KB · Views: 1,137
  • HPIM8800.jpg
    HPIM8800.jpg
    57.8 KB · Views: 1,157
  • HPIM8801.jpg
    HPIM8801.jpg
    74.2 KB · Views: 1,150
  • HPIM8833.jpg
    HPIM8833.jpg
    74.6 KB · Views: 1,171
Nice work! Pretty sure I'm getting use to seeing more Charger skeleton's here on FBBO vs. whole cars...lol. Keep up the good work.
 
In the previous pics you can see that I did not remove the leading edge of the quarter panels at the door openings. The reason for that was so that I would have a reference for fitting the new doors to the quarters and rockers.
Now we have the new doors hung to fit, and confirmed the new fenders align with the doors. We have the left rocker being trimmed away in the first picture. The fender was later removed to install the full length of rocker. Notice too the car is raised for access without using stands. As we all know, with a weakened body you want to have to be careful to not let it twist.
In another picture you can see the lower door jamb has been cut away and replaced. That made it easier to replace a thin section of jamb and made the rocker replacement easier.
At the rear of the car we learned that the replacement trunk pan fit the rails and wheel housings nice, but came up about 3/8" short at the rear! The flange was too tall and the pan too short, soooooo another flange had to be bent and welded to the pan to extend the length. At this time the trunk pan is not welded to the rails, just flotaing on them, but attached behind the seat at the flange. You will find out why In a minute.
Also notice how the car is supported. Both front rocker corners were blocked from the floor equal amounts to prevent sag while the body is being built and/or entered for welding (taking the load off of the suspension), and to confirm that the 4 rocker corners stayed in the same plane, even though it was angled.
At the rear rockers the scissor jacks were used to take the load off the back of the frame caused by body weight being supported by the leaf springs and the weak rear half. What I did was hang both quarters (old jamb edge removed now) and attached it to fit at the doors, then put the tail light panel into place. Without the scissor jacks raising the rear of the body, the trunk drop offs were too high to weld the lower quarters, and the t/light panel was too low at the rear pan lip. Turning the screws on the jacks brought the forward section of the car up (along with the fronts of the quarters), which let the rear of the car appear to go downward. That took the suspension load off of the rear rails & brought the t/light panel and trunk pan into alignment, along with the drop offs. All of this was confirmed with scribe marks on the inner w/housings where the pan meets. We also had both quarters in place and the tail panel attached at the upper edges of each.
Now we start clamping things into welding position, such as the outer wheel housings, pan to rails, and pan to inner wheel housings, rear valance and corners. After EVERYTHING fit, we drilled 1/8" holes in strategic locations to use as our markers during many break-downs and re-assemblies to follow.
Also notice the original dutchman panel is still in place for now. That is what I built the rear body around, then removed it for replacement.

Now the trunk pan can be welded to the frame rails and inner wheel housings. No more springy body!
 

Attachments

  • HPIM8661.jpg
    HPIM8661.jpg
    58.1 KB · Views: 1,043
  • HPIM8878.jpg
    HPIM8878.jpg
    60.8 KB · Views: 1,058
  • HPIM8904.jpg
    HPIM8904.jpg
    69.5 KB · Views: 1,051
  • HPIM8907.jpg
    HPIM8907.jpg
    60.5 KB · Views: 1,047
  • HPIM8912.jpg
    HPIM8912.jpg
    61.5 KB · Views: 1,056
  • HPIM8937.jpg
    HPIM8937.jpg
    48.7 KB · Views: 1,037
Man, that's some nice work your doing. Keep it up!
 
Auto Transport Service
Back
Top