• When you click on links to various merchants on this site and make a purchase, this can result in this site earning a commission. Affiliate programs and affiliations include, but are not limited to, the eBay Partner Network.

What did you do to your Mopar today?

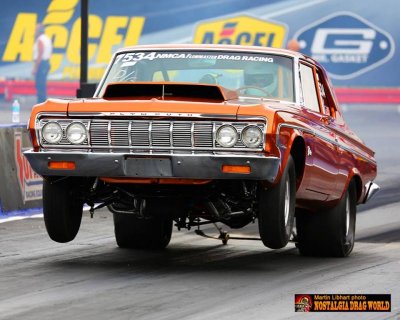
Well, I mounted my taller front tires/rims. Helps balance the car's stance after the add-a-leaf mod. Also fixed a high RPM miss. Turned out to be a loose plug wire at the cap. I'll keep working on the body and chassis until I get the 400 finished.
View attachment 249656
 
I swapped my aluminum 2 row radiator for the re-cored 2949 054 4 row. Both are US Radiators. Funny how the camera flash reveals the copper core; it looks black in the light.

New US Radiator 054.jpg

New US Radiator 054-001.jpg

New US Radiator 054-002.jpg

New US Radiator 054-003.jpg

New US Radiator 054-004.jpg

New US Radiator 054-005.jpg

New US Radiator 054-006.jpg

New US Radiator 054-007.jpg
 
Replaced the voltage regulator.
Again.

Appears to be charging now. Hopefully won't die in traffic for a while!
 
Got my sandblasting cabinet up and running today. Now I can blast all of my small bits and pieces. Looking forward to really starting to get this job rolling.
 
Wait, I don't get it.. metric Challengers? I feel like I'm about to get it.. but don't yet. Please essplain

Metric Challengers (and Chargers) = New-gen cars. All of the fasteners and the specs are metric, hence the nic. NOT the classics we hold dear.
 
Had it towed to the shop due to a loud knocking in the motor...I remain optimistic. However, if it needs a rebuild, its getting stroked!
 
Well my mopar got more of its 4 speed parts delivered,so for fun I went and grabbed my friends charger why she was at work to get a feel for the 4 speed. (440 4speed)
So I took it to a local car show at the movie theater for the furious 7 movie.
No I don't know the color of her paint it's nice as hell in the sun though here's a pic for you guys
0403151841.jpg
 
I picked up a center console vacuum gauge for the 67 Coronet and bead blasted and powder coated the battery tray, brackets and hardware for the 66 Charger. I also got a cool Gas Monkey shirt for my boy at work today. He will be surprised because it came from the show.
 
Not for my car as usual :D but here's my most recent Powder ****. If you live in the Denver area or run at Bandimere, you might be able to see them in person sometime.

Yard Erosion and Greg Reynolds MPs with Stefs Tranny Pan 064 - Copy.jpg

Powder colors are Alien Silver, Wetstone Black (wrinkle), Flag Red, Manhattan Blue, Polar White and Clear Vision.
Yard Erosion and Greg Reynolds MPs with Stefs Tranny Pan 068 - Copy.jpg

Yard Erosion and Greg Reynolds MPs with Stefs Tranny Pan 071 - Copy.jpg

Yard Erosion and Greg Reynolds MPs with Stefs Tranny Pan 060 - Copy.jpg
 
Got it titled, tagged and insured Tuesday and finished some interior work today. Took it out for a night run...0409152028-1-1.jpg
 
Welded both wheel wells and trunk ext. in place. Going to put the quarters on for the last time and maybe weld them in place!
 
Getting ready for race season. Pulled the trans Friday and installed a super sprag and new filter, front seal. Also straightened bent wheelie bars incurred from running over the battery charger last year. Saturday pulled the pan and did a bearing inspection, replaced slightly marred #3 rod bearing. Rebuilt the Willwood calipers as the pistons were sticking. The Willwood rotors are now 25 years old and cracked, ordered replacements and pads from Summit Wednesday. Showed up today. Welded a bung in my aftermarket aluminum oil pan for a dipstick. The factory location the stick hits the pan above the oil level. Tomorrow the rotors get reinstalled on the hubs, saftey wired and brakes finished up. Then install the pan. Then install the trans. That will leave resealing the Indy valley tray, leaking vacuum for the vacuum pump and cleaning out the oil accumulator.
Doug
 

Attachments

  • 10534517_605953346169216_2302541632895330289_n.jpg
    10534517_605953346169216_2302541632895330289_n.jpg
    73.7 KB · Views: 148
Those are nice. I'd send ya mine if you could make em stop leaking. :)

Thank you!

I've seen a lot of those through the years and know their defects pretty well. Where do yours leak, and are you running an aftermarket intake? Sometimes notches on the intake side are needed, or thicker gaskets. Though they haven't (and probably won't) admit it, there's also a factory defect in the big block version, hairline cracks on the dog ears. After posting that, more than 200 people reported they thought they'd just over-tightened them ...

Mine leak in the back like most. No cracks. Just poor seal surface on the factory iron heads. Passenger side is like a knife edge in the back where it leaks. Just bought Superformance gaskets. Good reviews and stops leaks. Fingers crossed.
 
I put the new rear wheel cylinders in. Hooked up the rear axle lines and put the front to rear line in. Painted the coil bracket

001.JPG002.JPG003.JPG004.JPG005.jpg
 
I pulled my dist and resealed it with a new o-ring as it seemed to be seeping a little and I hate any oil leaks. Then fired it up and let it run a bit. Other then that its ready to hit the streets again. Ron

409849854.jpg
 
Auto Transport Service
Back
Top