• When you click on links to various merchants on this site and make a purchase, this can result in this site earning a commission. Affiliate programs and affiliations include, but are not limited to, the eBay Partner Network.

What did you do to your Mopar today?

Keep in mind that certain automotive steels, such as gas tanks and brake lines aren't just uncoated steel. They're Ni-Terne coated to aid in corrosion resistance. Ni-Terne, which is a lead/tin alloy (92% lead) isn't naturally shiny but it does polish up quite easily. You'd have to sand this coating off to expose bare steel to test for rusting.
 
This morning I stopped the leaky valve cover, adjusted idle down, washed it and changed the oil & filter.
I'm going to try to get up the nerve to go look at the latest fire carnage but it is hard to do.
Alexander Valley was/is? (TBD) one of my favorite drives and it's toast now.
If I do I will post some before/after pics...
 
Ripped the dash and heater box out and am getting ready to reengineer the front end..

IMG_0907.JPG

IMG_0908.JPG
 
Fixed the leaky gas tank - everytime I filled up or went around a corner with a full tank it would leak gas. I parked on a slant and when I got back a few hours later it had leaked A LOT - running all down the road gutter. I couldn't easily get the correct bent hose here in Australia, so I used a 90° bend instead. There was also a slight gap in the rubber seal so I filled it with epoxy, a pretty messy job but who's looking under there? I did the job a few weeks back actually and it's fixed it. No more leaks!
20191029_154417.jpg
 
Bought a used chrome ignition box, a Made in USA. Well the removal of the orange box was a FnPITA I probably should've loosened the alternator but nooooo. Mounted on inner fender below horns and back far so they weren't the problem. Had 7/16 x 3/4 long on one end, needed to reach through cam adjustment hole to hold nut. Of course the nut once loosened still had to have wrench on both until last couple turns the MFer. Had a self tapping with a ground wire on the other end. The ground could have longer so putting box on that end harder. Good news engine fired right so the box was good.
 
Last edited:
Another day of shop cleaning and sitting on a stool drinking beer... with some Neil Young cranking in the background..
shopcleanupnov2019 077.JPG
 
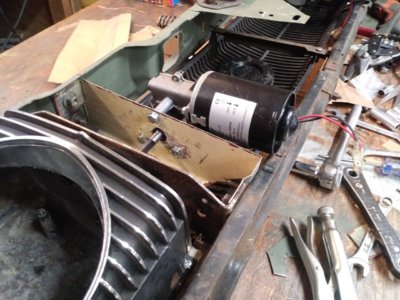
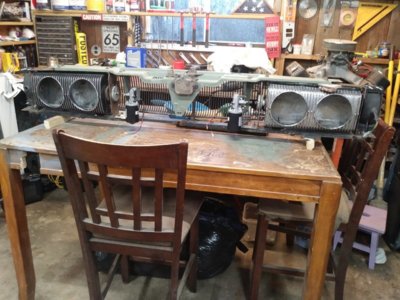
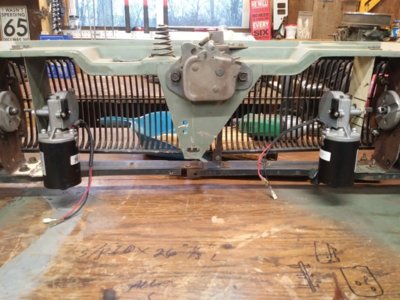
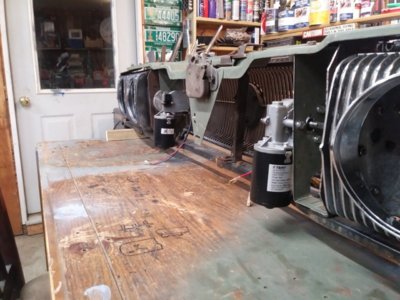
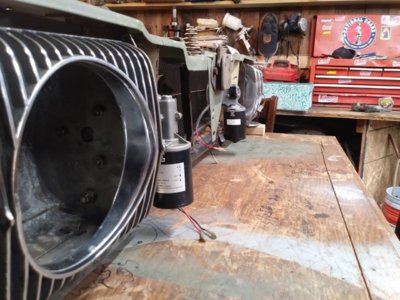
Decided I was clever enough to fabricate my own mounts for the headlight bucket motors I ordered. Worked out okay. I used the pizza box cardboard to make patterns and then transferred that to 18 ga. steel. Now that I have the metal all adjusted and the bugs worked out i'll get some 16ga. and make them out of the stiffer metal. I did a cleaner job on the second one, on the left, than I did on the right so i'll make adjustments when I do the final plates. The motors hang out about 5 1/2" from the end of the hood towards the rear of the car. Leaving plenty of space for the trans cooler. I mounted up the vertical stabilizer to see if it was the correct one and that it did fit. The lower attachment point had been reversed so I had to beat on it a bit to get it in the correct position. So, now i'll be taking this all apart and bagging the fasteners, getting it cleaned up, sanded and primered so I can paint it all. The buckets need cleaning up inside and out, and painting as well. The grill too.

1124191455b.jpg View attachment 871485 1124191516.jpg View attachment 871488 1124191516a.jpg 1124191517.jpg 1124191517a.jpg
 
Today I took the right motor plate and tossed it in the trash. lol. I used the template from the Left side and reversed it to make one for the Right. Turned out fine.
1125191653.jpg
 
Last edited:
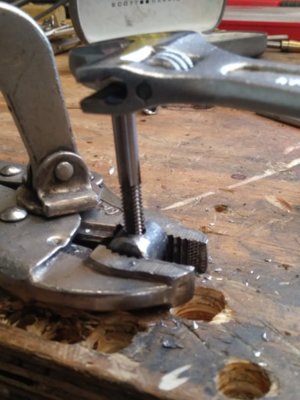
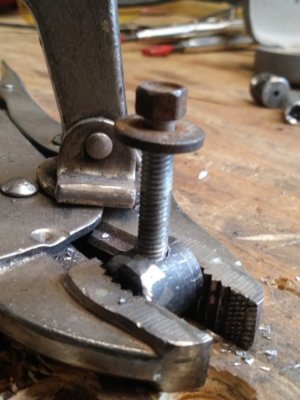
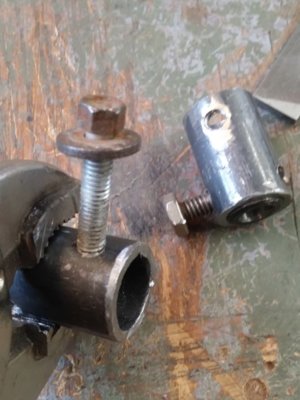
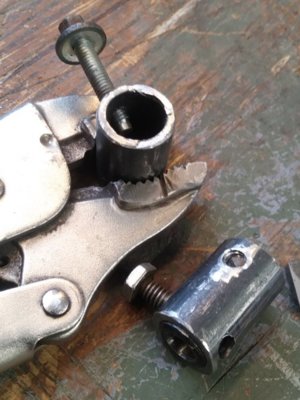
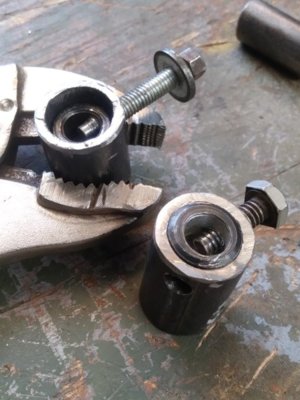
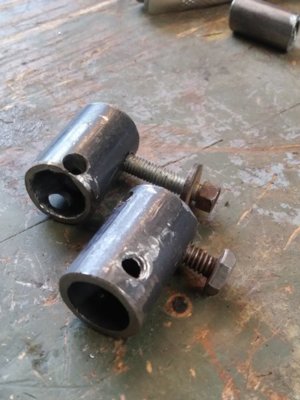
I decided that I would take a stab at fabricating the connecting collars to connect motor shafts to bucket axles. I bought a 6" length of steel ,threaded on both ends & 5/8" ID. Drilled a 1/4" hole at each end just next to the start of the threads. Cut the threads off 3/16" away from the hole centers. This will ensure that end of the collar wont rub against the donut. Then cut each end to 1 1/2" long chunks. Searched around the shop for anything that would slide inside the 5/8" ID pipe. Found this tool in my box that worked perfectly although I still don't know what the tool was for. Anyway, it has one end with a hole bored into it that is exactly 10mm, the same as the motor shaft. So I sliced THAT in half. That left me with two pieces about 3/4" long. I drilled a 3/16" hole through 10mm bore for a set screw and another 3/16" hole through the collar to mate up with it so the set screw would go through both and set against the DD shaft flat thereby locking the pieces together and to the shaft. Tapped threads into both holes. The first 1/4" hole is for a pin through the collar and the axle head, locking those together. And "Bob's yer Uncle.....",,,pics.

1126191255.jpg
1126191304.jpg
1126191304a.jpg
1126191308.jpg
1126191308_Burst01.jpg
1126191334.jpg
1126191354.jpg
1126191402.jpg
1126191407.jpg
1126191407a.jpg
 
Last edited:
Never mind the clunky bolts, they are just for mock up. I'll be using set screws..worked like a charm though. When I put the whole thing together I'll slice off as much as I need to in order for the 3/4" chunks to slide into the collars far enough to obtain the correct spacing between shaft and axle.
 
I was going to rotate the tires on my 300M in preparation for winter, but found the right front was down to the wear bands.
So plan b was to use some half worn snow tires I used a couple winters back. They still had good air pressure.
One was missing the center decal so I made a plug out of flashing and caulked it in.
Next was a slight exhaust leak, did nothing with that possibly a welding job for my son.
Finally the I inspected the front brakes and brake lines. Both are about shot, lines are rotted pretty badly but it is a 2000 and around here 12-14 years for original bake lines is about all you get.
Next I changed the oil in the Dakota, that will get stashed this weekend. (Provided roads are dry)
I ordered a whole set of lines for the 300 along with hoses, calipers, rotors and pads. Total about 400 bucks, but that should make the install easy.
I'm at the point where I would rather spend money on parts than spend extra time fabricating lines and messing with fittings.
I've done plenty of that over the years.
 
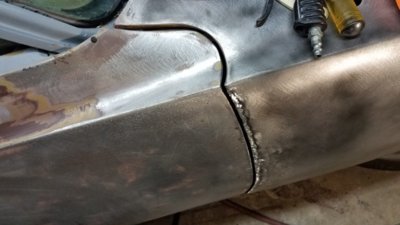
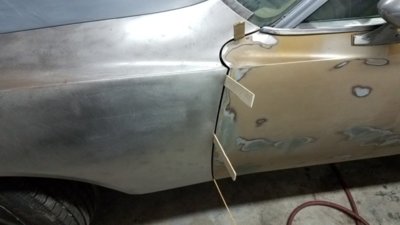
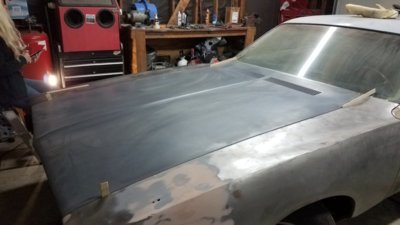
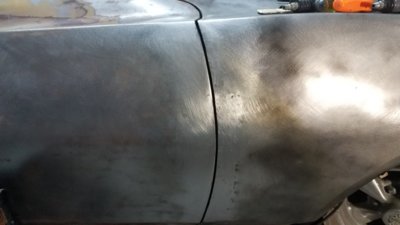
Verifying left fender and hood fitment. Started welding up the right fender to door gap.
Good thing I am an excellent grinder.

20191130_190026.jpg 20191130_171236.jpg 20191130_171104.jpg
 
I finished up the right fender gap today. It Came out good — Ready for filler and high build primer.

20191201_172916.jpg
 
Last edited:
Auto Transport Service
Back
Top